

Gingerbread Ornament Crochet Pattern
Day 4 of the 12 Days of Crochet Christmas is this super cute gingerbread ornament crochet pattern.

This gingerbread ornament crochet pattern was actually the first ornament that I made as I thought it would be the easiest but as with most simple things, it was a bit of a struggle to get him just how I wanted.
I’m glad I persisted though as I think he turned out so cute. He might even be my favourite from the whole collection (shhh don’t tell the others).
The white band is created with surface slip stitching and I tried something slightly different for the bow but overall he works up quickly.
More Patterns
If you love this gingerbread ornament crochet pattern, you might also like to check out these other Christmas patterns:


Gingerbread Ornament Crochet Pattern
Materials
- DK weight yarn in brown, red, white and green (I used Paintbox Yarns Cotton DK in Soft Fudge, Pillar Red, Paper White and Grass Green)
- 2.5mm crochet hook
- 8mm safety eyes
- 4 ply yarn in white or white embroidery floss
- Polyester fiberfill
- Yarn/twine for hanging
- Stitch marker, yarn needle, scissors
Abbreviations (US Terms)
- ch – chain
- sc – single crochet
- inc – increase
- invdec – invisible decrease
- sl st – slip stitch
- st/s – stitch/es
- […] – repeat the instructions in brackets
- (…) – indicates stitch count at end of round
Useful Links
Finished Size
The finished gingerbread ornament measures approximately 2″ x 2″ (5cm x 5cm). Size may vary depending on tension and materials used.
Gauge
Gauge is not important in this pattern. Use a hook size to match your chosen yarn. Make sure that your stitches are tight enough to prevent stuffing showing through and adjust hook size if necessary.
Notes
- Pieces are worked in a continuous spiral starting with a magic ring unless otherwise specified. Mark the first stitch of each round with a removable stitch marker.
LET’S GET STARTED!
Gingerbread (brown)
R1: 6 sc in magic ring (6)
R2: [Inc] x6 (12)
R3: [Sc, inc] x6 (18)
R4: Sc, inc, [2 sc, inc] x5, sc (24)
R5: [3 sc, inc] x6 (30)
R6: 2 sc, inc, [4 sc, inc] x5, 2 sc (36)
R7: [5 sc, inc] x6 (42)
R8-15: [Sc] x42 (42) 8 rounds
R16: [Sc] x42 (42)
R17: [5 sc, invdec] x6 (36)
Insert safety eyes between R11 and R12, 7 sts apart.
R18: 2 sc, invdec, [4 sc, invdec] x5, 2 sc (30)
R19: [3 sc, invdec] x6 (24)
Start stuffing and continue to stuff as you go.
R20: Sc, invdec, [2 sc, invdec] x5, sc (18)
R21: [Sc, invdec] x6 (12)
R22: [Invdec] x6 (6)
Cut the yarn leaving a tail and pull through last st. Weave the yarn tail through the front loop only of the final round and pull to close. Hide end inside.
Cheeks (make 2, red)
R1: 6 sc in magic ring (6)
Fasten off invisibly leaving a long tail for sewing.
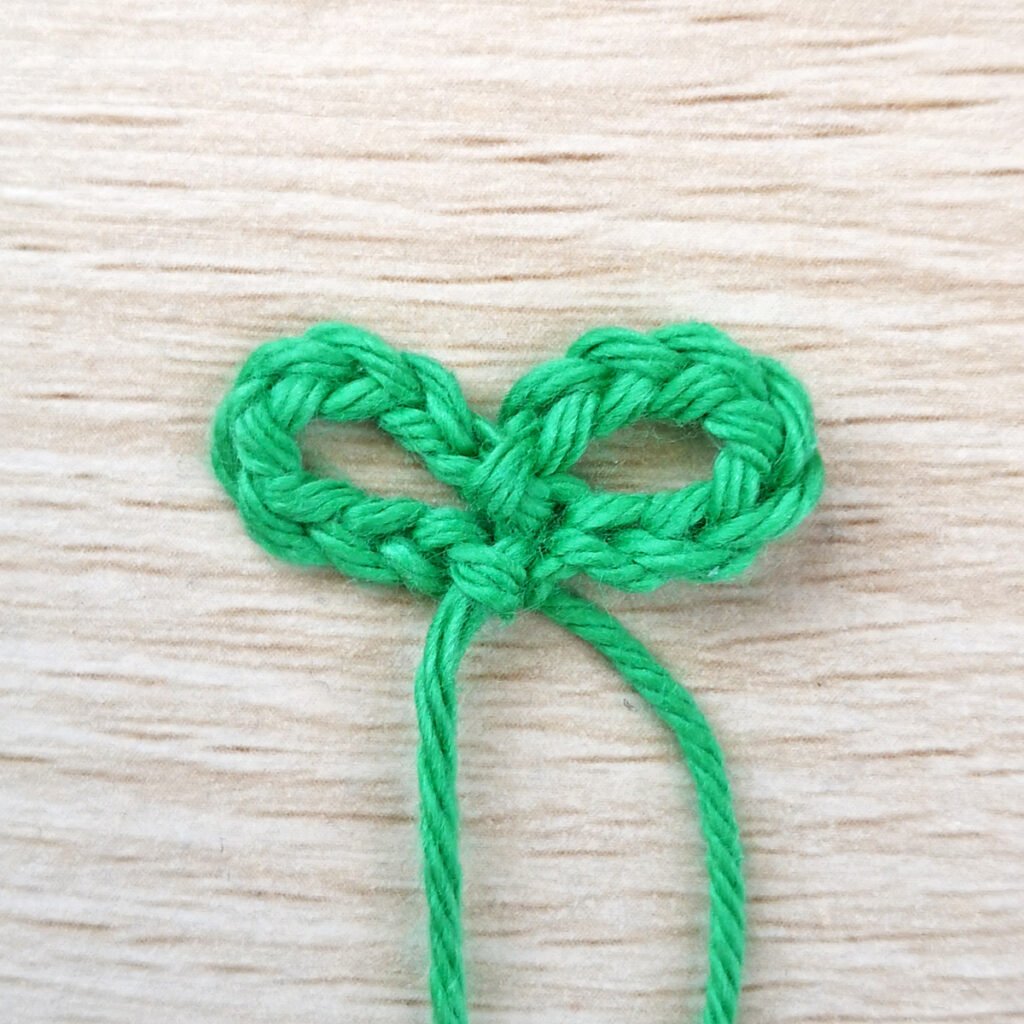
Bow (green)
Ch 8, sl st in first ch. Ch 8, sl st back into the first ch
Fasten off leaving a long tail for sewing. You should have 2 loops that are joined together.
Assembly
- Starting at the back with white yarn, surface sl st between R7 and R8.
Tip: Use pins to mark out where you want the slip stitches to go.
- Sew cheeks to either side of the eyes. The top of the cheeks sit on R12 just below the eyes.
- Using brown yarn, sew a nose between R12 and R13 centred between the eyes. Stitch over it until you get your desired look (I made 5 sts).
- Using white 4 ply yarn or white embroidery floss, sew a mouth at a slight angle over R14 starting approximately 1 st away from the nose.
- Sew the bow over R17. Your stitches will form the centre of the bow so make sure you’re stitching over where the 2 loops are joined. Stitch over it as many times as you like to get your desired look.
- Attach a hanging loop.
not ready to make this yet?
Pin this post for later

I love seeing your creations! Feel free to send me a photo or tag me on Instagram @stitchbyfay.

This pattern is for personal use only and may not be copied, reproduced, altered, published or distributed in any way. If you wish to share this pattern, you may link to this pattern but please do not reprint it on your site.
You can sell finished products made from this pattern in small quantities. Do NOT use our photos as your sale photos.