

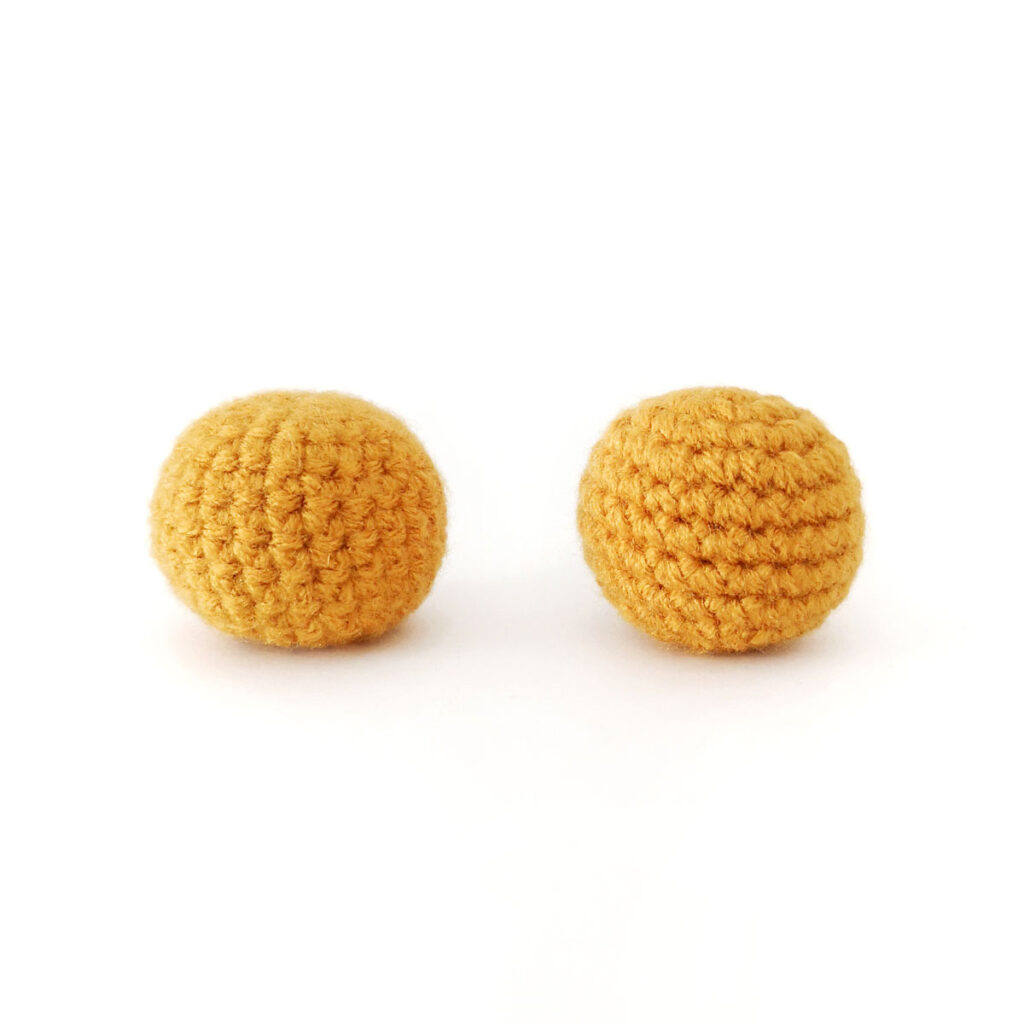
How To: Single Crochet Invisible Decrease
Take your amigurumi to the next level with the single crochet invisible decrease. Say goodbye to unsightly holes, bumps and ugly stitches.
The most important thing about the single crochet invisible decrease is that you need to be familiar with the front loops and back loops of stitches.
Normally you would insert your hook under both loops of the stitch but when it comes to the invisible decrease you will be using the front loops only.

What is the Single Crochet Invisible Decrease
The single crochet invisible decrease is a way of reducing your stitches in single crochet without leaving any unsightly holes. It mimics a regular single crochet stitch and creates a smooth, seamless look that’s perfect for amigurumi.
What is the Difference Between the Invisible Decrease and a Regular Decrease
The main difference is that the invisible decrease is worked through the front loops only which means fewer yarn overs which creates a less bulky stitch.
Decrease Abbreviations
In most crochet patterns the single crochet invisible decrease is abbreviated as: invdec or dec.
Sometimes you might also see sc2tog which usually indicates a regular single crochet decrease.
Since the single crochet invisible decrease is mostly used in amigurumi which are usually made up of single crochet stitches, the single crochet part of the name is oftentimes not included in the abbreviation.
When to Use the Invisible Decrease
The single crochet invisible decrease is particularly useful for amigurumi that are worked in the round with the right side facing out. It prevents holes, keeps stitches tight and consistent while giving a smooth, neat finish without visible lines.
For other projects that are worked flat in turned rows, you’ll want to stick to the regular single crochet decrease.
More Tutorials
If you love this single crochet invisible decrease tutorial, you might also like to check out these other tutorials:


How to Single Crochet Invisible Decrease
The single crochet invisible decrease consists of 3 simple steps:
1. Insert your hook into the front loops only of the next 2 stitches (3 loops on hook).
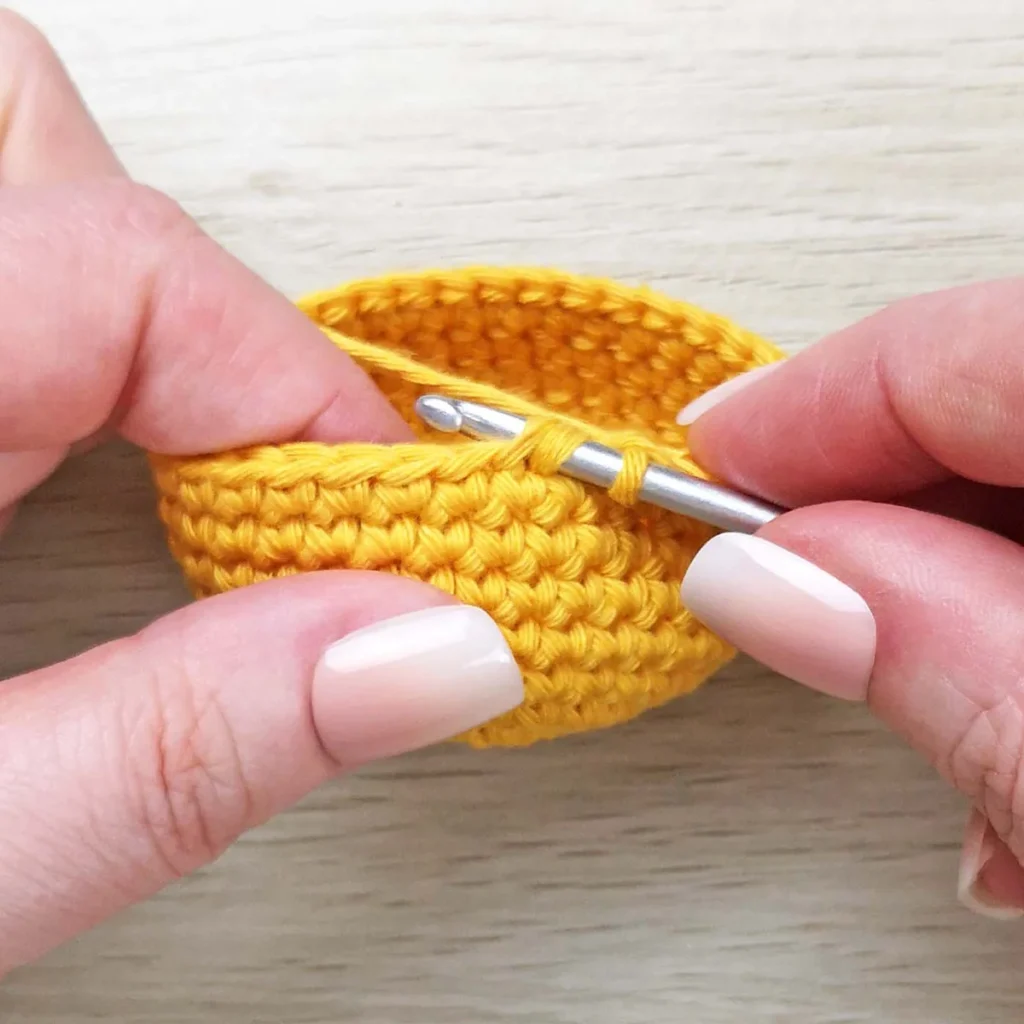
2. Yarn over and pull through the first 2 loops on your hook (2 loops on hook).
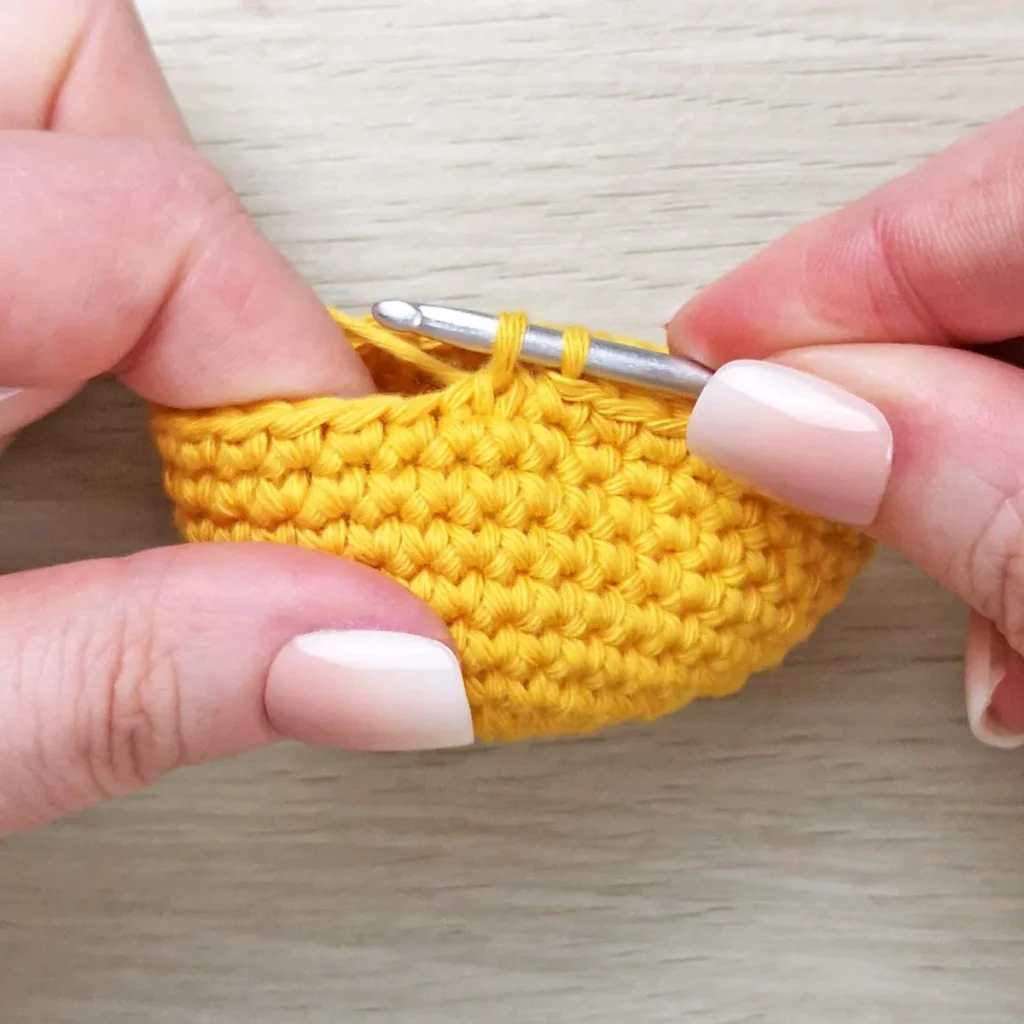
3. Yarn over and pull through the remaining 2 loops on your hook.

And that’s all there is to it, you’ve completed your first invisible decrease.
tips
- Keep an eye out for loose stitches. After completing an invisible decrease the following stitch can be a little loose so you may need to tighten up the working yarn to avoid this.
- Make sure that you don’t accidentally work into the same front loop twice. it can be hard to tell some times so keep an eye on your stitch count at the end of each round.
not ready to try this yet?
Pin this post for later

Invitation To Our Facebook Group
We hope you enjoyed this crochet tutorial. Come and hang out with me in the Stitch by Fay Community Facebook group. We created this space for you to share pictures, ask questions and support each other.

This is an original crochet tutorial written for Stitch by Fay. Please don’t claim this tutorial as your own. If you wish to share this crochet tutorial, you may link to this post but please do not reprint it on your site.
Absolutely adore your designs! Just started crocheting two yrs ago when I turned 50 and having a blast making amigurumi for the grandkids!
Thank you so much! I appreciate you taking the time to comment.
Thank you for explaining the inv dec. I couldn’t figure it out and why it was needed.