

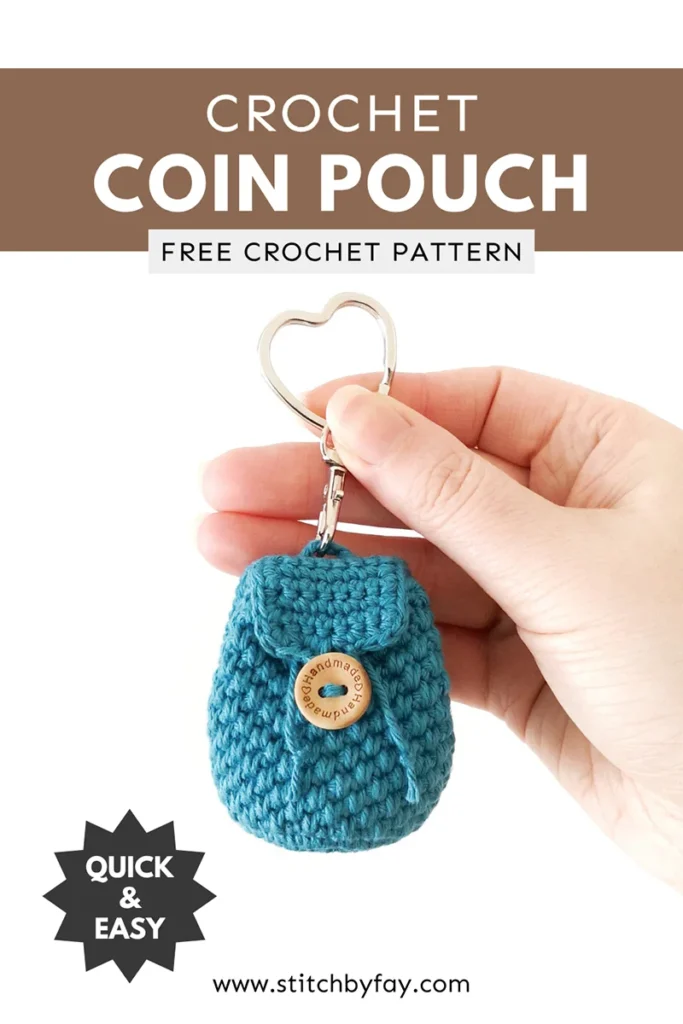
Mini Crochet Coin Pouch Pattern
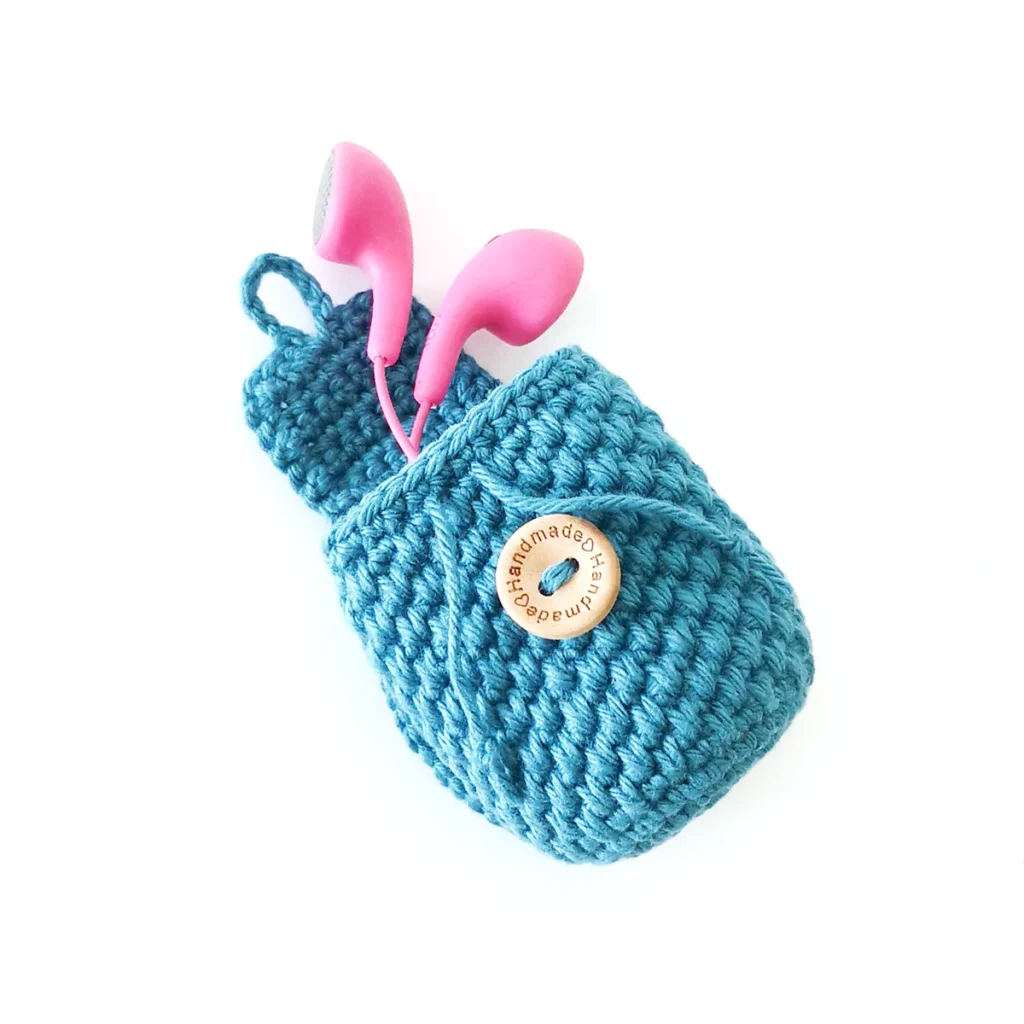
This mini crochet coin pouch pattern is quick, easy and cute! It’s the perfect size for holding coins, earbuds or other small items when you’re on the go.
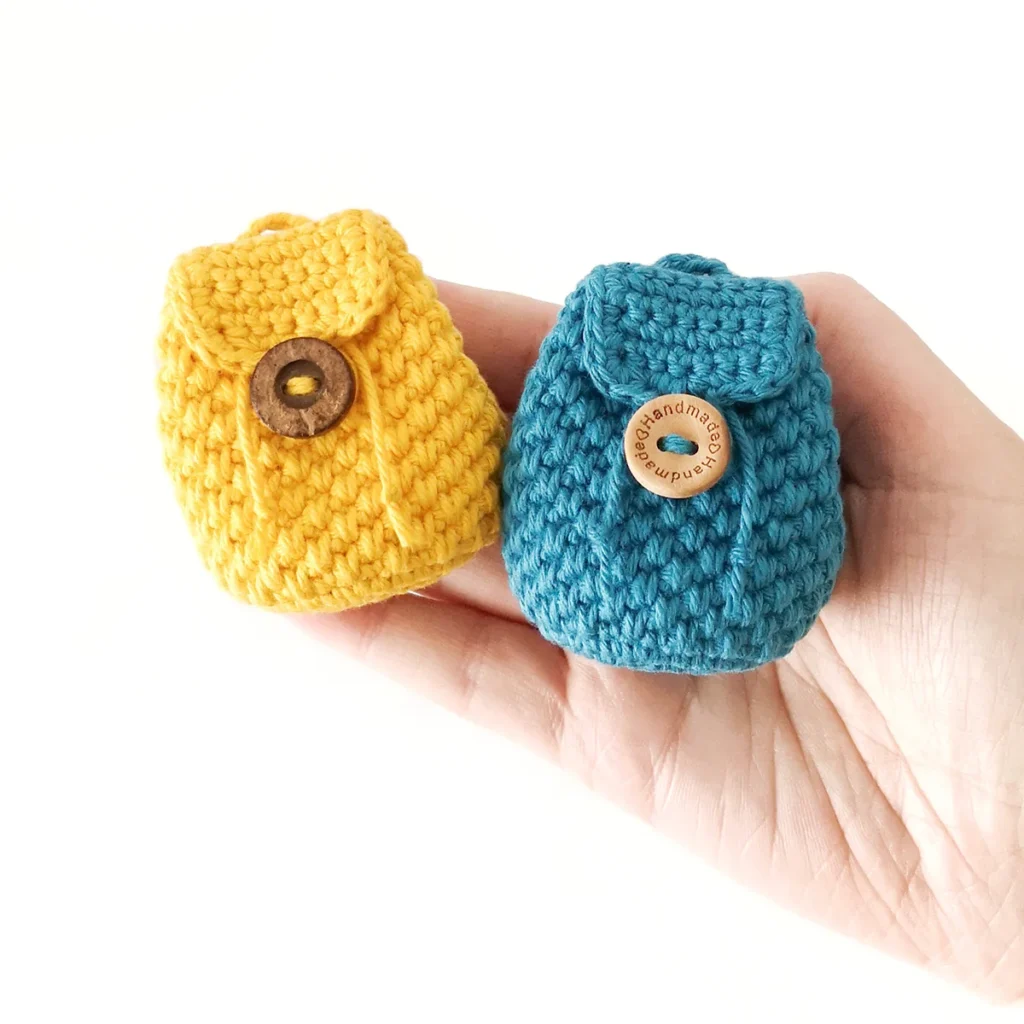
I might be a little obsessed with this crochet coin pouch. It’s a miniature backpack and let’s be honest, anything mini is instantly cuter.
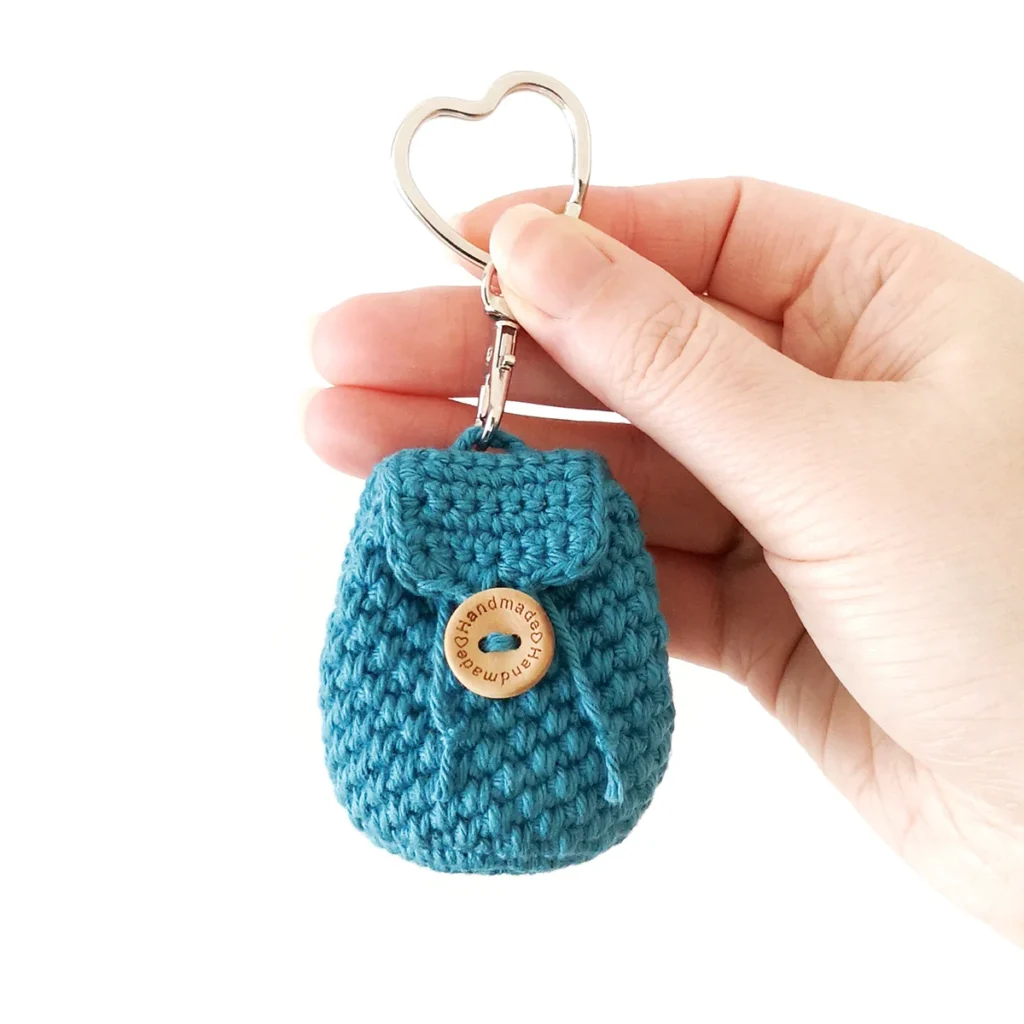
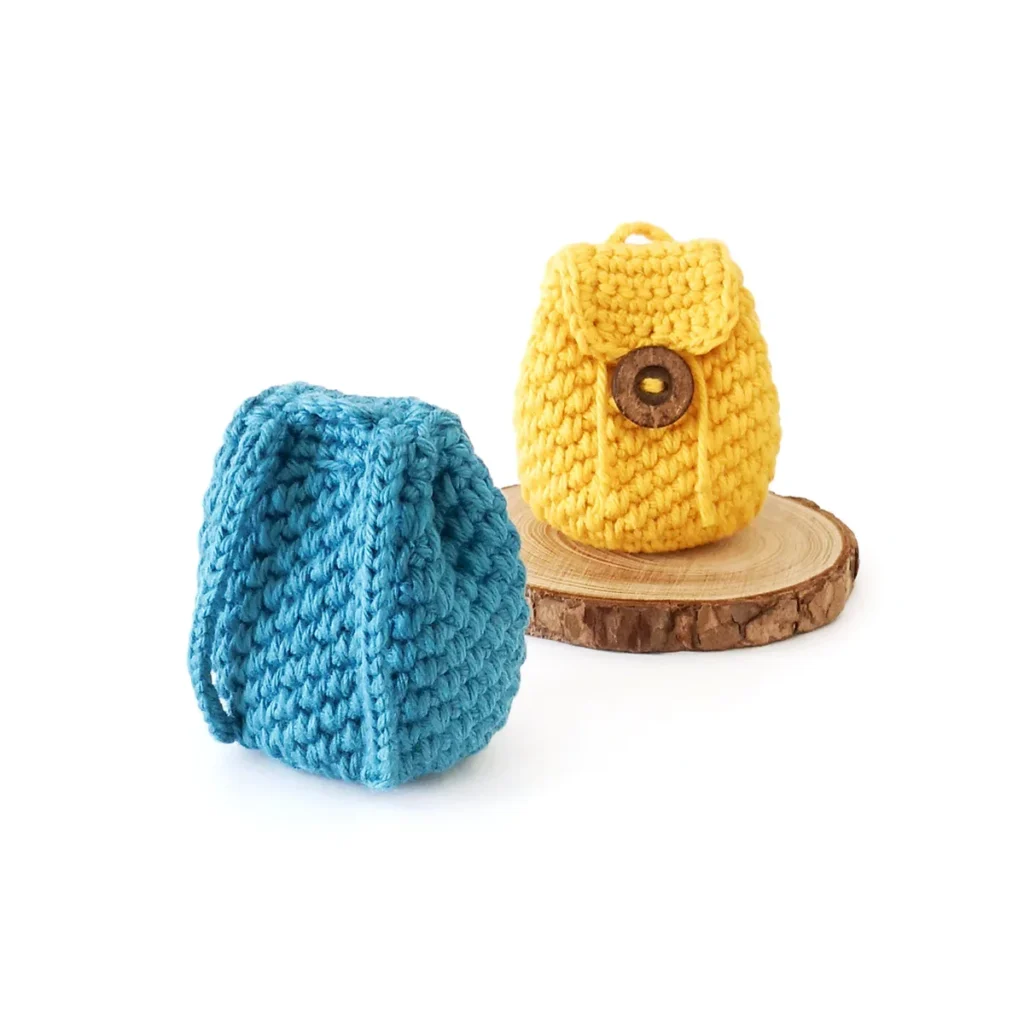
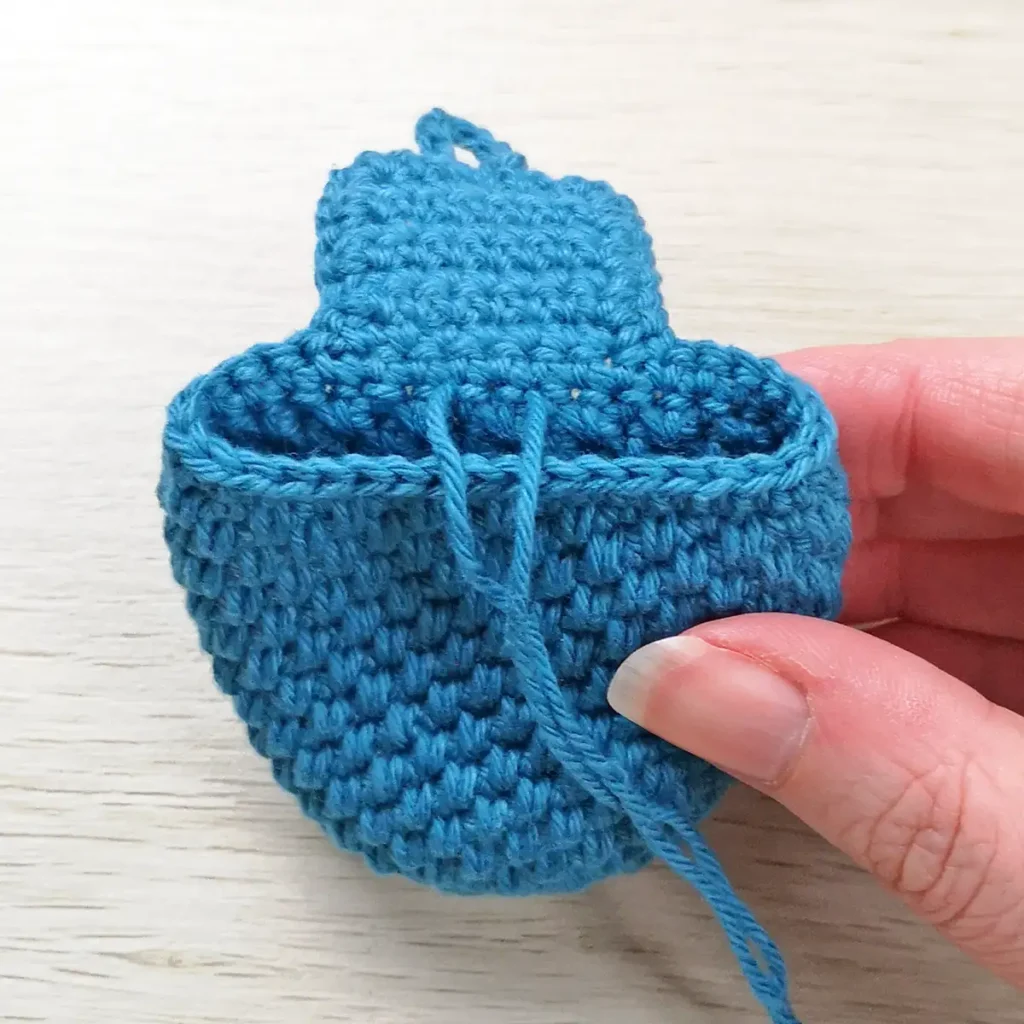
It has a little loop on the top (just like a real backpack) that makes it easy to attach a keychain or you can make the loop longer and turn it into a bag charm. The straps on the back are optional, but they’re also perfect for wearing it on a belt.
About the Pattern
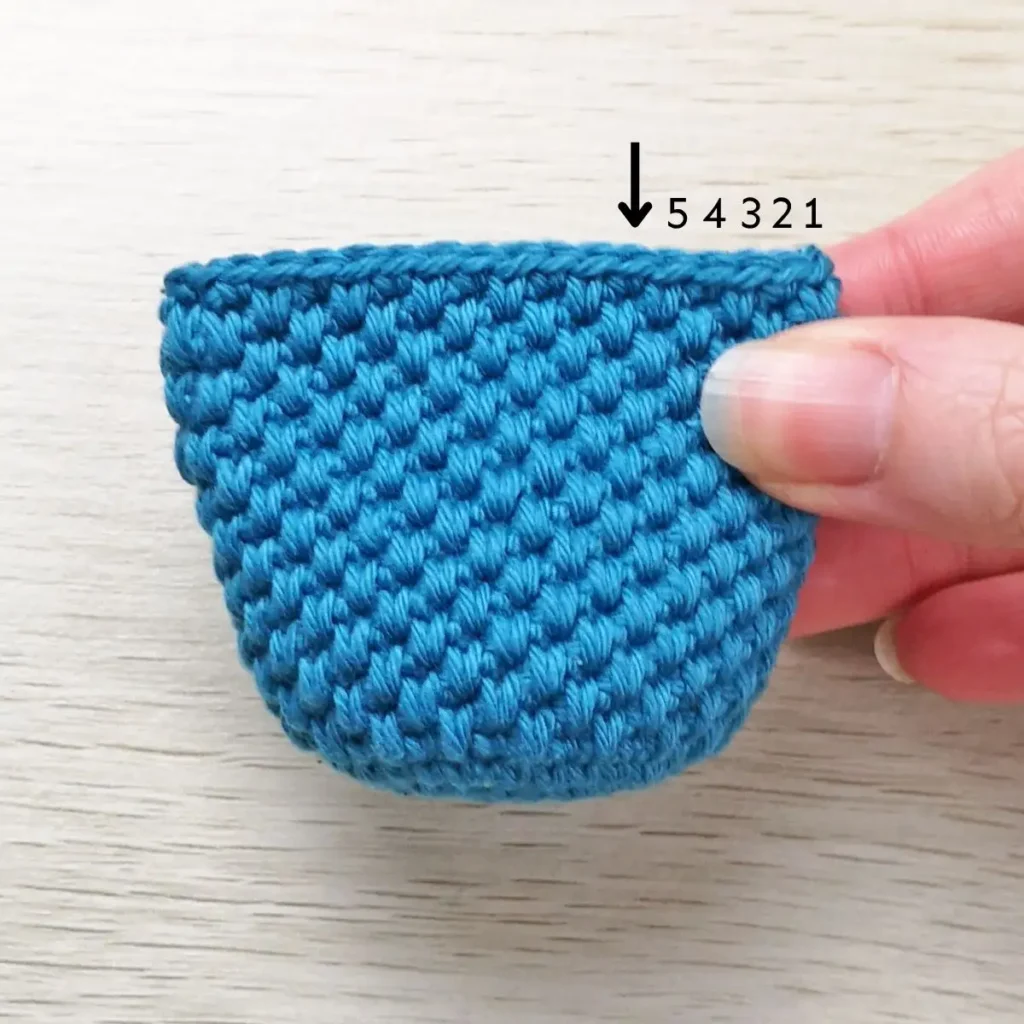
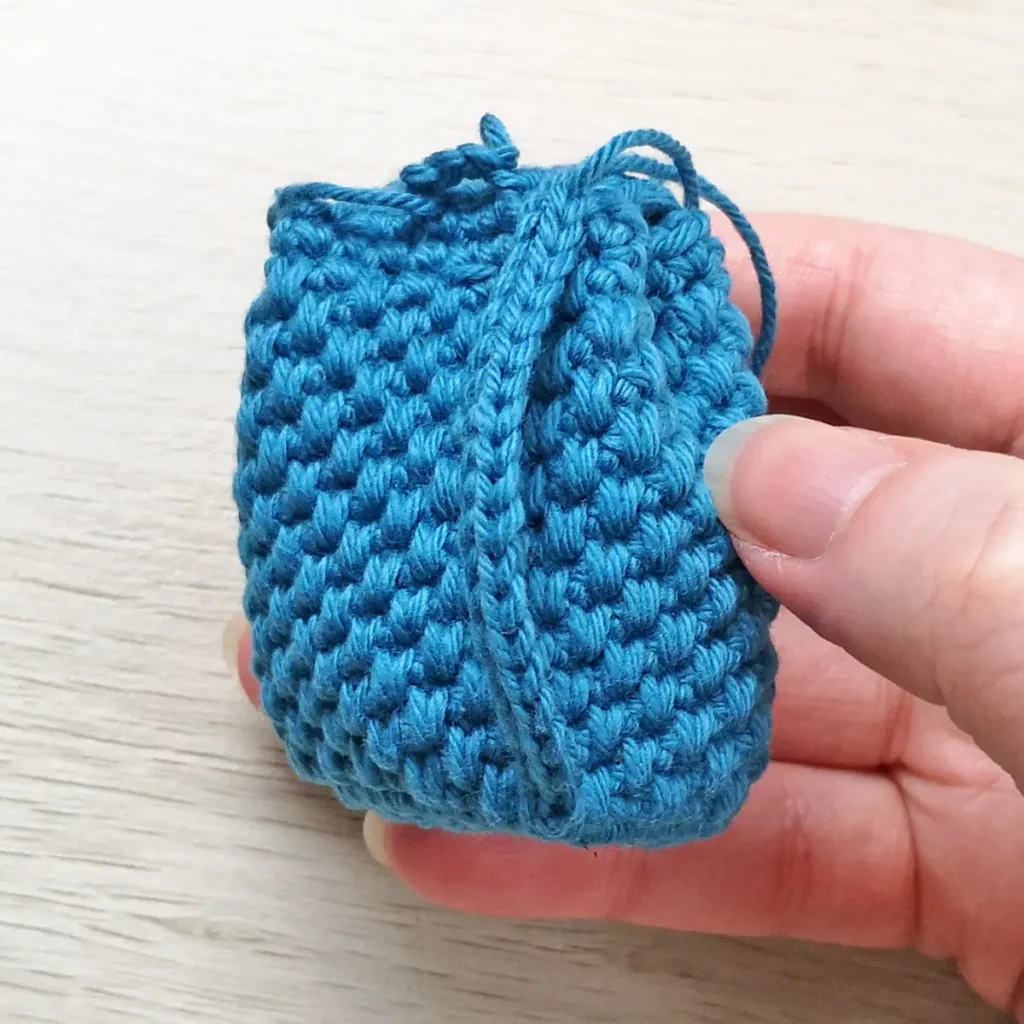
This crochet coin pouch pattern is worked in a spiral from the bottom up.
We’ll start with a simple single crochet base before alternating single crochet spike stitches and regular single crochet to give the body of the pouch some fun texture.
The flap is crocheted on and the whole pouch is finished with a round of single crochet before adding the final details of the bag loop and straps which make it look like a little backpack.
Recommended Yarn
I used Paintbox Yarns Cotton DK yarn with a 2.5mm hook for my crochet coin pouch. You can easily make it bigger by using thicker yarn and a larger hook.
Why You’ll Love This Crochet Coin Pouch Pattern
More Crochet Patterns
If you love this crochet coin pouch pattern, you might also like to check out these other crochet patterns:

Crochet Coin Pouch Pattern
Grab the free downloadable PDF from the freebie library. The ad-free PDF includes detailed instructions and photos as well as easy print pages.
Freebie Library
Join our newsletter to gain access to exclusive freebies and keep up to date.
Already a member? Login here.
Materials
- DK weight yarn in your choice of colour (I used Paintbox Yarns Cotton DK in Jewel and Mustard Yellow for the coin pouches pictured)
- 2.5mm crochet hook
- 1.5cm button
- Optional: keychain
- Stitch marker, yarn needle, scissors
Abbreviations (US Terms)
- ch – chain
- dec – single crochet decrease
- inc – increase
- sc – single crochet
- sl st – slip stitch
- SPsc – single crochet spike stitch
- st/s – stitch/es
- […] – repeat the instructions in brackets
- (…) – indicates stitch count at end of round
Special Stitches
Single crochet spike stitch (abbreviation: SPsc)
- Insert your hook into the next stitch, 1 round below the current round.
- Draw up a loop to the height of the stitches of the working round.
- Yarn over and pull through both loops on the hook to complete the stitch.
Useful Links
Finished Size
The finished coin pouch measures approximately 2.5″ x 2″ (6.5cm x 5cm). Size may vary depending on tension and materials used.
Gauge
Gauge is not important in this pattern. However, using a different yarn and hook size will change the size of the finished item.
Notes
- Pieces are worked in a continuous spiral using the traditional YO (yarn over) method, unless otherwise specified. Mark the first stitch of each round with a removable stitch marker.
- The flap is worked in turned rows starting with a ch 1.
Pattern Instructions
Pouch
R1: 6 sc in magic ring (6)
R2: [Inc] x6 (12)
R3: [Sc, inc] x6 (18)
R4: Sc, inc, [2 sc, inc] x5, sc (24)
R5: [3 sc, inc] x6 (30)
R6: 2 sc, inc, [4 sc, inc] x5, 2 sc (36)
R7: [Sc] x36 (36)
In the next round, we start alternating sc and SPsc. All spike stitches are worked into the round below.
R8: [Sc, SPsc] x18 (36)
R9: [SPsc, sc] x18 (36)
R10-23: Alternate R8 and R9 (36) 14 rounds
Sl st in next st. Fasten off invisibly and weave in ends.
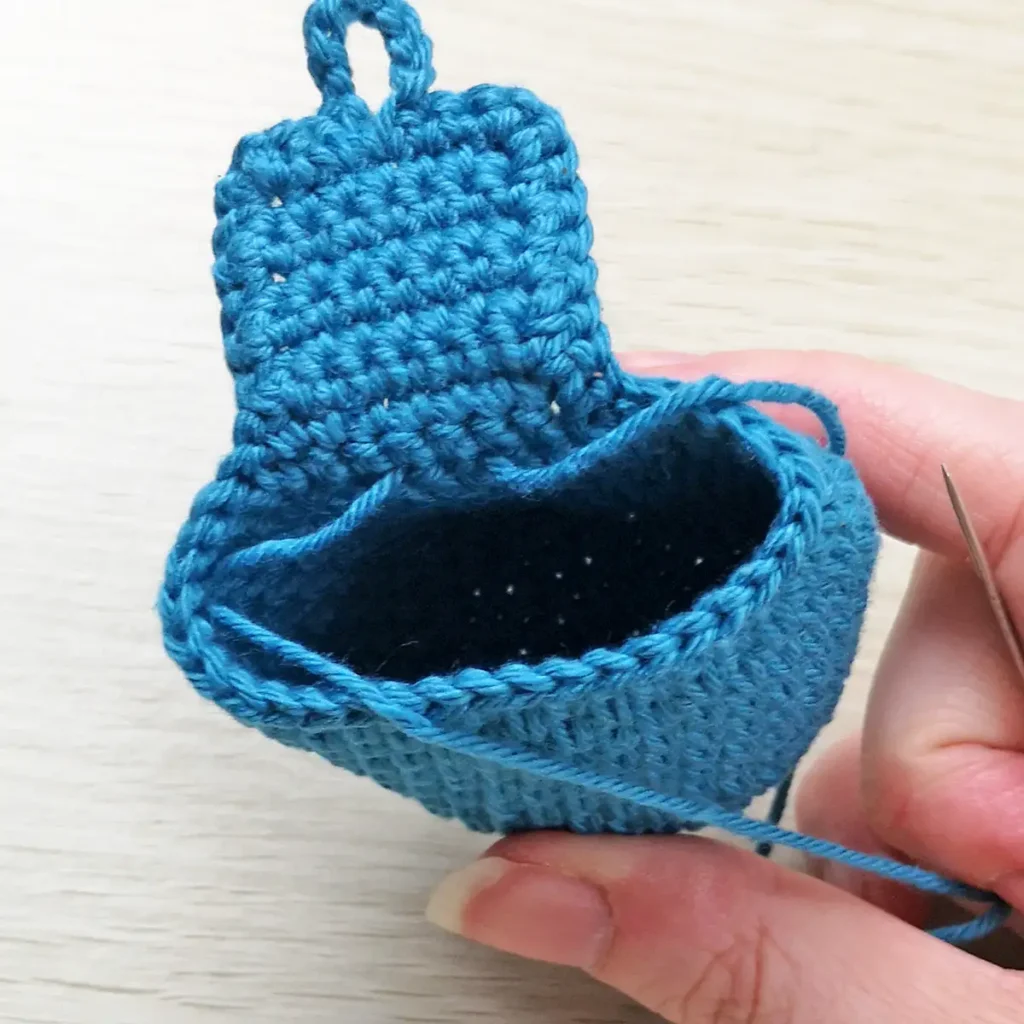
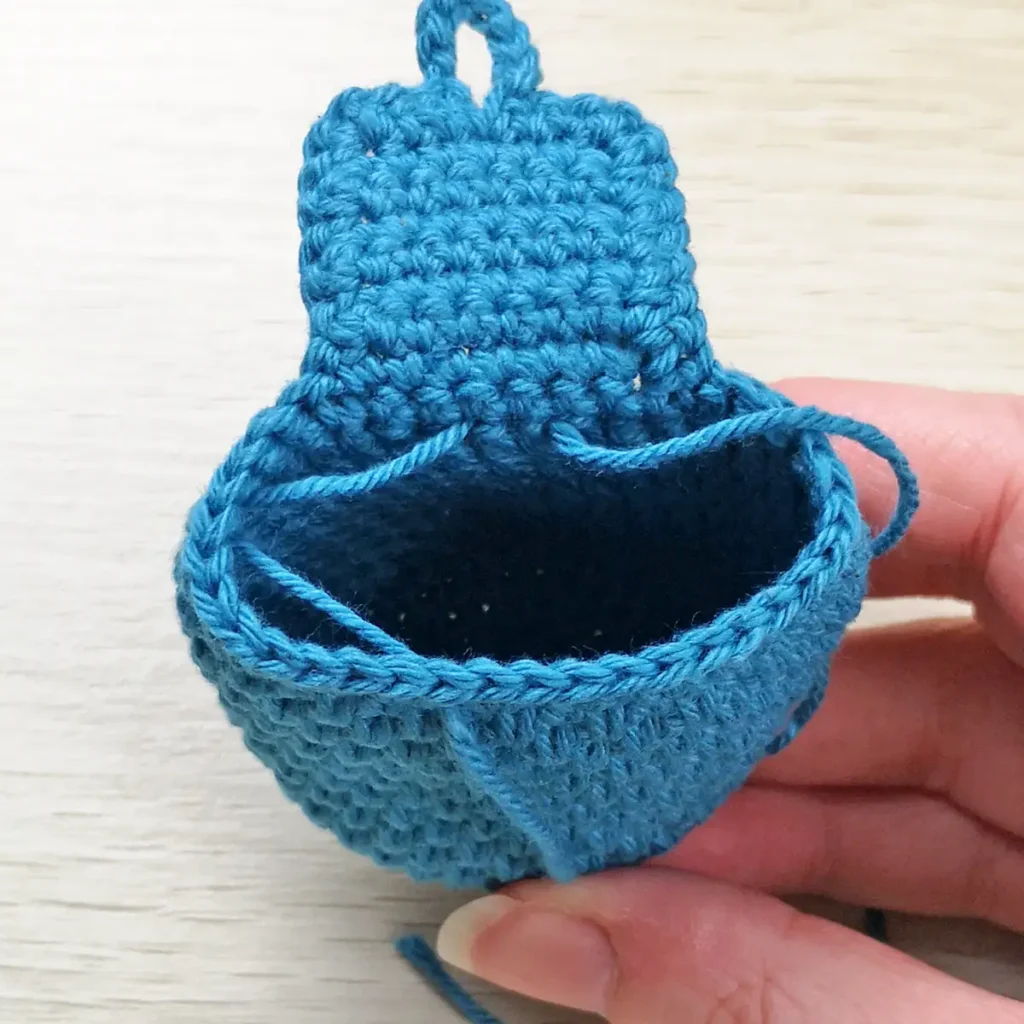
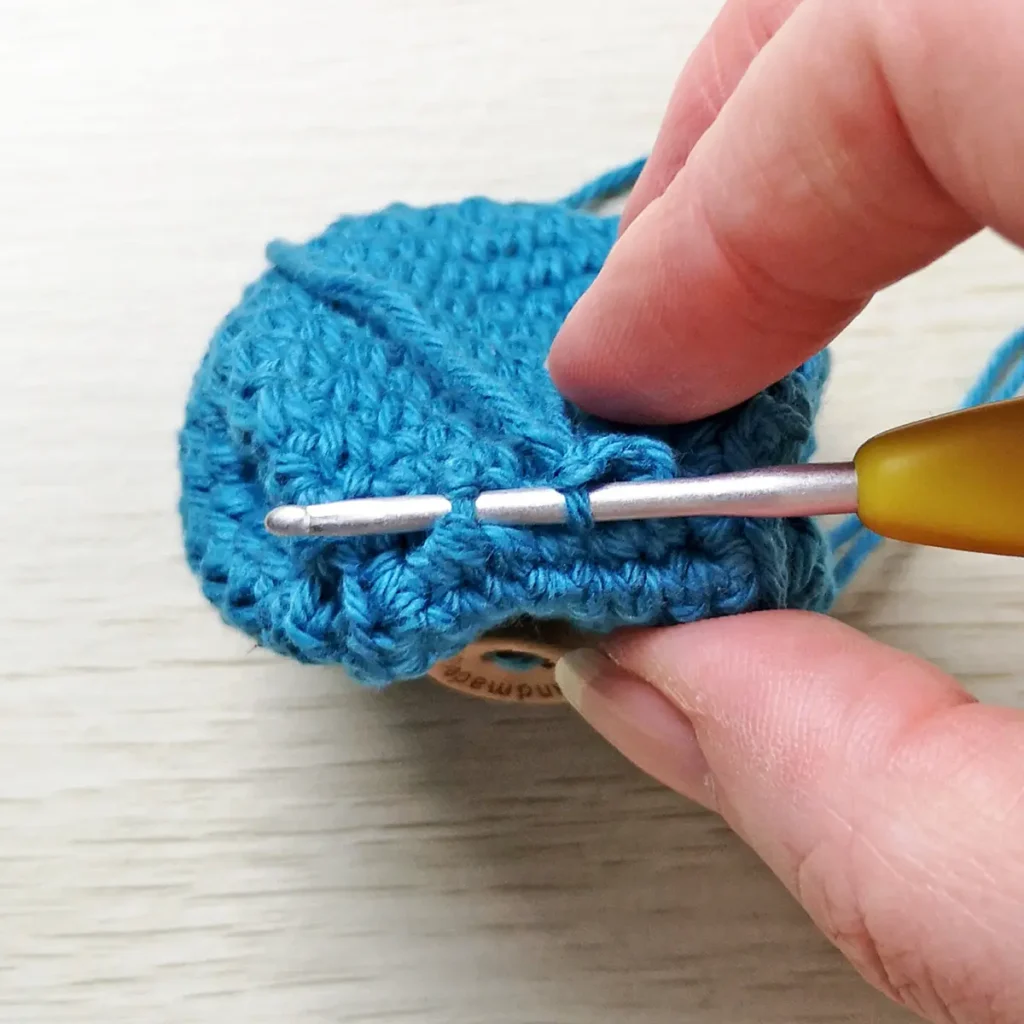
Flap
Press the top of the bag together with the invisible join in the left-hand corner.
Count 5 stitches in from the right corner and start the flap in the next stitch. Join the yarn with a standing single crochet.
R1: [Sc] x7 (7)
R2-8: Ch 1, turn. [Sc] x7 (7) 7 rounds
R9: Ch 1, turn. Dec, 2 sc, ch 8, sc in same st, sc, dec (6)
Pause here to check that the button fits through the chain loop. Make the chain longer or shorter if needed.
R10: Do not turn. Place 2 sc in the same stitch as the last st from R9, sc evenly down the side of the flap, around the body of the pouch and up the other side of the flap, finishing with 2 sc in the top corner.
Fasten off invisibly and weave in ends.
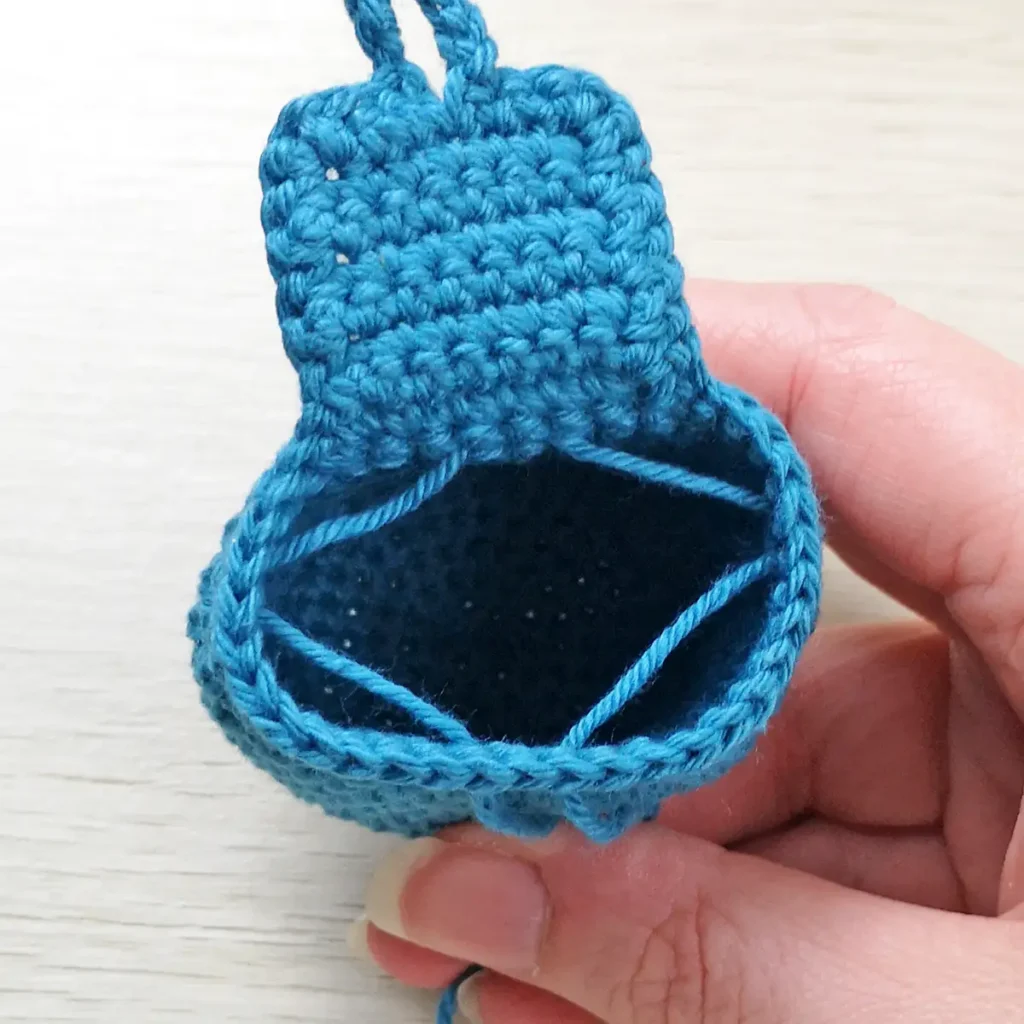
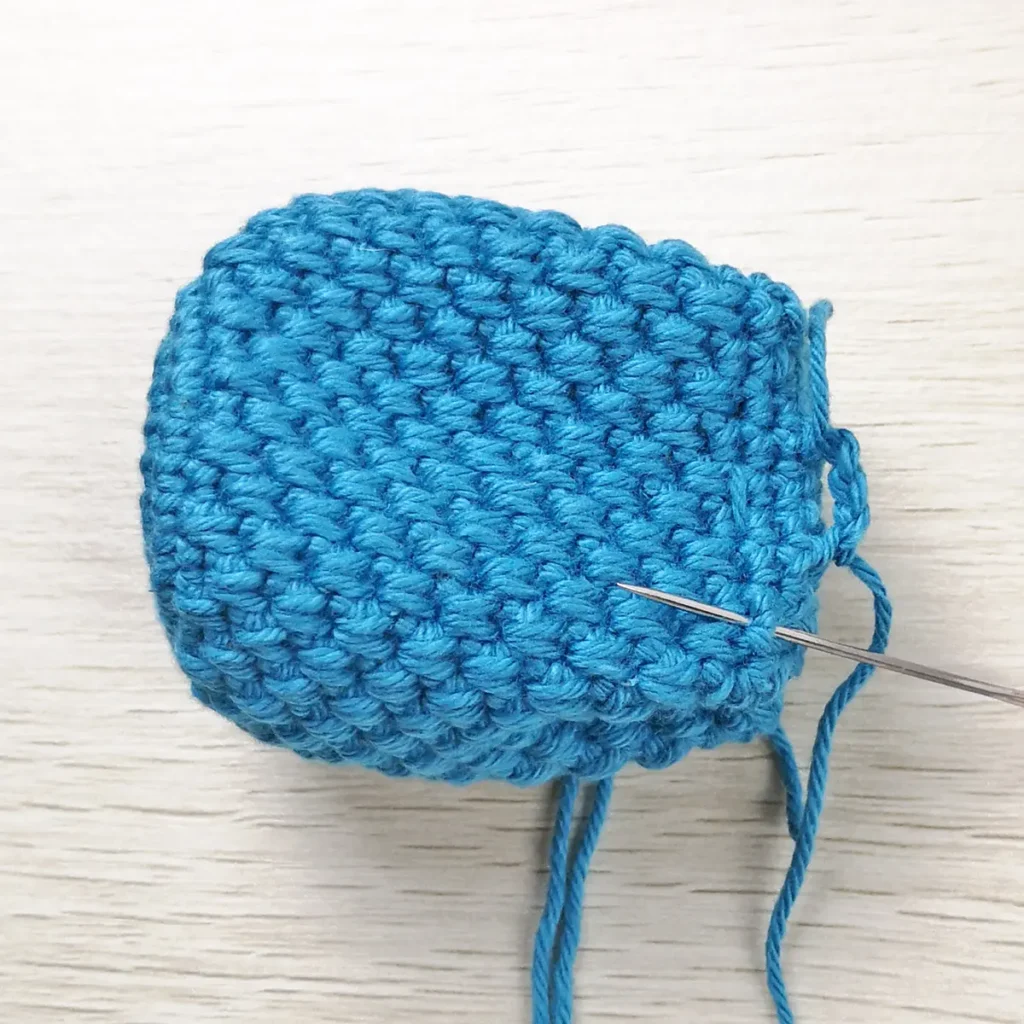
Drawstring
Using a yarn needle, weave a length of yarn (approximately 14″) through the centre back of the flap in between the last round of the pouch and the first row of the flap with 1 stitch in between, leaving a long tail on both sides.
Press the top of the pouch together with the flap centred at the back.
Find the right-hand corner and weave the yarn through the corner stitch.

Finally bring the yarn out one stitch to the side of the centre front of the pouch.
Repeat on the left-hand side with the other end of the yarn. You should have 1 stitch between where the 2 ends come out at the front of the pouch.
Gently pull both tails to close the pouch. The sides should fold in and it should look even with the ties centred with the flap. Make any adjustments if needed.
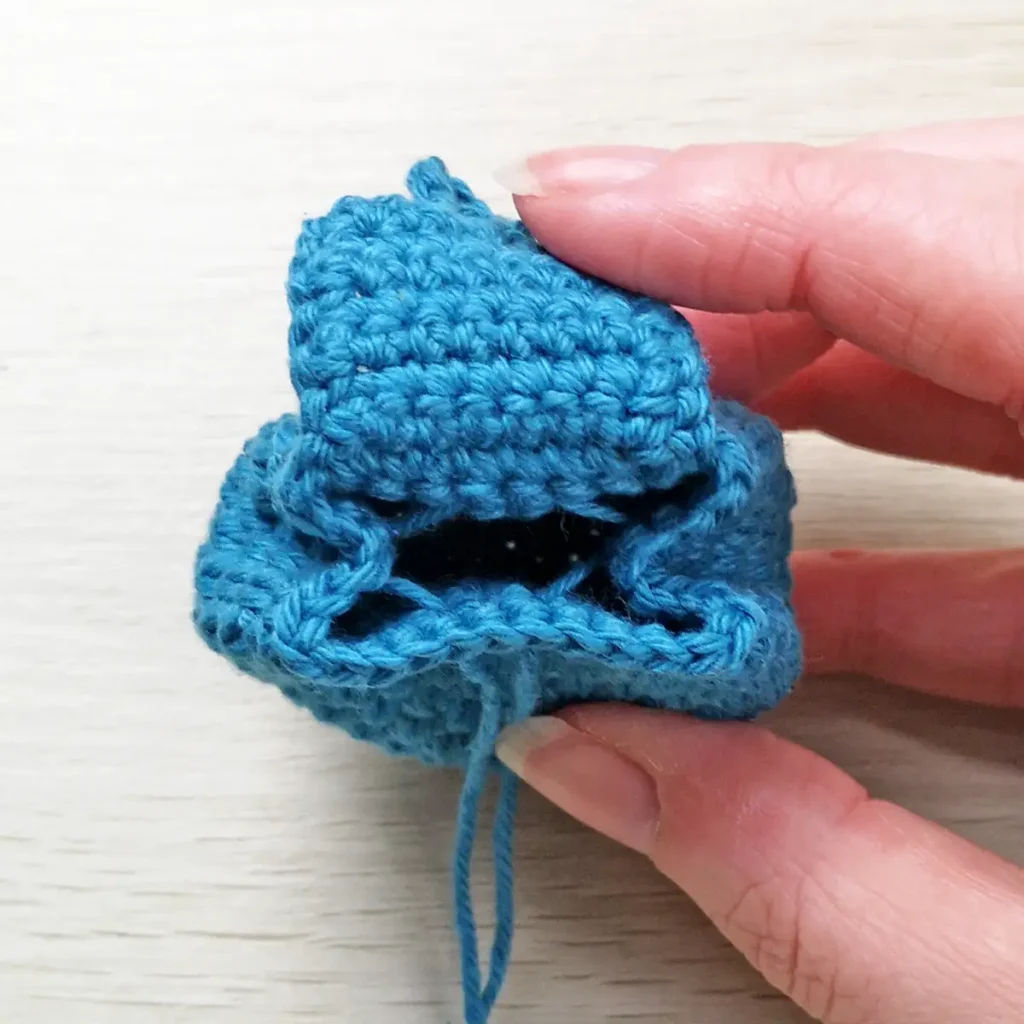
Button
Fold the flap down to cover the opening of the pouch.
Sew on the button in line with the loop closure, centred on the front of the pouch.
Leave the drawstring long for now and close the pouch for the next step.
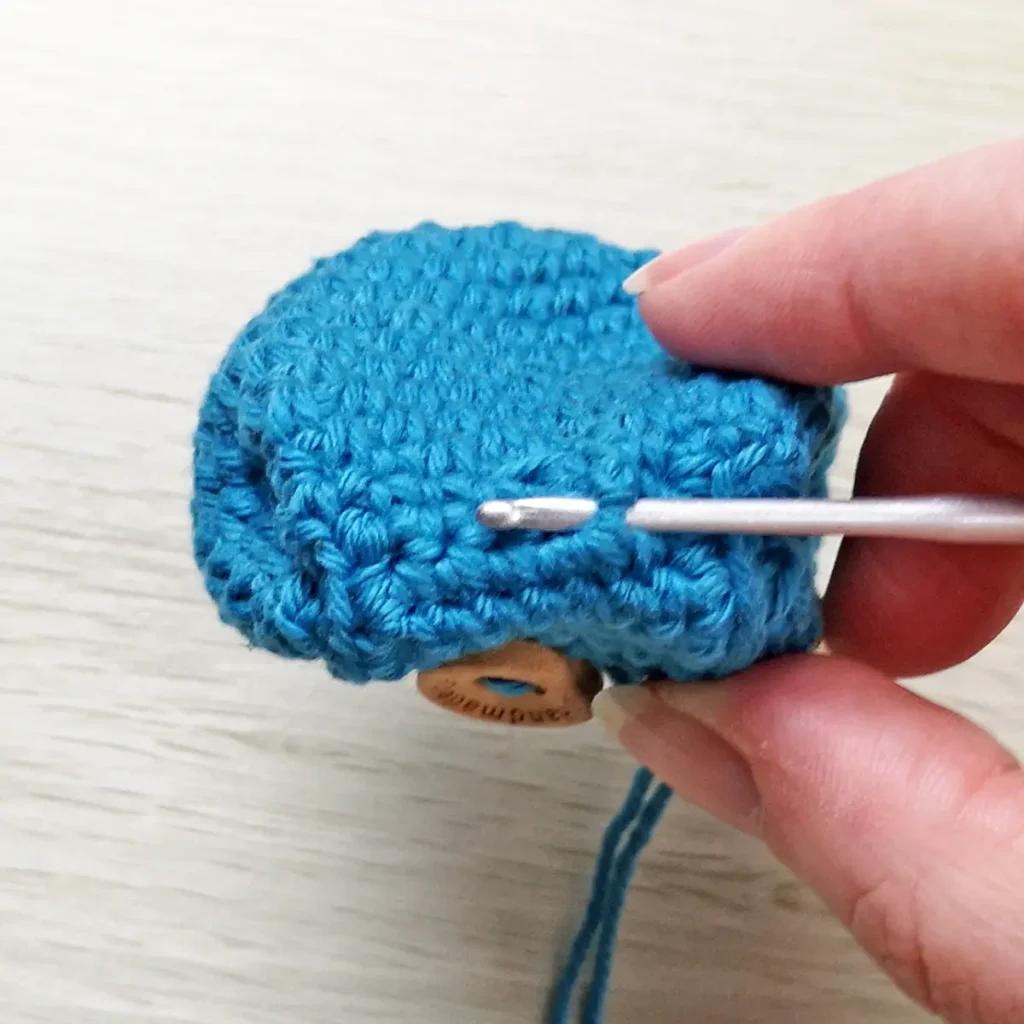
Bag Loop
With the front of the pouch facing you, insert your hook between R2 and R3 of the flap, 1 stitch in from the edge and pull through a loop of yarn. Ch 4, insert your hook back through a stitch on the flap approximately 2 stitches over.
Fasten off and weave in ends on the inside of the flap.
Bag Straps (optional)
The bag straps are attached similarly to the bag loop.
tip
Use pins to mark where you want each handle to start and end.
Lay the pouch sideways with the back facing up and the top of the pouch on the right-hand side. Insert your hook through R1 of the flap, 1 stitch in from the edge and pull through a loop of yarn.
Ch 21
Sl st into R7 at the bottom of the pouch. Make sure that where you join at the bottom is inline with where you started at the top so that the strap hangs straight.
Turn so the front of the chain is facing you. Skip the first chain, [sl st] x20
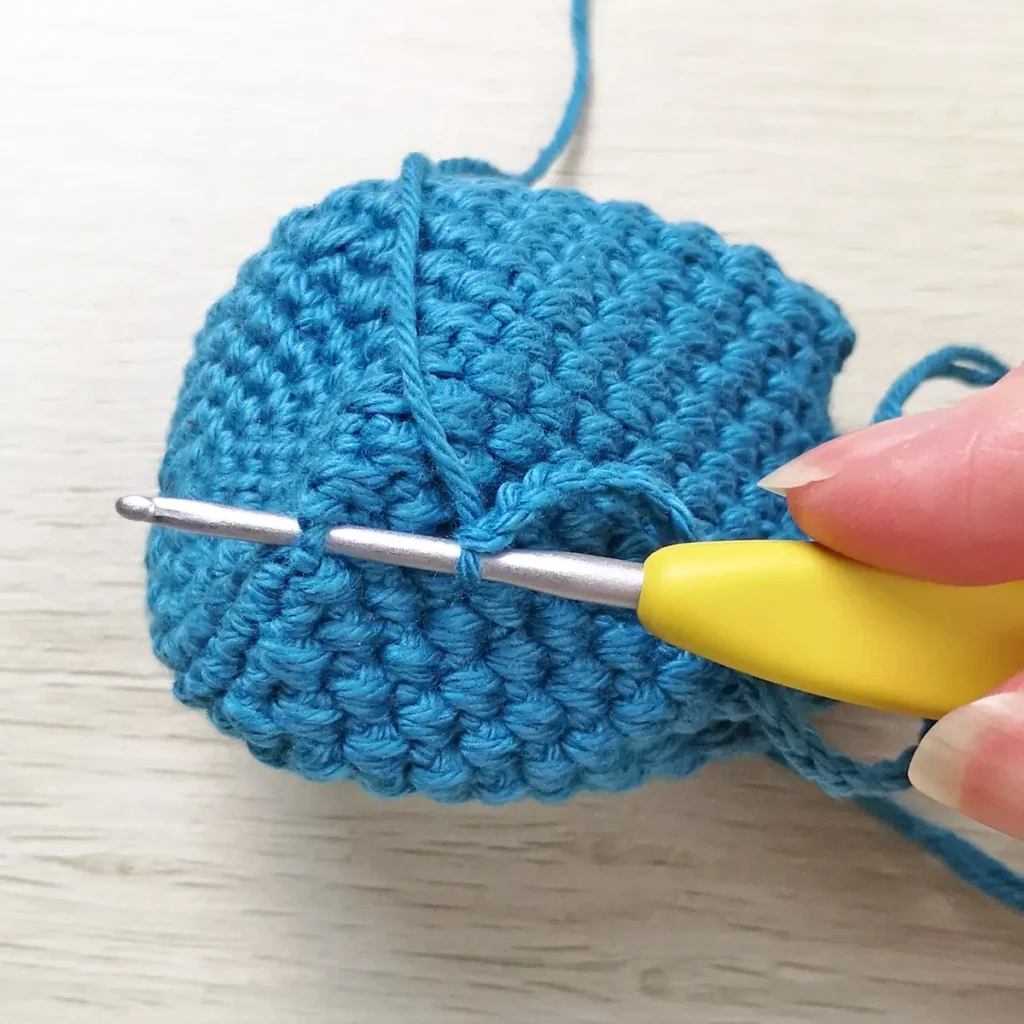
Fasten off and repeat for the second strap.
Open the bag and weave in ends on the inside of the pouch.
Finishing
- Cinch the pouch closed with the drawstring and tie in a bow.
- Make a double knot at your desired length on each tie and trim excess yarn.
- Close the pouch with the ties hanging on either side of the button.
- Optional: add a keychain to the bag loop.
not ready to make this yet?
Pin this post for later
Explore More Crochet Patterns
After you crochet this coin pouch, here are some more crochet patterns to try:
What’s Next?
Have questions? Join the Facebook group!
We hope you enjoyed this pattern. Come and hang out with me in the Stitch by Fay Community Facebook group. We created this space for you to share pictures, ask questions and support each other.

This pattern is for personal use only and may not be copied, reproduced, altered, published or distributed in any format (including video). If you wish to share this pattern, you may link to this pattern but please do not reprint it on your site.
You can sell finished products made from this pattern in small quantities. Do NOT use our photos as your sale photos.
This is so cuuuute! And practical. I like that there’s a loop on top and the loops on the back so there’s more than one way to carry it.
This is SO cute! I’m going to make some for my daughter’s teacher gifts!
Quel Adorable petit sac!❤ Un petit quelque chose de complètement différent mais tellement joli et original.
Merci pour ce petit morceau de joie aujourd’hui 😘