

Crochet Magic Ring Tutorial
This crochet magic ring tutorial will guide you step-by-step through the process from start to finish, including working into the ring and an optional way to secure it.
The magic ring, also known as the magic circle, magic loop or adjustable ring, is one of the most useful techniques out there. It eliminates the hole at the centre of your work, ensuring a clean finish every time and is an essential amigurumi technique.
While the magic ring can be a bit tricky to master, it’ll quickly become a favourite as it can be used in many other projects such as: granny squares, coasters, baskets and top-down beanies/hats – pretty much anything that’s worked in the round.
I’ve been reluctant to share my method for the magic ring mainly because I don’t conform to the standard way of doing things.
However, representation within the crochet community is important and just because a lot of people do things a certain way, doesn’t make it the only way.
How To Crochet the Magic Ring
The crochet magic ring consists of two parts – the adjustable ring itself and the stitches that are worked into the ring.
Instructions
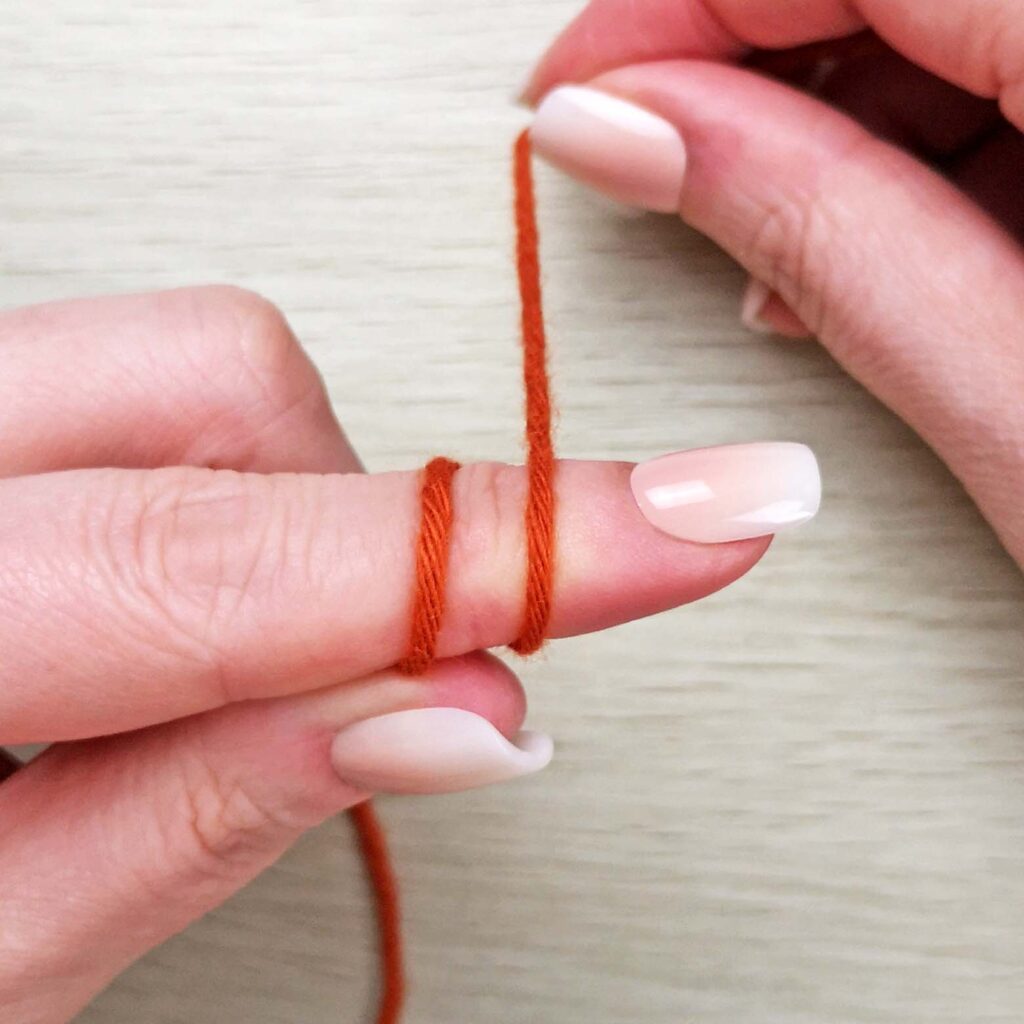
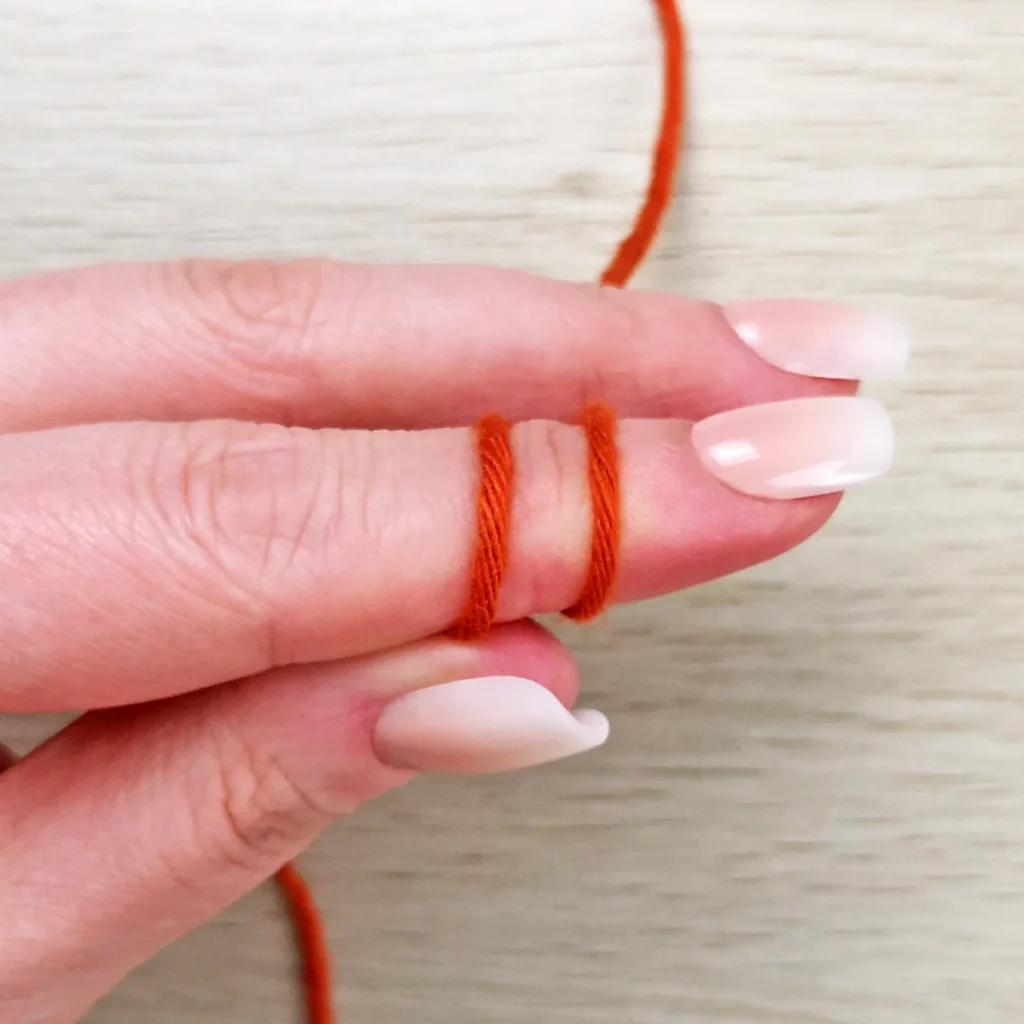
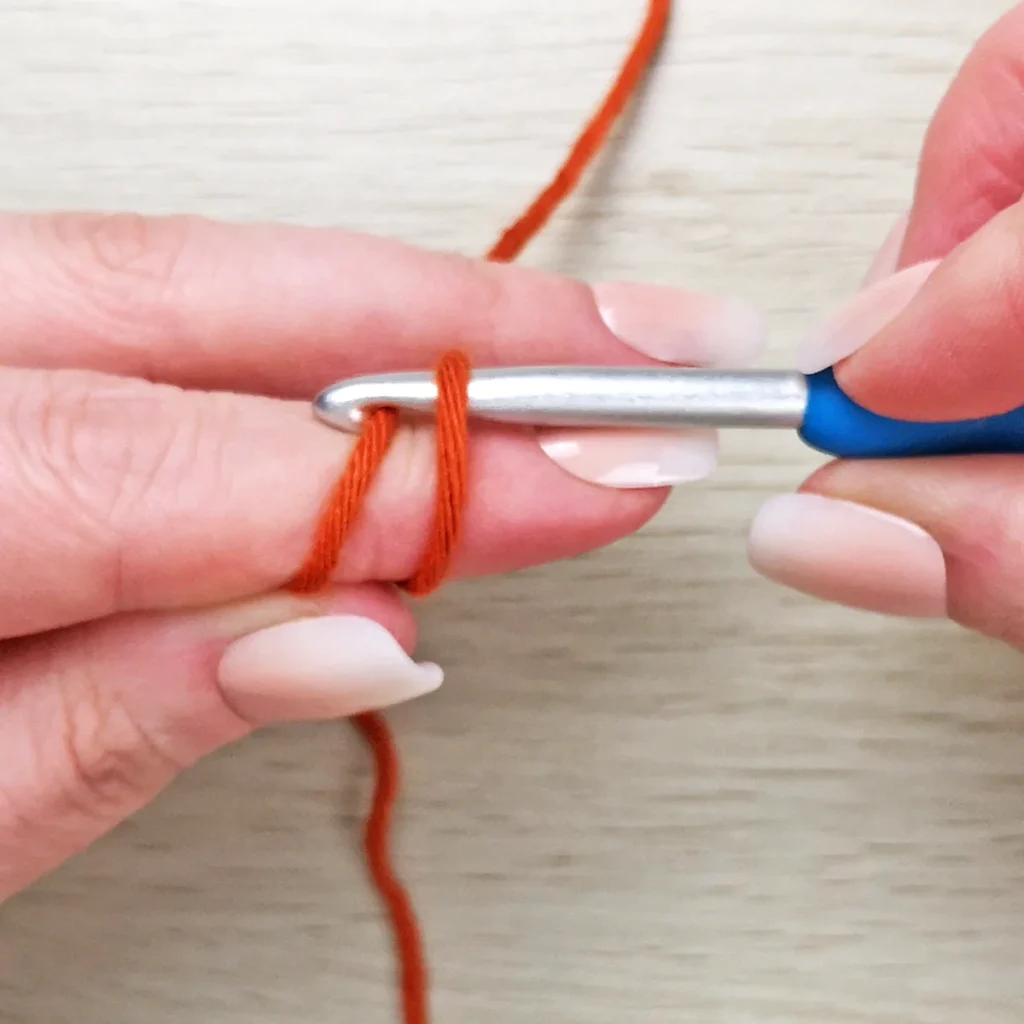
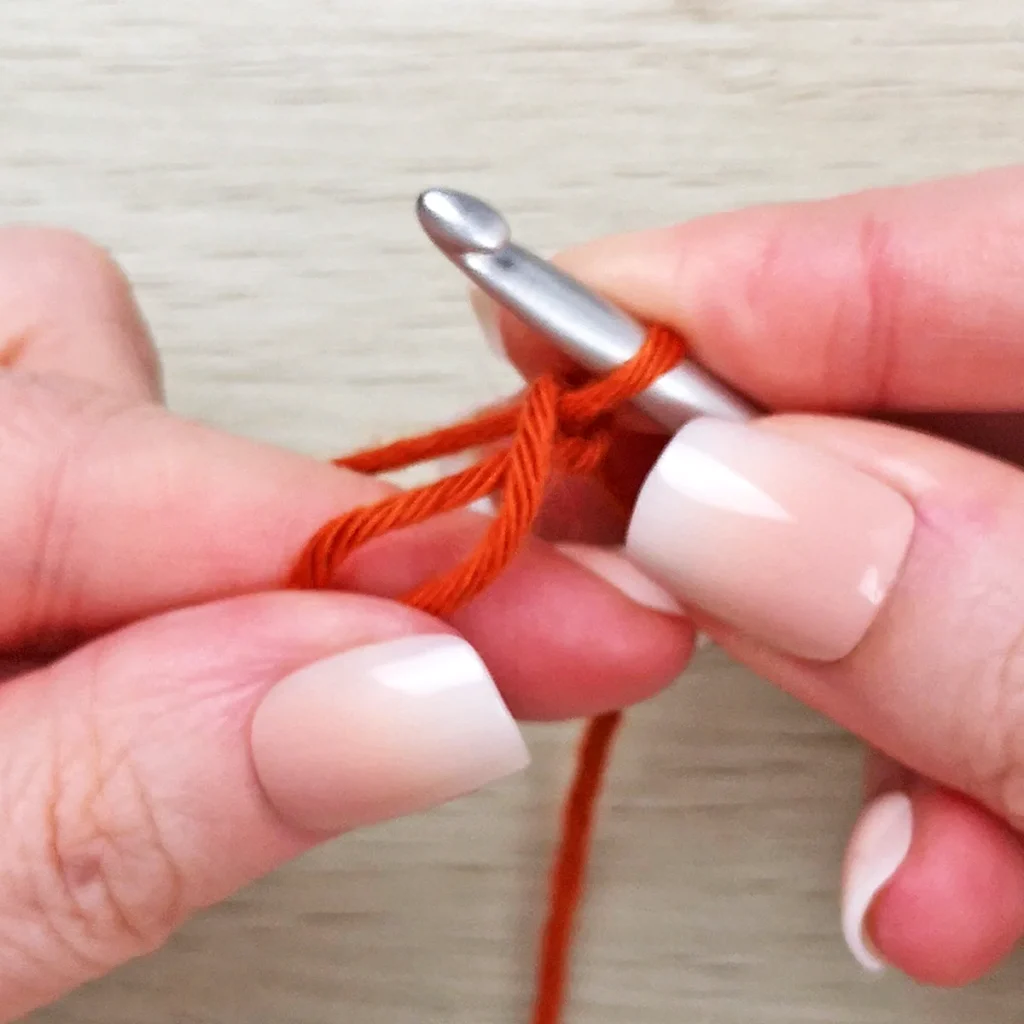
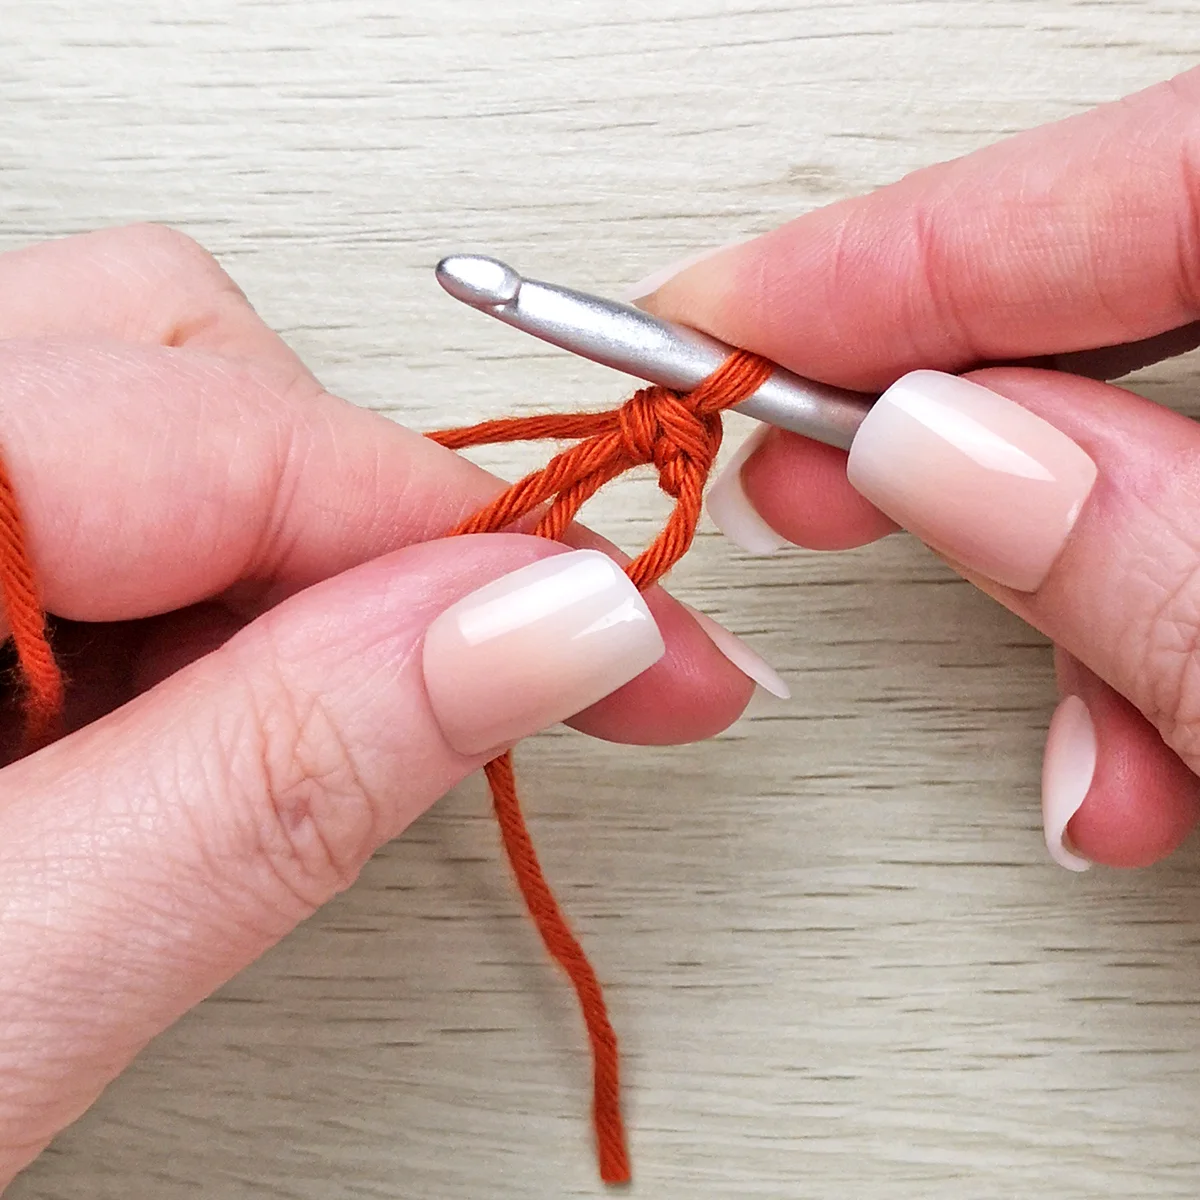
1. Holding the tail end of the yarn in your right hand, wrap the yarn around the index finger of your left hand twice. Use your thumb to hold the working yarn in place and bring your middle finger down on top of the loose tail end.
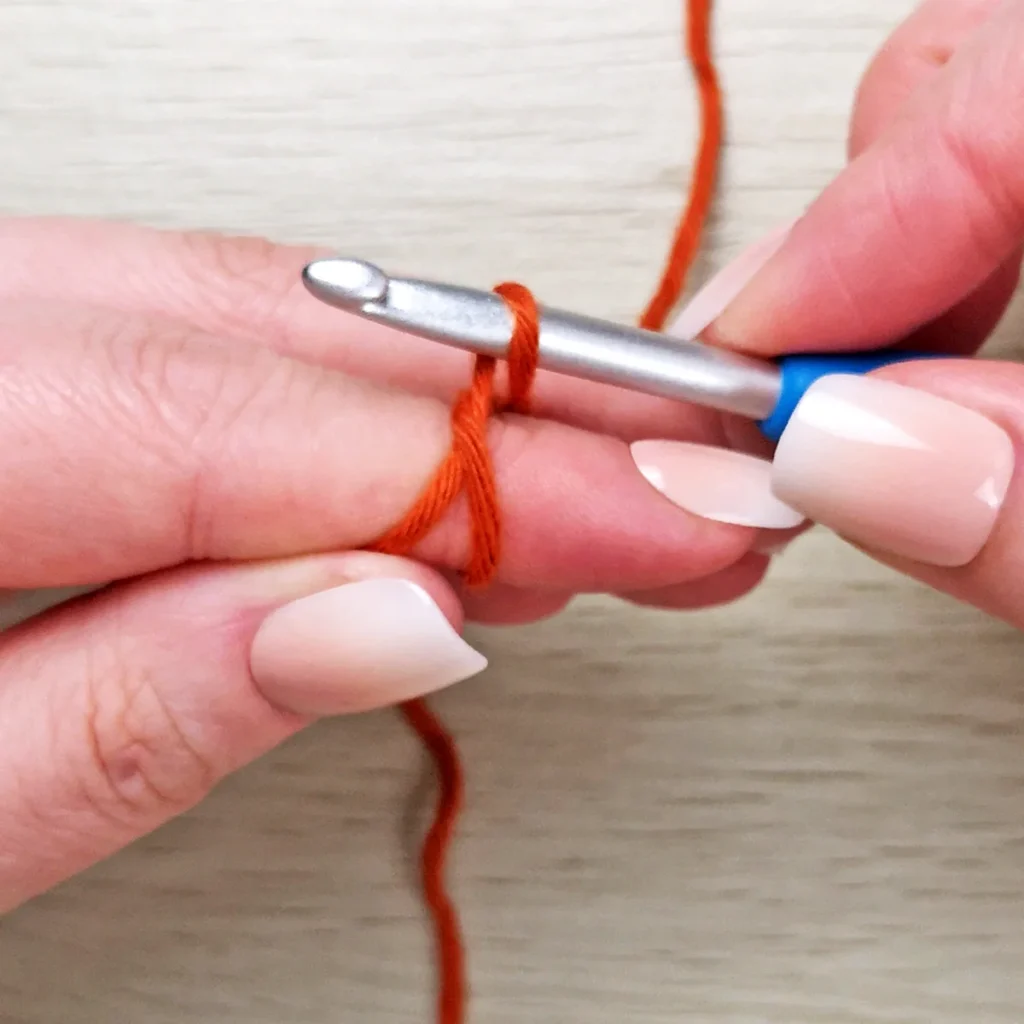
2. Insert your crochet hook under the front strand of yarn and grab the back strand.
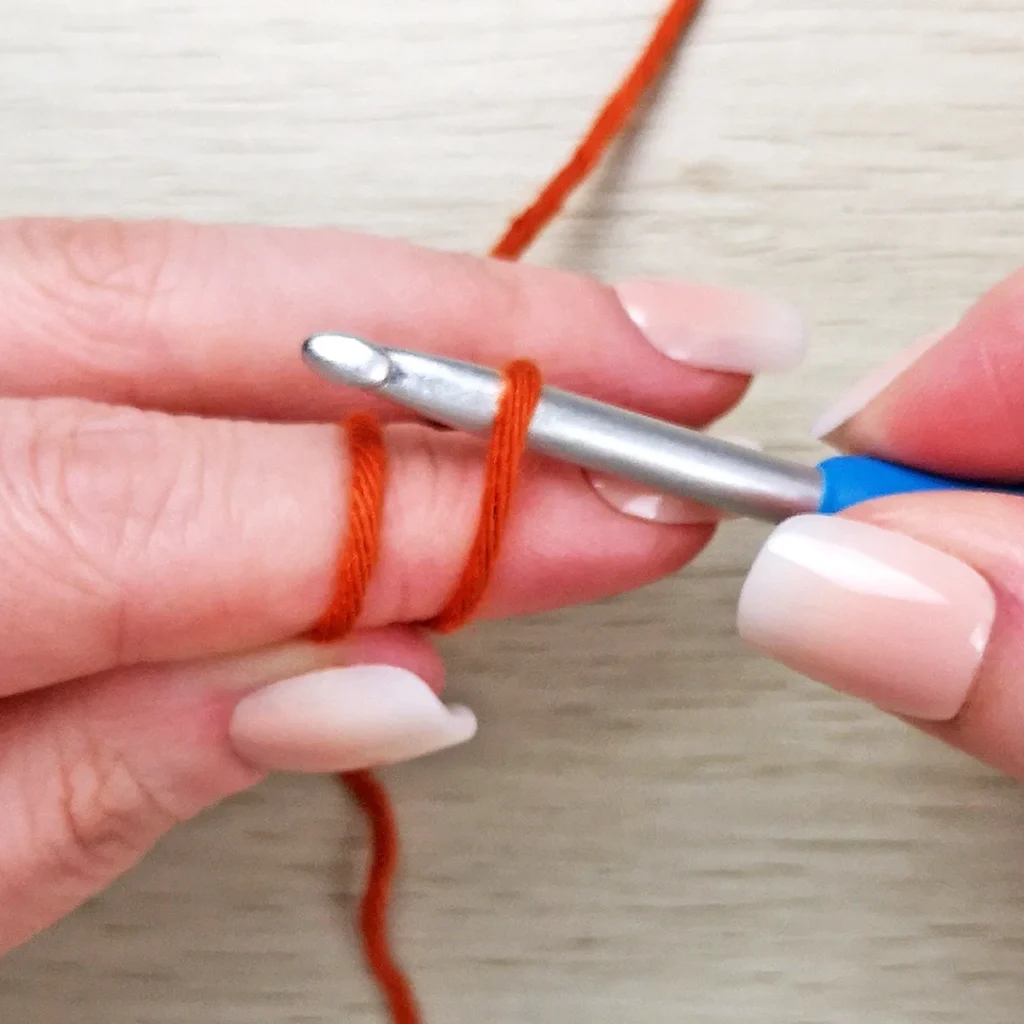
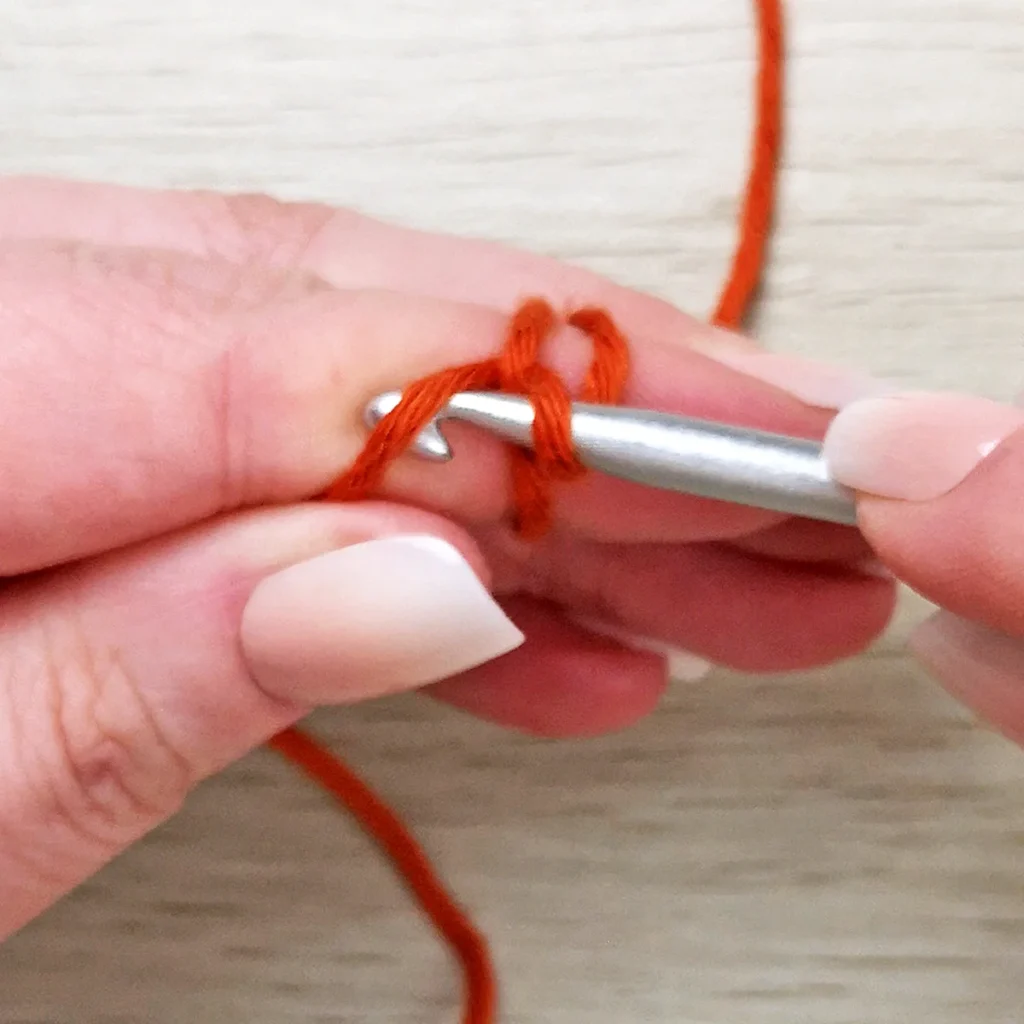
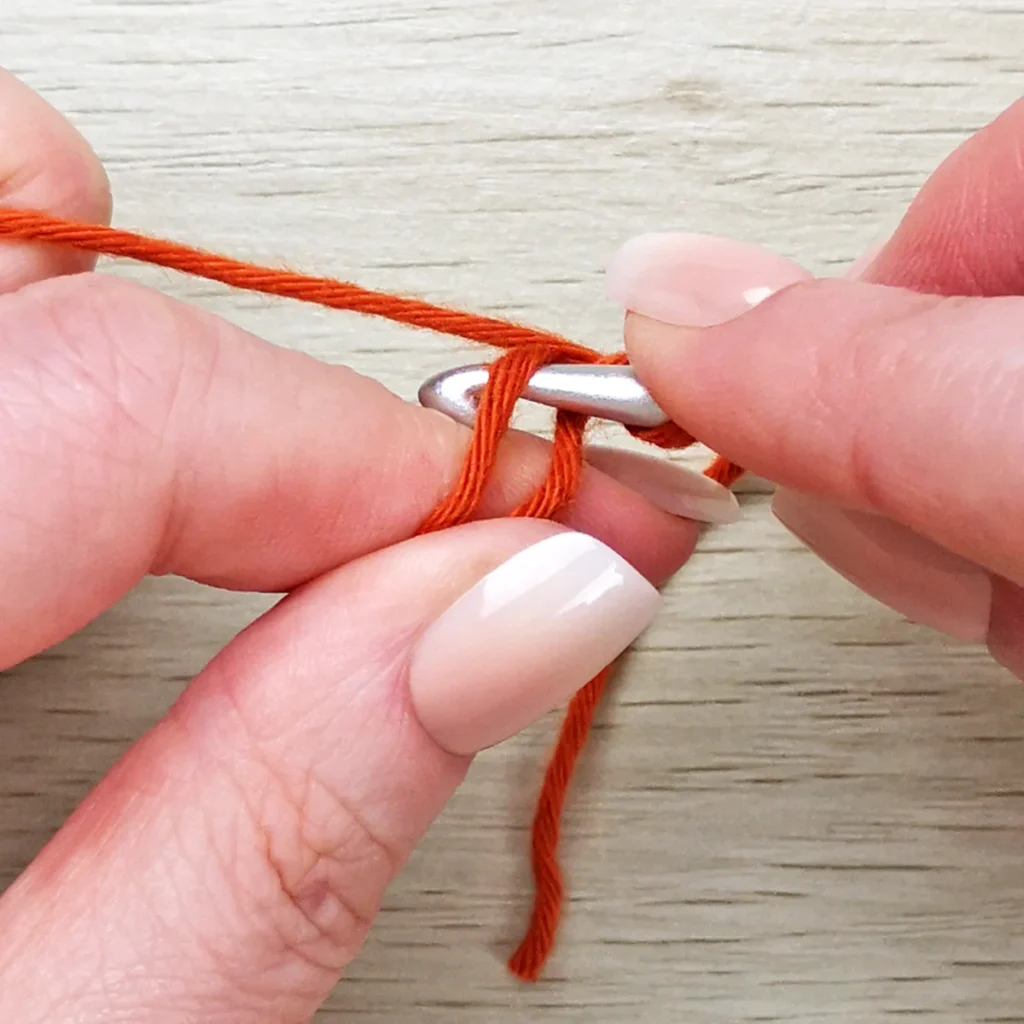
3. Pull the back strand through and rotate your hook up so you have a loop on your hook.
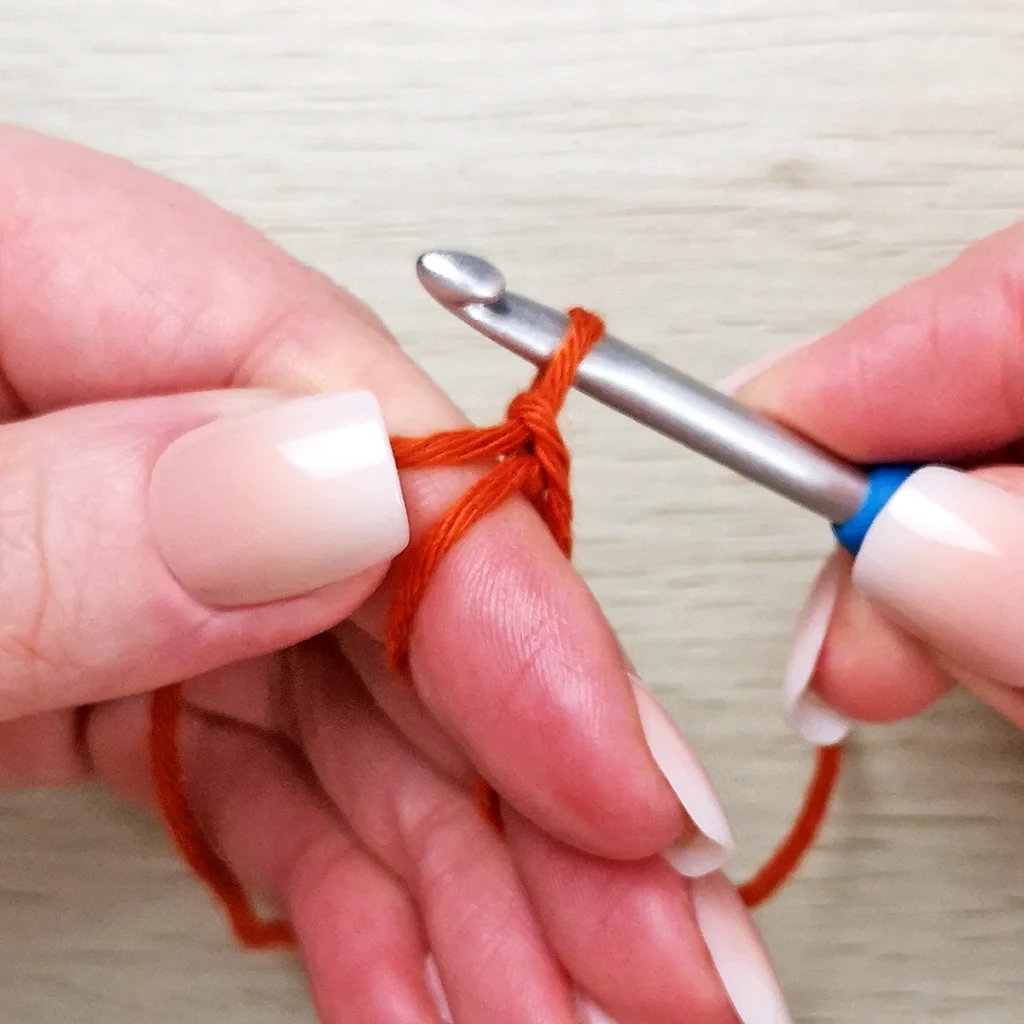
4. Insert your crochet hook under the working yarn which is still being held in place by your thumb and pull through the loop on your hook.
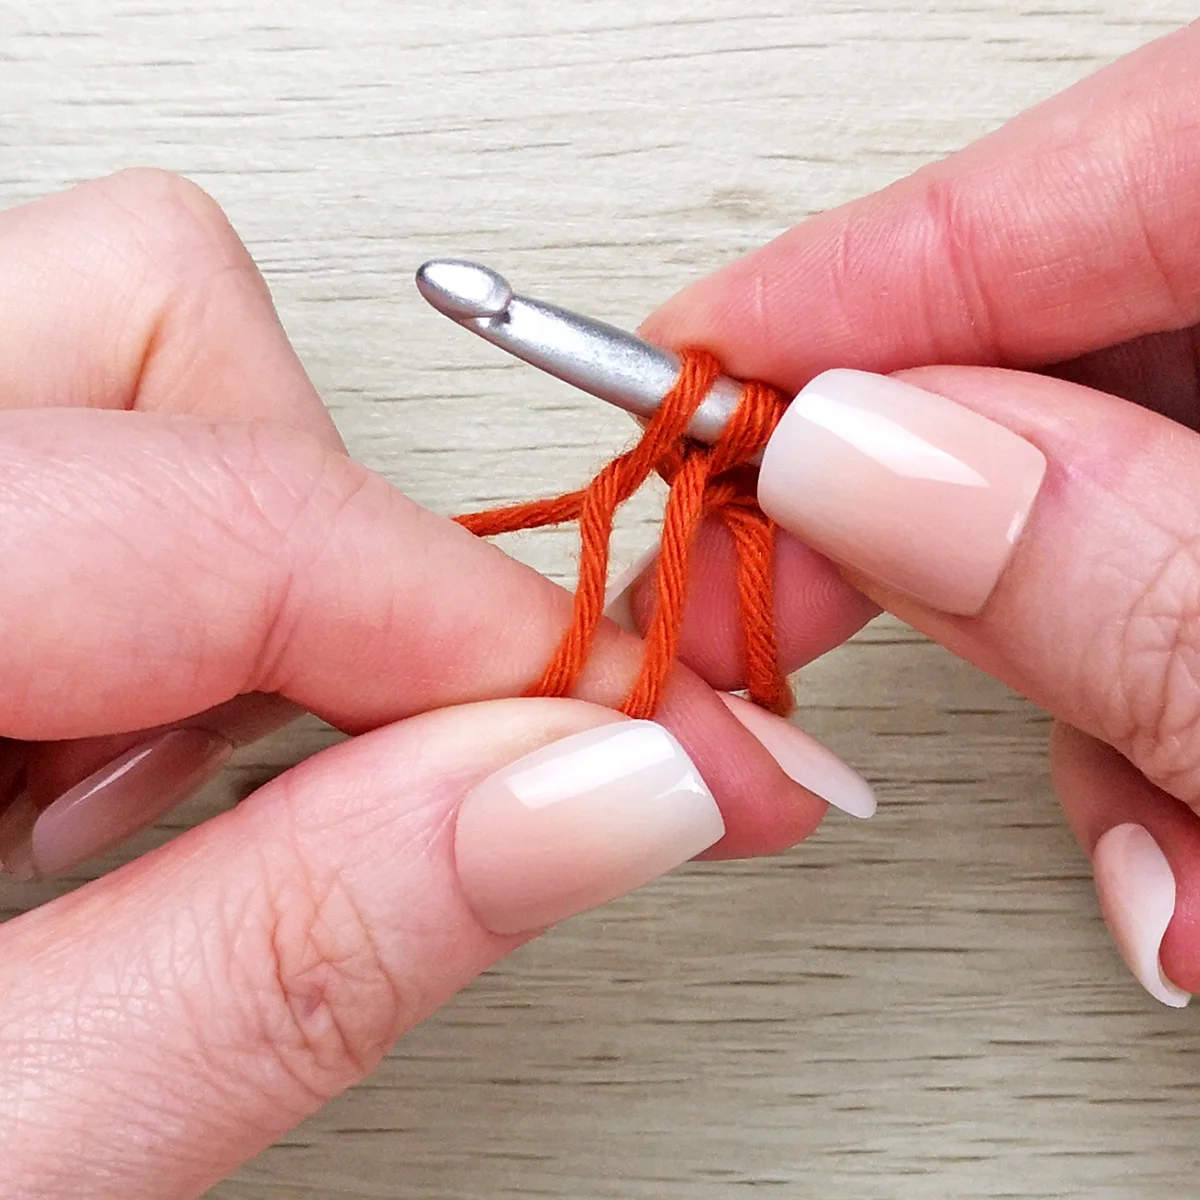
6. Carefully slide the loop off your finger making sure to hold it firmly so it doesn’t twist.
How to Crochet into the Magic Ring
In this step, we’ll work the first round of stitches into the magic ring.
Always refer to the pattern you’re using as you may need to chain first depending on the stitch being used.
In this example, we’ll make 6 single crochet into the magic ring. Leave the yarn tail loose at the back and do not crochet over it.
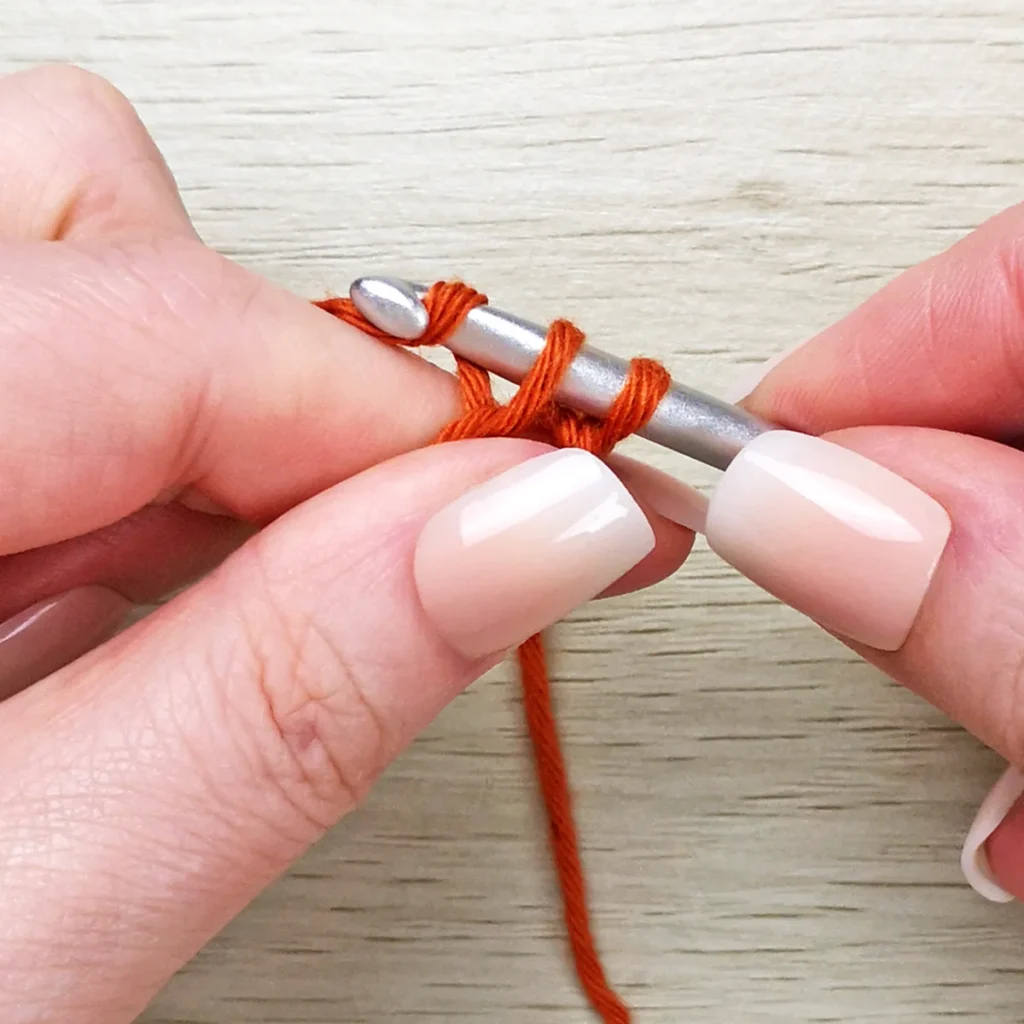
1. Insert your hook through the center of the magic ring, yarn over and pull up a loop (2 loops on hook).
2. Yarn over and pull through both loops on the hook to complete the first single crochet.
3. Repeat steps 1-2, 5 more times for a total of 6 single crochet stitches.
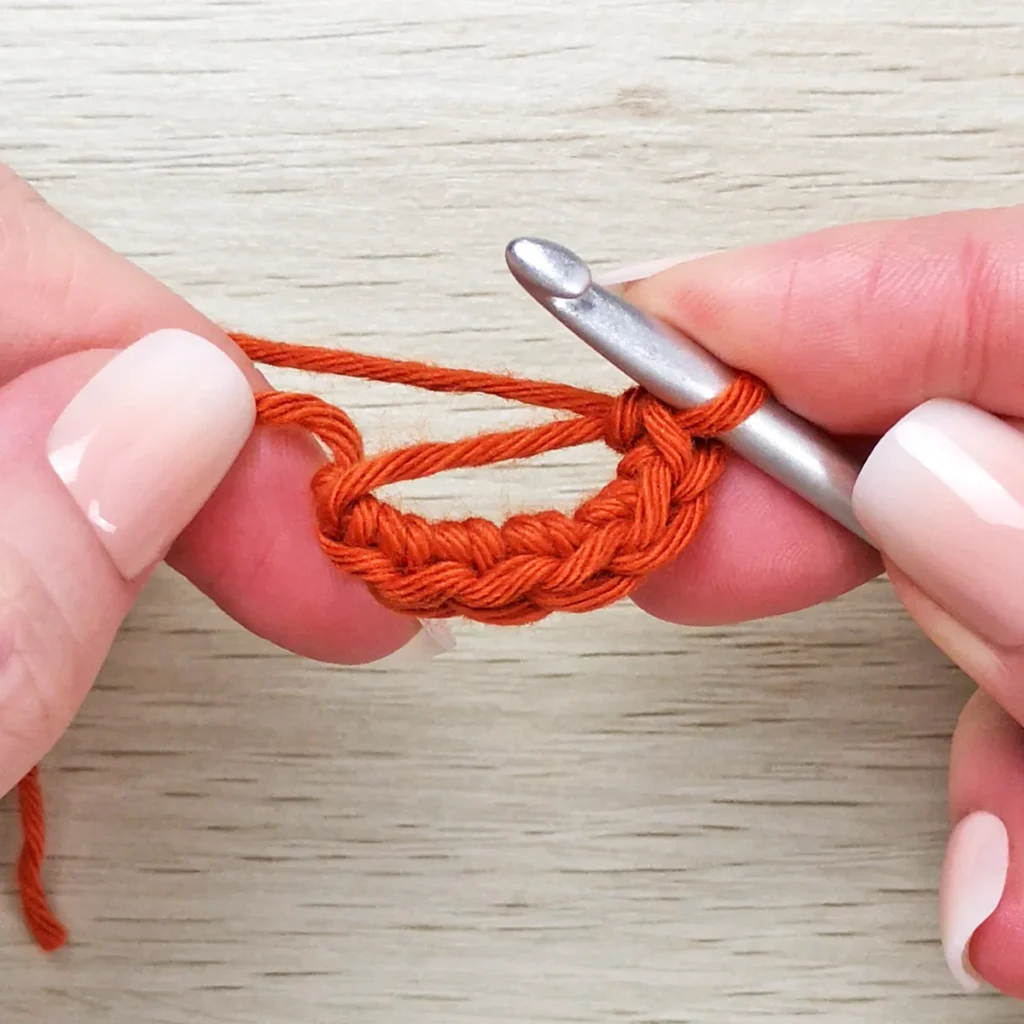
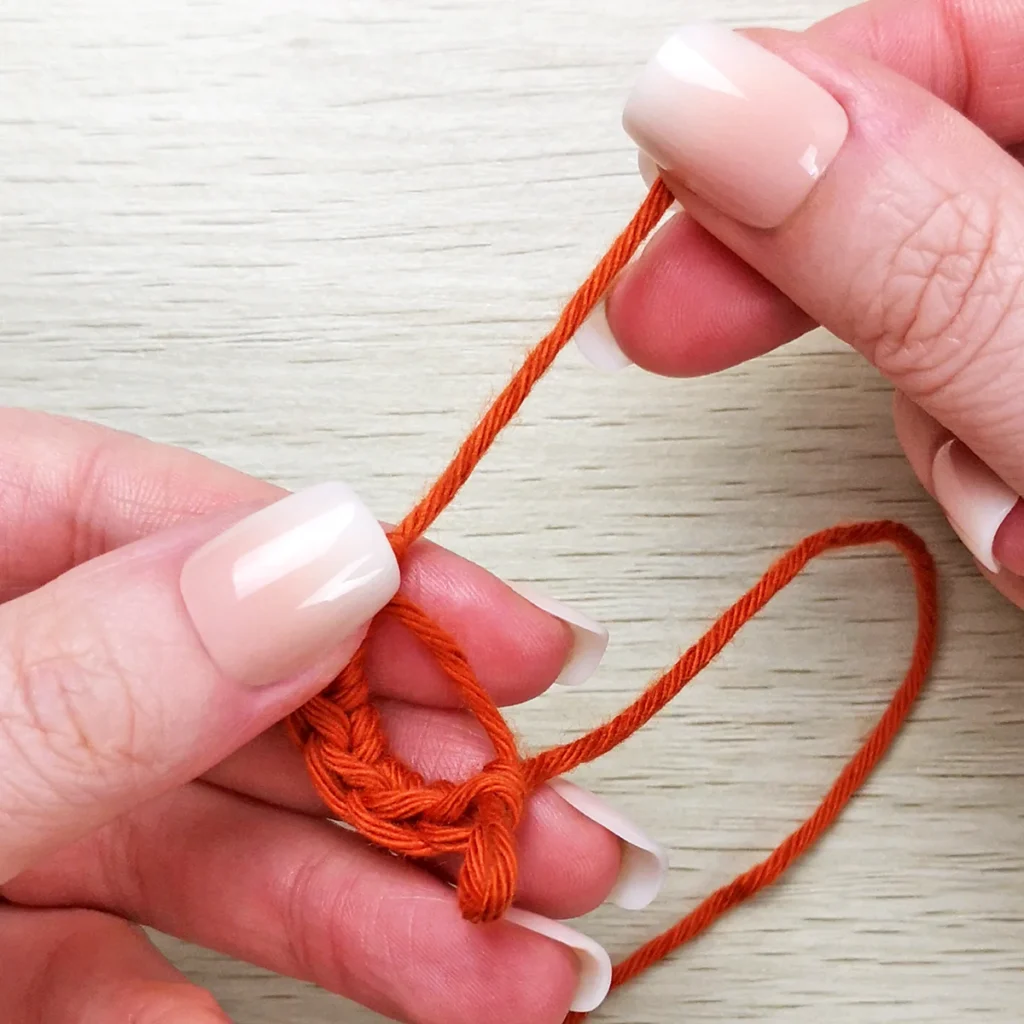
4. Drop the working yarn (I find it easiest to remove my hook first). Holding the stitches with your left hand, pick up the tail end of yarn with your right hand and gently pull on it to close the magic ring.
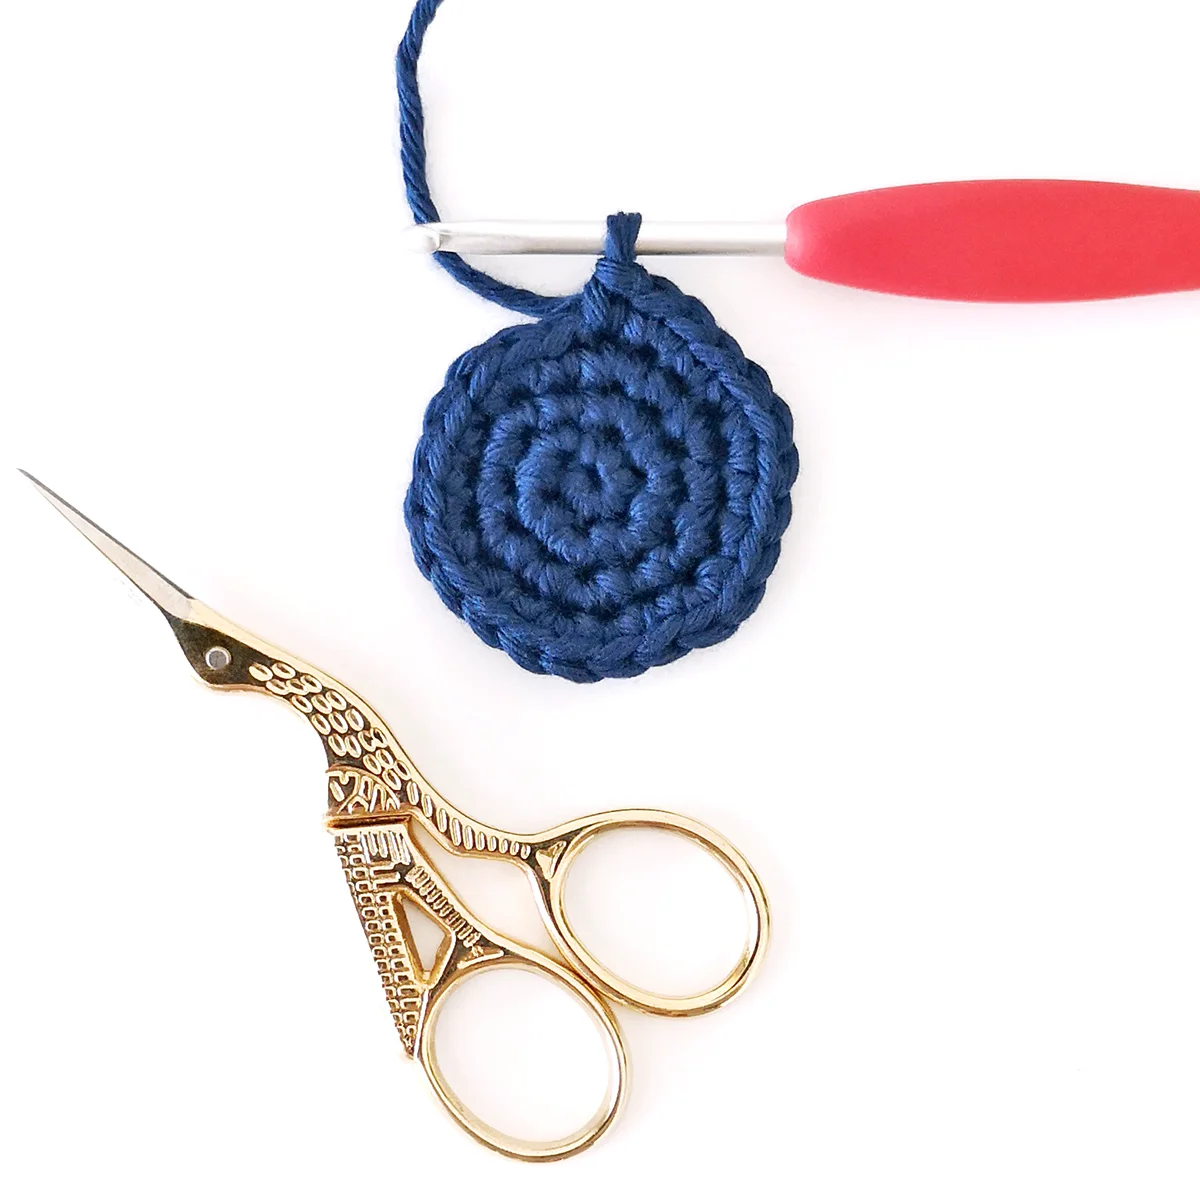
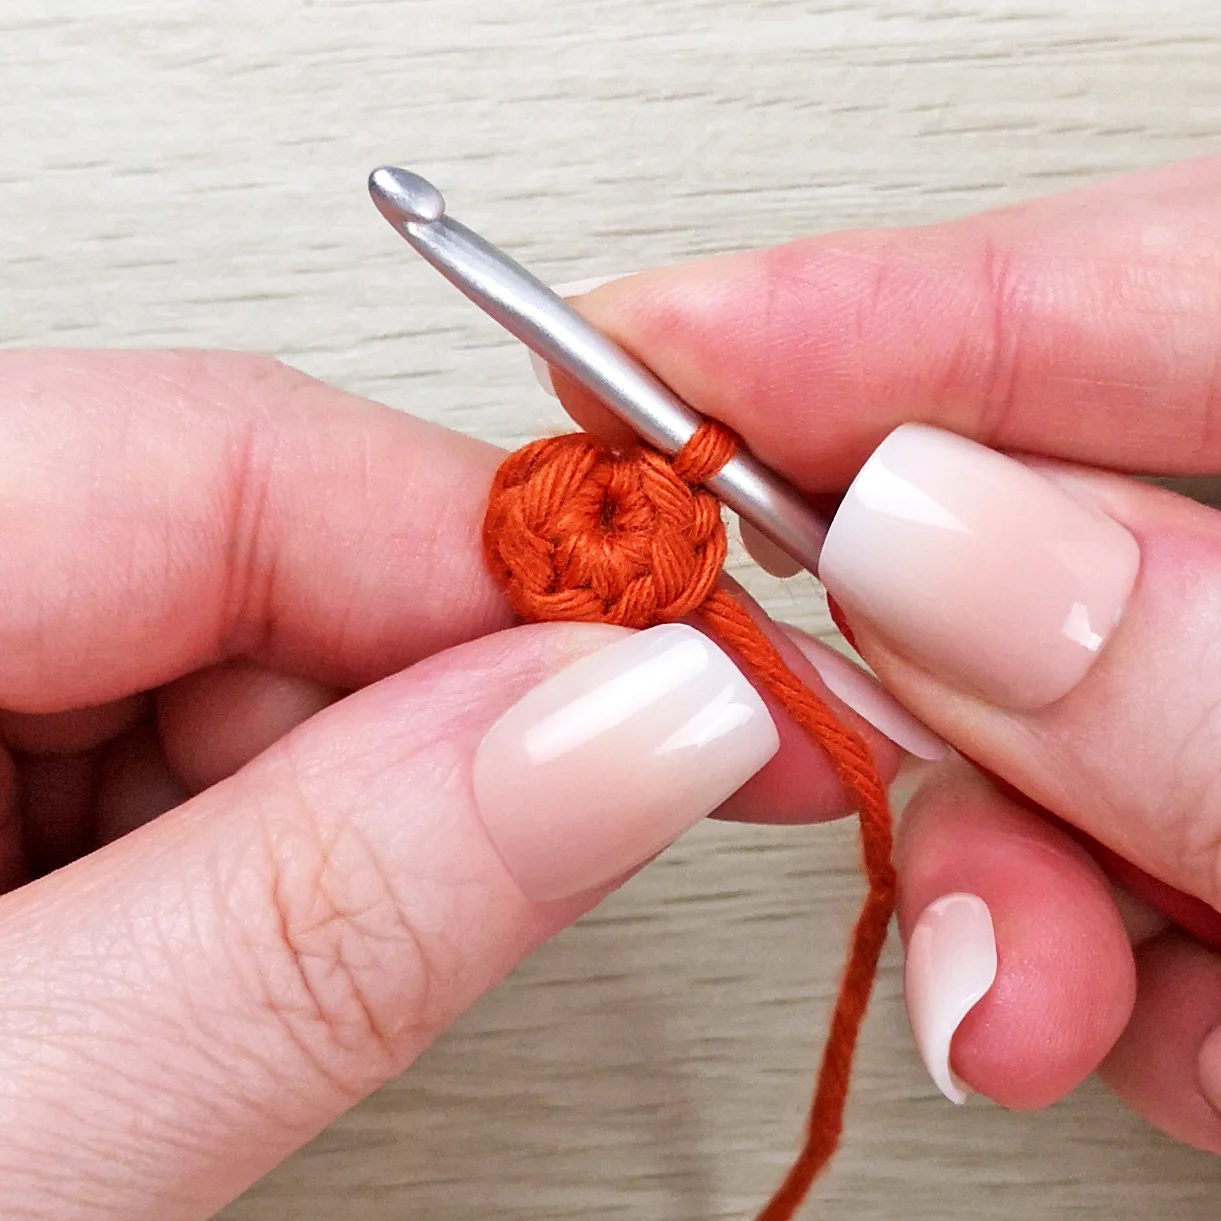
The first round is complete.
Check out the short video below to see the process in action.
The magic ring may loosen a bit in round 2 as we increase the number of stitches, but just pull on the tail again to tighten it back up and it will stay nice and closed.
tip
If it feels like your crochet stitches are twisting or it’s hard to manage, gently pull on the tail end of yarn to make the ring a bit smaller.
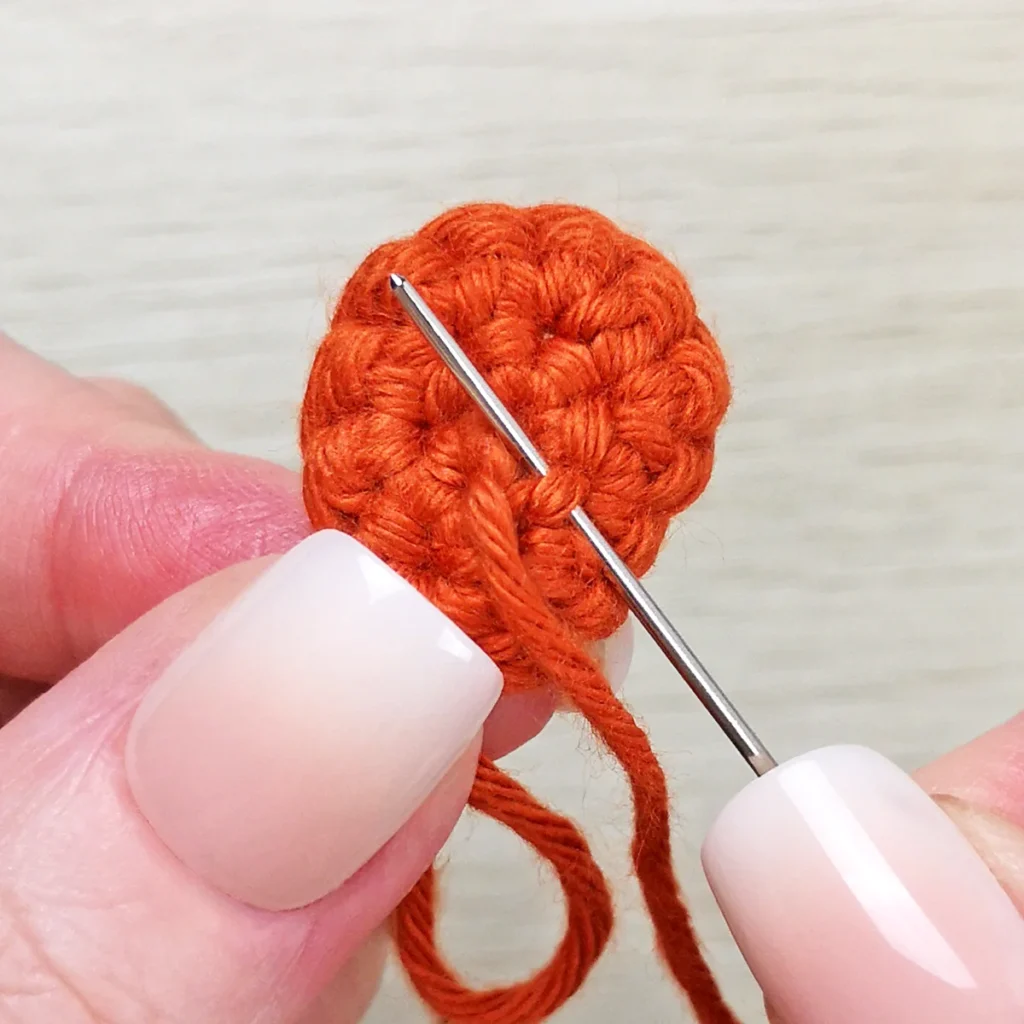
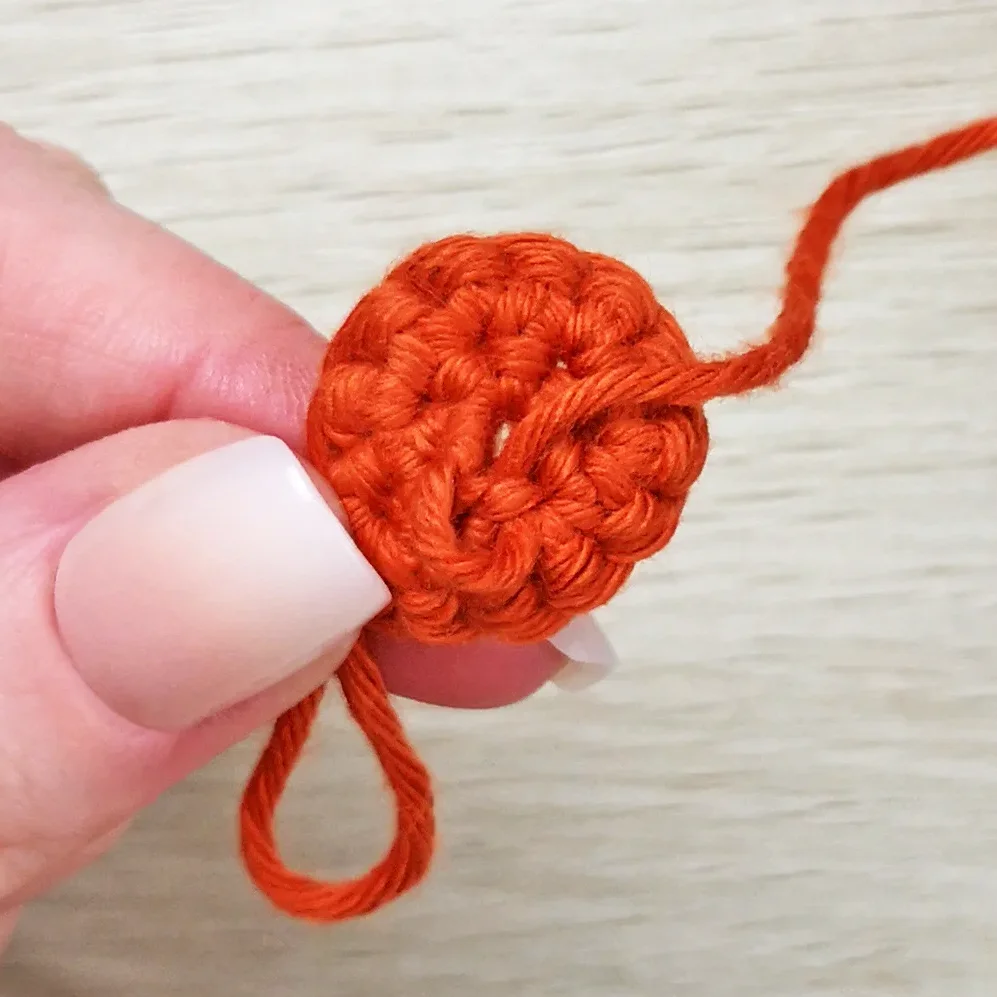
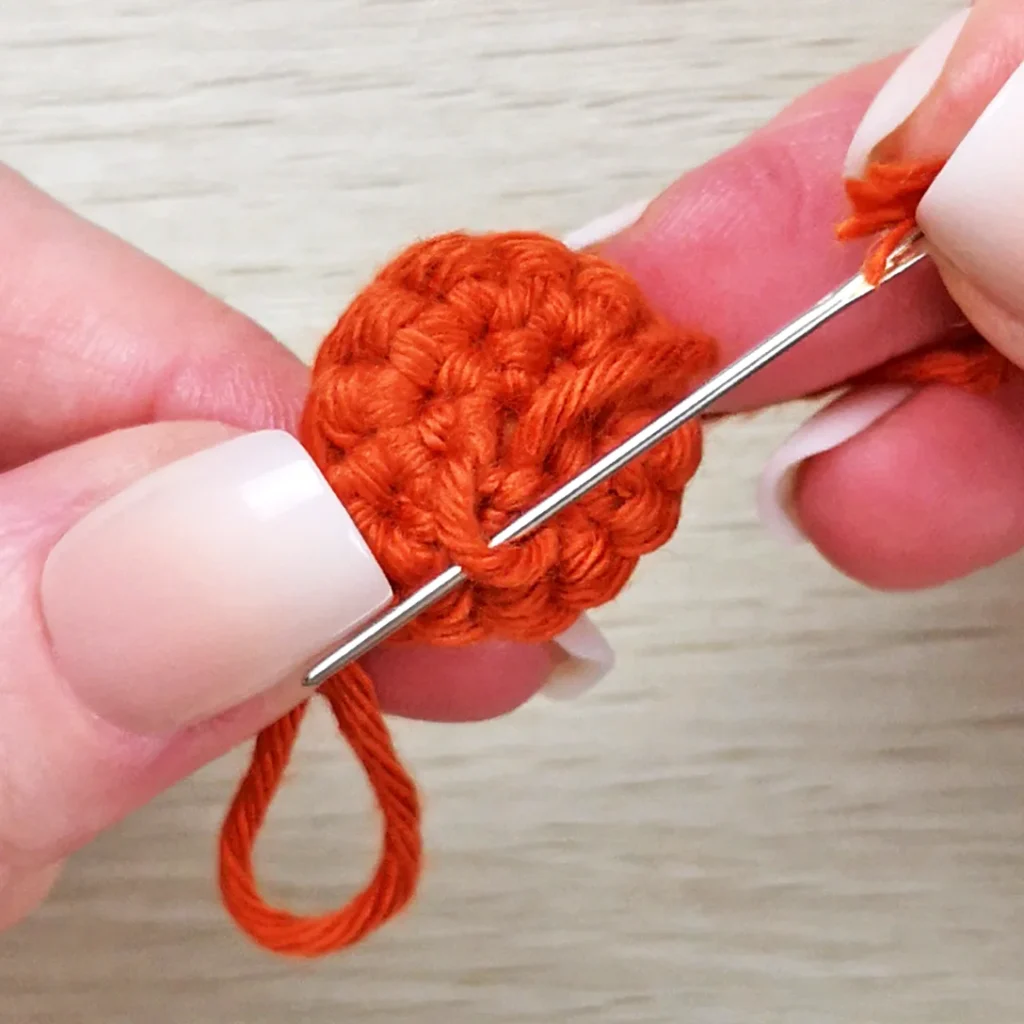
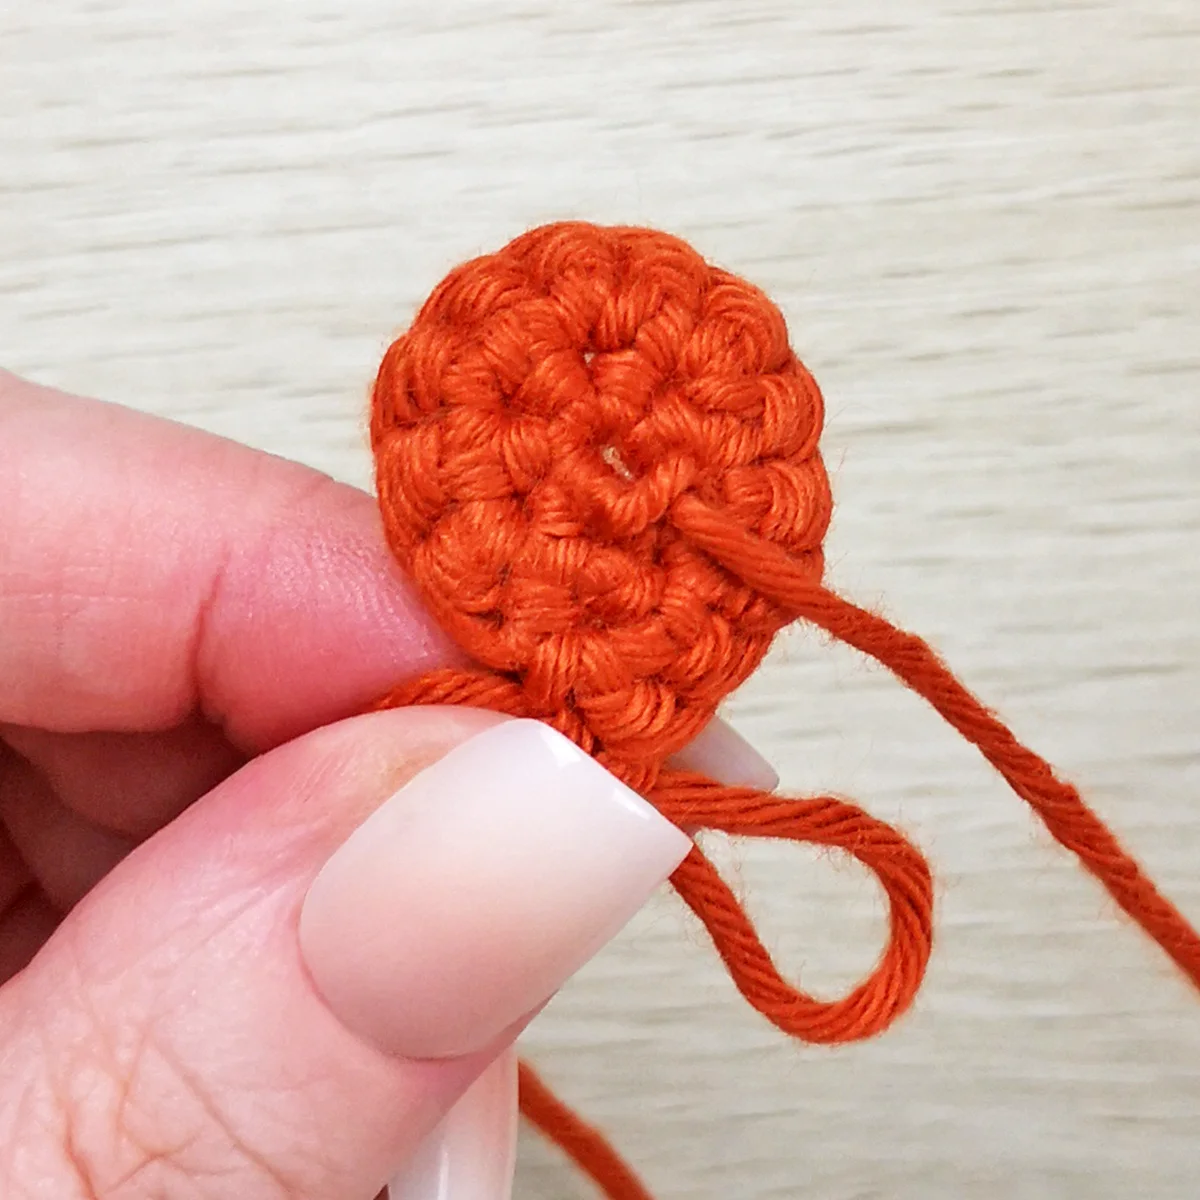
How to Secure the Magic Ring
This is an optional step and I’ve personally never had any issues with the magic ring coming undone (even when my son was young and he was anything but gentle with my creations), but if the yarn you’re using is particularly slippery or you want an added layer of protection, you can secure the magic ring with a small knot on the inside of your piece.
It’s easiest to do this after working a couple of rounds.
1. Thread the tail end of yarn onto a yarn needle. Insert the needle through the back bar of the stitch closest to where the yarn tail emerges.
2. Pull the tail through leaving a small loop on the inside of your piece.
3. Thread the needle through the small loop and pull to tighten.
More Tutorials
If you love this crochet magic ring tutorial, you might also like to check out these other tutorials:

Practice Makes Perfect
The magic ring is used in many of my crochet patterns. Check out these patterns and give it a try:
not ready to try this yet?
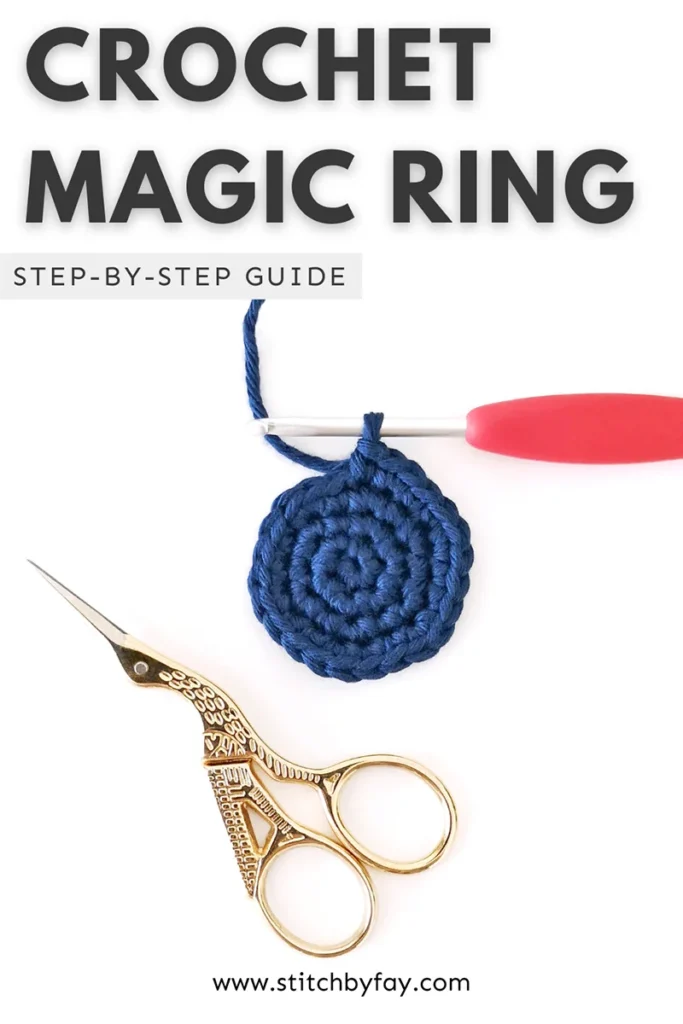
Pin this post for later
Invitation To Our Facebook Group
We hope you enjoyed this crochet tutorial. Come and hang out with me in the Stitch by Fay Community Facebook group. We created this space for you to share pictures, ask questions and support each other.

This is an original crochet tutorial written for Stitch by Fay. Please don’t claim this tutorial as your own. If you wish to share this crochet tutorial, you may link to this post but please do not reprint it on your site.