

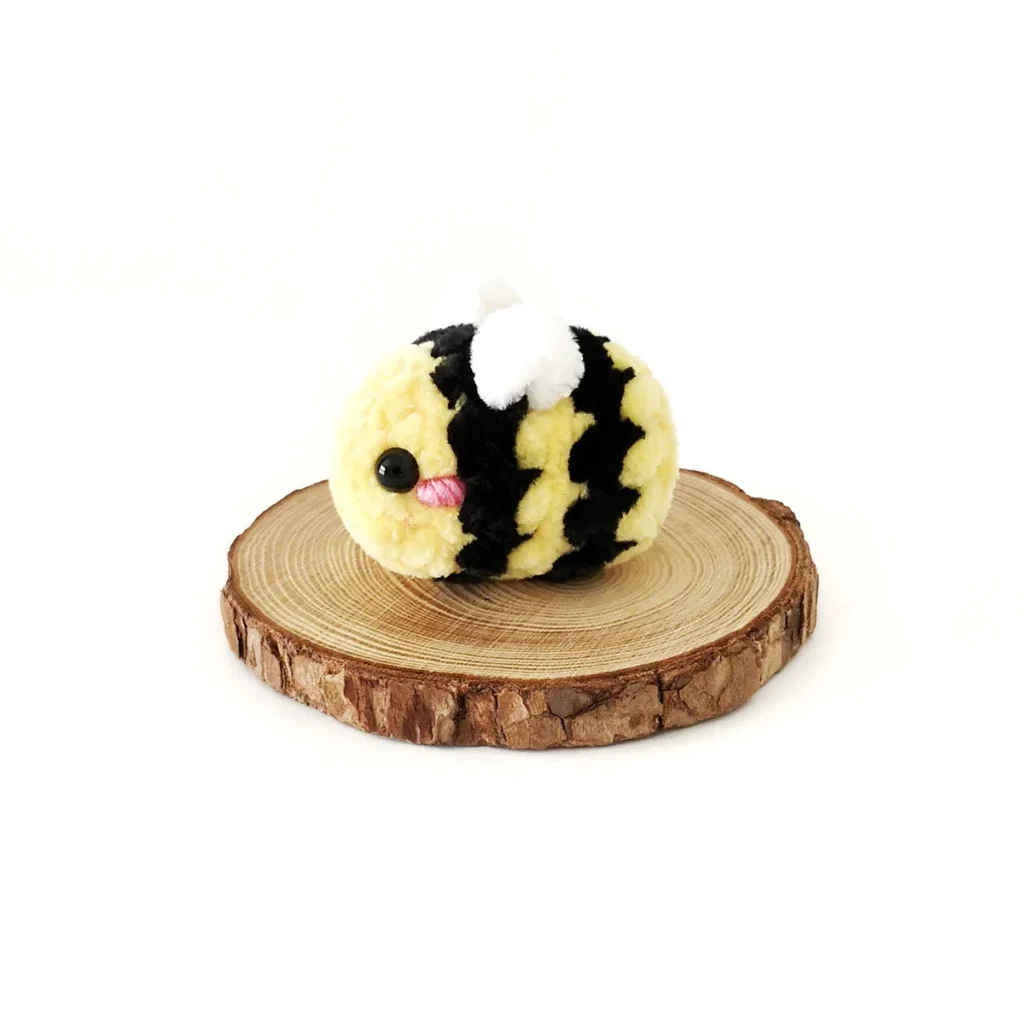
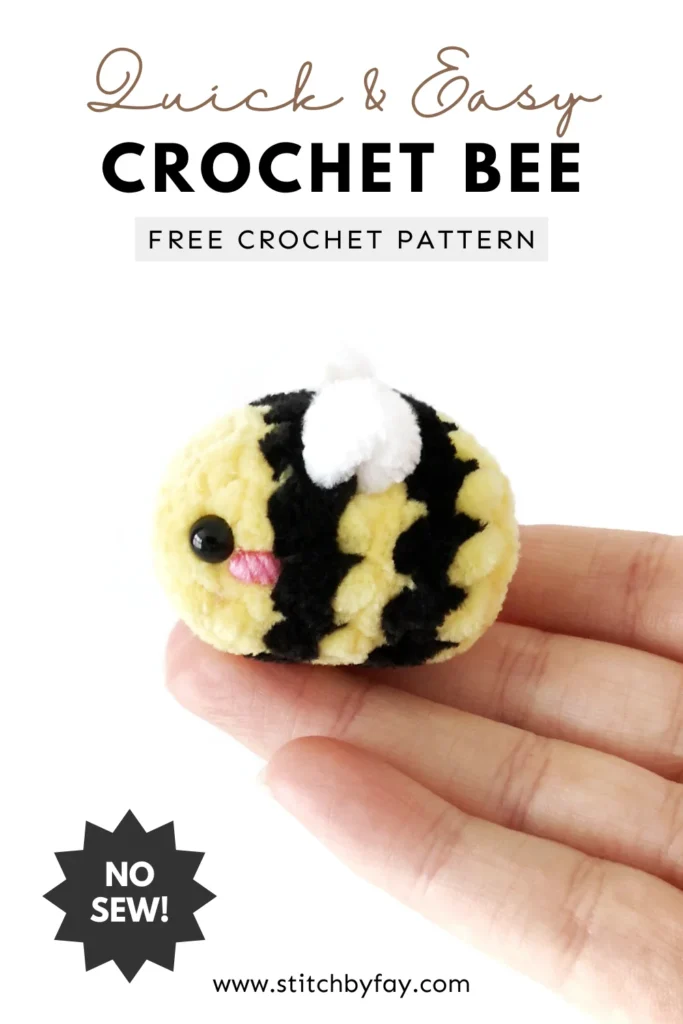
No-Sew Crochet Bee Pattern

Real bees? No thanks. Crochet bees? Yes please! There’s just something so sweet about that round fuzzy body and tiny wings.
This mini crochet bee would make a fun Valentine’s Day gift especially if you need to make a lot of them, plus there are loads of fun puns to accompany it:
- Will you bee mine?
- Bee mine Valentine
- We were meant to bee
- You’re the bee’s knees
You get the idea!
Easy Crochet Bee
The stripes are worked in the back loop only and the wings consist of chain stitches that are worked in as we go.
Wrap Knots
I love the 3D look of wrap knots and in general, find them easier to attach to small projects.
The following instructions are for a 4-wrap knot.
TIP
The more wraps you make, the bigger the knot and vice versa.
- Cut a length of yarn (approximately 6″/15cm) and cross one end over the other to make a loop.
- Pass one end of the yarn through the loop as if tying a knot.
- Repeat step 2 a further 3 times.
- Slowly pull both ends of the yarn. The loops will start to align and shrink down into a knot – avoid pulling the knot too tight.
- Use the yarn ends to secure the knot to your amigurumi.
Check out the short video below to see this process in action.
Making Them For Valentine Gifts?
If you’re making this crochet bee for Valentine’s Day, I’ve added some cute bee themed gift tags to the Stitch by Fay freebie library.
Freebie Library
Join our newsletter to gain access to exclusive freebies and keep up to date.
Already a member? Login here.
Simply pop your bee in a small cellophane bag, tie with some ribbon or twine and add your gift tag.
Looking for a Non-Plush Bee?
I’ve added this crochet bee pattern to the Stitch by Fay freebie library.

Why You’ll Love This Crochet Bee Pattern
More Patterns
If you love this crochet bee pattern, you might also like to check out these other crochet patterns:


No-Sew Crochet Bee Pattern
Materials
- Super bulky yarn in yellow, black and white (I used Premier Yarns Parfait Chunky in Sunshine, Black and White)
- Optional: A small amount of worsted weight yarn in pink (I used Paintbox Yarns Simply Aran in Bubblegum Pink)
- 4.5mm crochet hook
- 6mm safety eyes
- Polyester fiberfill
- Stitch marker, yarn needle, scissors
Abbreviations (US Terms)
- BLO – back loop only
- ch – chain
- inc – increase
- invdec – invisible decrease
- sc – single crochet
- sl st – slip stitch
- st/s – stitch/es
- […] – repeat the instructions in brackets
- (…) – indicates stitch count at end of round
Special Stitches
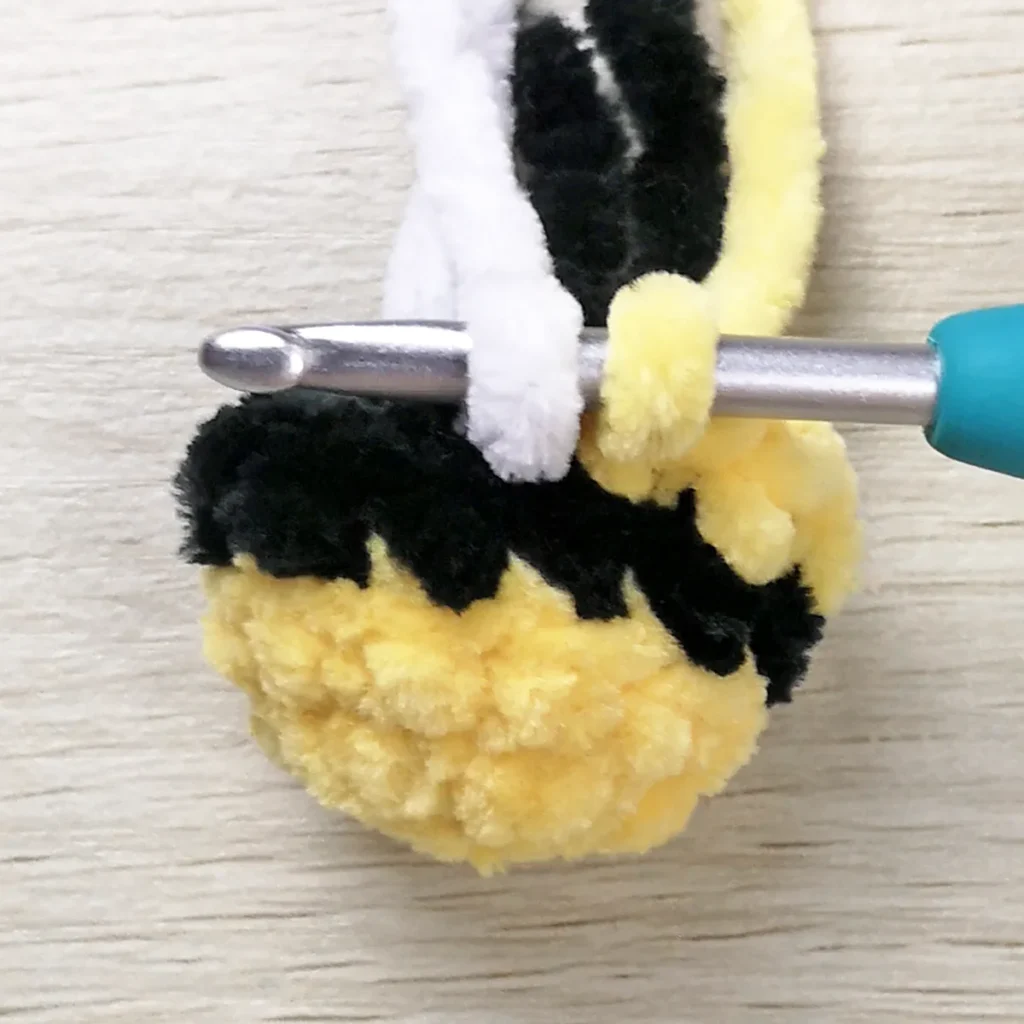
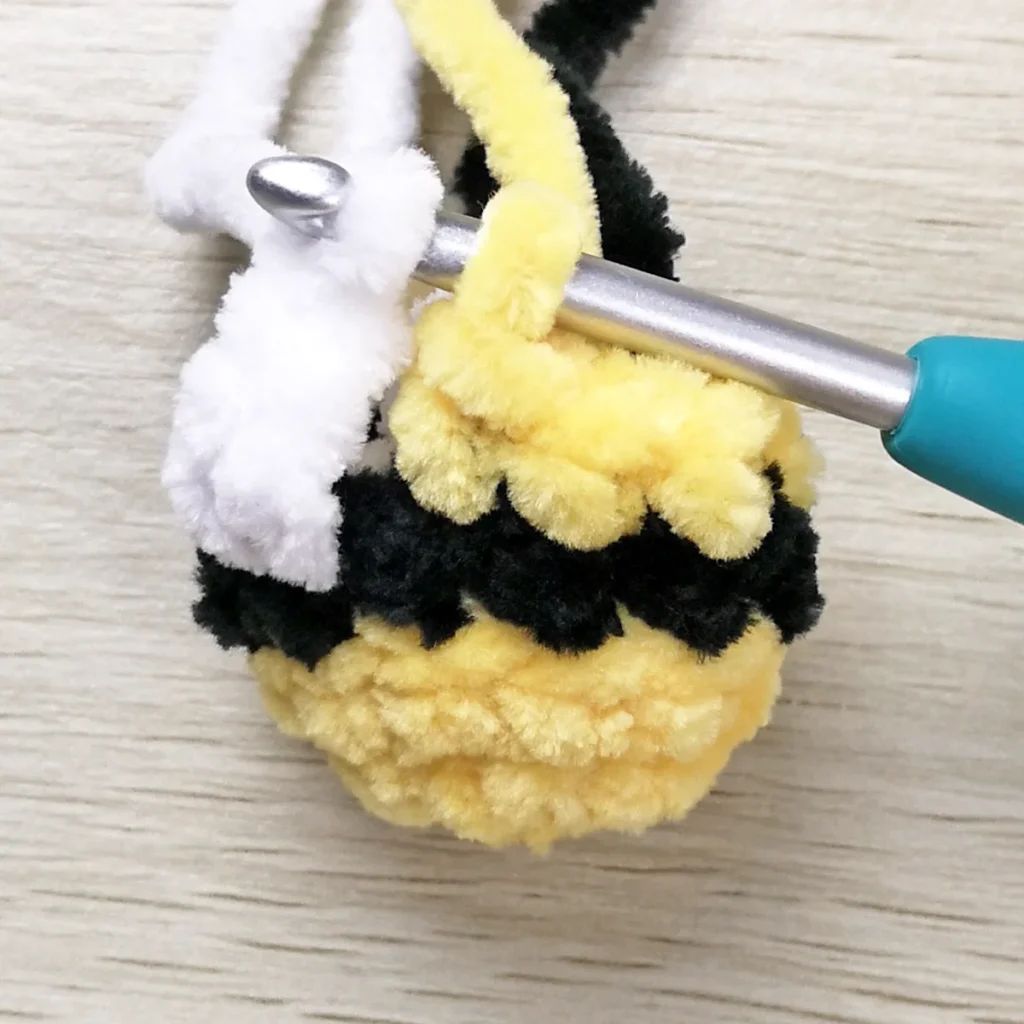
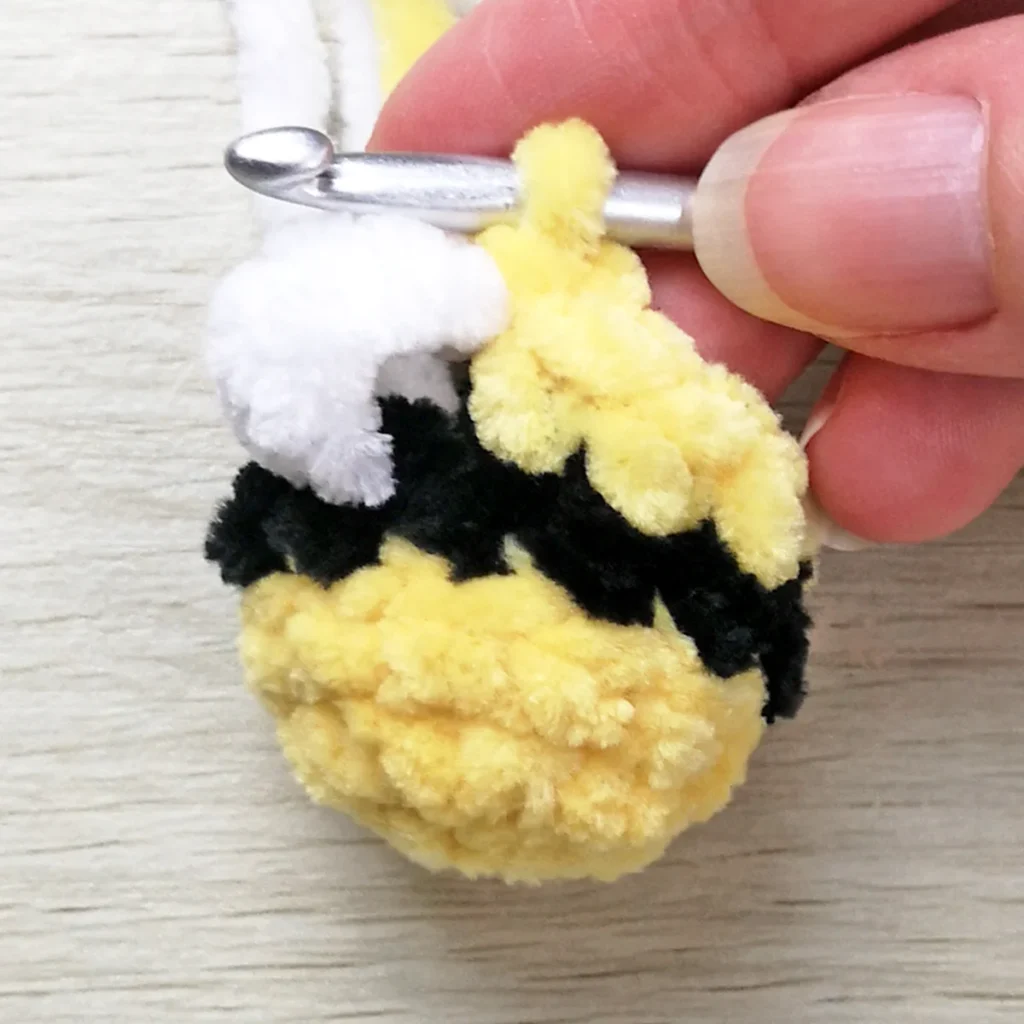
Wing
With yellow yarn on the hook, insert hook under the back loop of the next stitch. Place white yarn over the hook and draw through the back loop only.
Ch 4 with white yarn only. Yarn over with yellow yarn and pull through both loops on the hook.
Continue with the pattern as written.
Useful Links
Finished Size
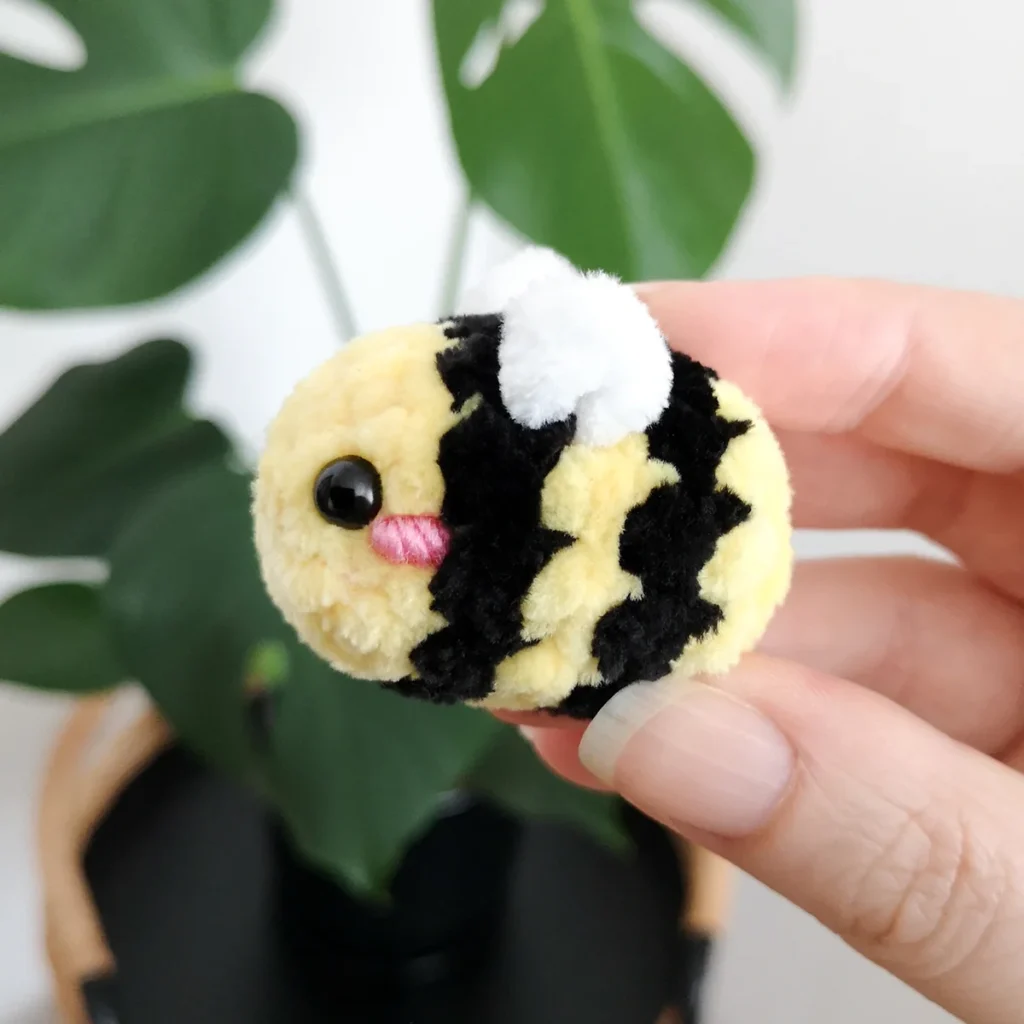
The finished bee measures approximately 2″ (5cm) long. Size may vary depending on tension and materials used.
Gauge
Gauge is not important in this pattern. Use a hook size to match your chosen yarn. Make sure that your stitches are tight enough to prevent stuffing showing through and adjust hook size if necessary.
Notes
- Pieces are worked in a continuous spiral. Mark the first stitch of each round with a removable stitch marker.
- Colour changes take place in the last yarn over of the previous colour. Do not cut the yarn, pick up each colour as needed.
- The colour change rounds are worked in the back loop only.
Pattern Instructions
Bee (starting with yellow)
R1: Ch 2, 6 sc in second ch from hook (6)
R2: [Inc] x6 (12)
R3: [Sc] x6 (12) – change colour to black in last st
R4: [BLO sc] x12 (12) – change colour to yellow in last st
In this next round we’ll be working the wings. See special stitches.
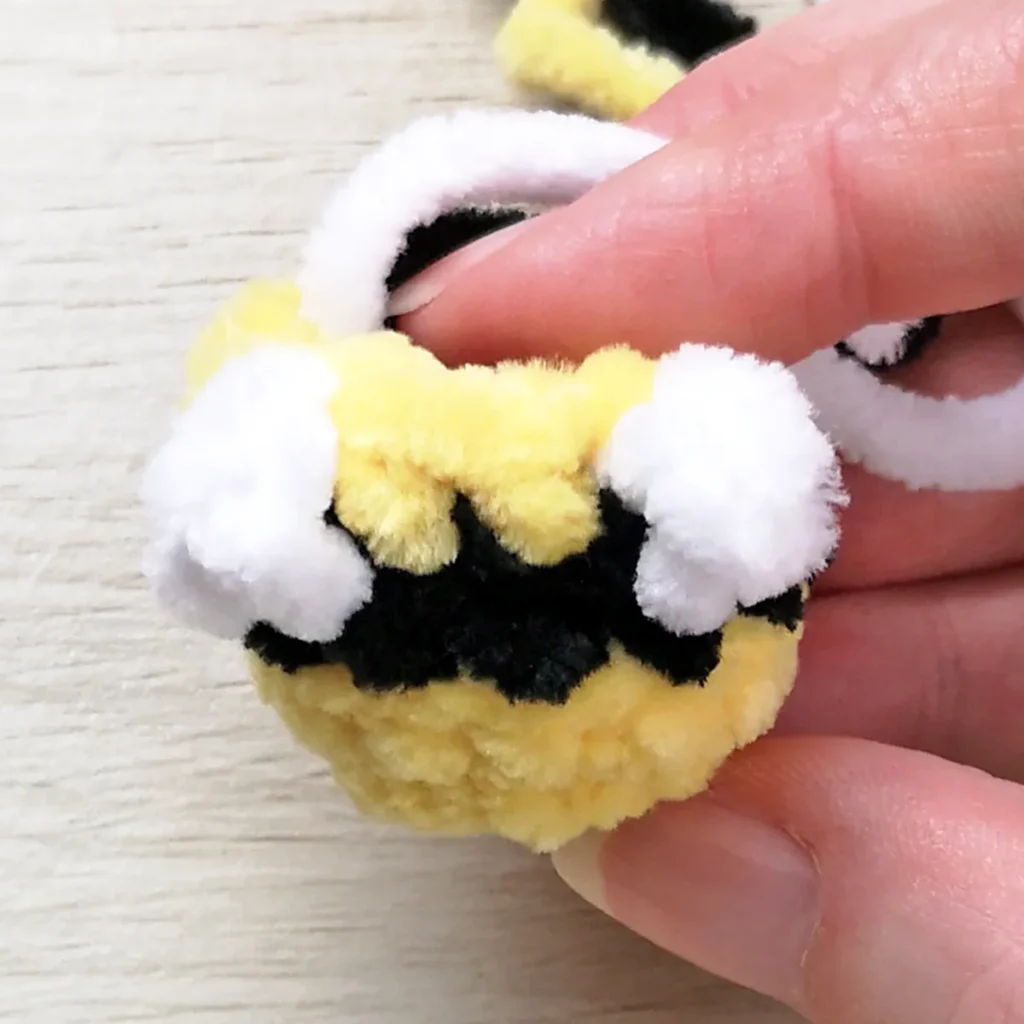
R5: [BLO sc] x4, wing, [BLO sc] x2, wing, [BLO sc] x4 (12) – change colour to black in last st
R6: [BLO sc] x12 (12) – change colour to yellow in last st
Insert safety eyes between R2 and R3, approximately 4 sts apart. Place the first eye 1 st below the level of the wing and place the second eye accordingly.
R7: [BLO sc] x12 (12)
Start stuffing and continue to stuff as you go.
R8: [Invdec] x6 (6)
Cut the yarn leaving a tail and pull through the last stitch. Weave the yarn tail through the front loops only of the final round and pull gently to close. Hide the end inside the bee.
Optional: Using pink worsted weight yarn, add cheeks just below and to the side of each eye (I used a 4-wrap knot).
not ready to make this yet?
Pin this post for later
Explore More Crochet Patterns
After you crochet this no-sew bee, here are some more crochet patterns to try:
What’s Next?
Have questions? Join the Facebook group!
We hope you enjoyed this pattern. Come and hang out with me in the Stitch by Fay Community Facebook group. We created this space for you to share pictures, ask questions and support each other.

This pattern is for personal use only and may not be copied, reproduced, altered, published or distributed in any format (including video). If you wish to share this pattern, you may link to this pattern but please do not reprint it on your site.
You can sell finished products made from this pattern in small quantities. Do NOT use our photos as your sale photos.