

Bear Crochet Pouch Pattern
One of my favourite things about crochet design is combining practical with cute. Practical doesn’t have to mean boring and this crochet pouch pattern is ticking all the boxes.

It’s the perfect size for holding your earbuds, spare hair ties and other small items – all those little bits and pieces that risk getting lost in the bottom of a bag.

How to Make a Crochet Pouch
This small crochet pouch is worked all in one piece using basic stitches. You will start by making a chain and crocheting down both sides to create a long oval which forms the base of our pouch.
Details
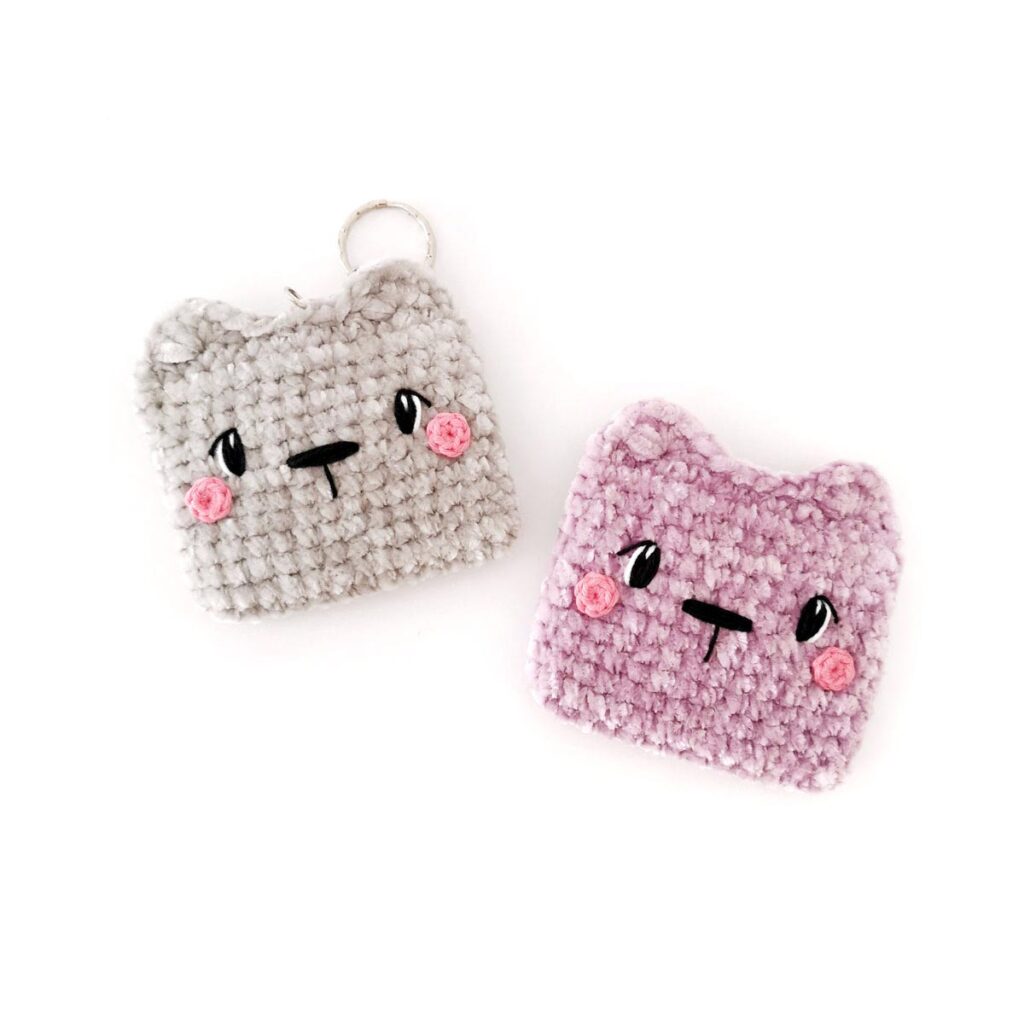
Embroidered eyes really kick up the cute factor for this pouch. If you’re new to embroidery on crochet, this would be a great piece for practicing on.
Here are my top 3 embroidery tips to get you started:
- Use a sharp needle.
- Use finer thread/yarn and build up definition through layering stitches (less is more).
- Don’t pull your stitches too tight.
This crochet pouch also features a simple button closure on the back for extra security and you have the option of adding a keychain.
Yarn Choice
I chose to use velvet yarn for my crochet pouch as I love the plush look but any #4 weight medium worsted yarn should work. However, you may need to increase your hook size to meet the gauge.

More Patterns
If you love this bear crochet pouch pattern, you might also like to check out these other bear inspired patterns:


Bear Crochet Pouch Pattern
Materials
- Lion Brand Vel-Luxe Yarn (I used the colours Silver and Lilac)
- DK weight yarn – small amount of pink (I used Paintbox Yarns Cotton DK in Bubblegum Pink)
- 5mm crochet hook
- 2.5mm crochet hook
- 4 ply yarn in black and white (or embroidery floss)
- 1.5cm button
- Optional: fabric glue or hot glue
- Optional: keychain (I used a 1″ keychain ring with a 1.25″ chain)
- Stitch marker, yarn needle, scissors
Abbreviations (US Terms)
- ch – chain
- sc – single crochet
- inc – increase
- hdc – half double crochet
- sk – skip
- sl st – slip stitch
- st/s – stitch/es
- […] – repeat the instructions in brackets
- (…) – indicates stitch count at end of round
Useful Links
Finished Size
The finished crochet pouch measures approximately 3.25″ x 3.25″ (8.5cm x 8.5cm). Size may vary depending on tension and materials used.
Gauge
Gauge = 3.5″ (9cm) long after R1
Notes
- Pieces are worked in a continuous spiral unless otherwise specified. Mark the first stitch of each round with a removable stitch marker.
LET’S GET STARTED!
Pouch (5mm hook)
R1: Ch 14, sc in second ch from hook and next 11 chs, 3 sc in last ch. Working down other side of ch – 11 sc, inc in last ch (28)
R2-9: [Sc] x28 (28) 8 rounds
R10: 17 sc, ch 10, sk 10, sc (18 sc + 10 chs)
R11: [Sc] x28 (28)
R12: 16 sc to the corner, flatten, 13 sc through both sides to close (13)
R13: Turn. Sk 2, 5 hdc in next st, sk 1, 5 sl st, sk 1, 5 hdc in next st, sk 1, sl st in last st
Fasten off and weave in end.
Cheeks (2.5mm hook, make 2, pink)
R1: 6 sc in magic ring (6)
Fasten off invisibly leaving a long tail for sewing or weave in ends if gluing.
Facial Features
Note: When adding the facial features, insert your needle through the opening in the back and be careful not to catch the back side of the pouch.
Starting with black 4 ply yarn, sew the eyes over R8 and R9, approximately 3-4 sts from each each edge and 6 sts apart.
- Begin by making 7-8 vertical stitches to create the base of the eye.
- Once you’re happy with the thickness, leaving the black yarn attached, add a white stitch to the outer edge of the eye.
- Still using white, add a stitch going from the centre of the top of the eye to about 1/3 of the way down. Cut the white yarn, knot the ends together and weave in.
- With black again, make a single stitch from the top of the eye at an angle over R9. Cut the black yarn, knot the ends together and weave in.
Repeat the above steps for the second eye.
Using black yarn, sew a nose centred between the eyes, 4 sts long. Sew over it 5-6 times or until you have your desired look.
Still using black, make a single horizontal st from the centre of the nose and 2 rounds long.

Button Closure (5mm hook)
With the back side of the pouch facing up at you and the ears pointing towards you, join yarn in approximately the centre of the top of the opening.

Note: You can adjust the number of chains here depending on the size of your button.
Ch 6, sl st back into the same space to create a loop. Make sure the loop is big enough for your button to fit through (it should be a snug fit).
Cut the yarn, knot the tails together on the inside and weave in ends.
Sew the button on inline with the loop closure between R8 and R9.
Finishing
- Sew or glue the cheeks on over R6 and R7, just to the side of each eye.
- Optional: add a keychain or hanging loop using the same method that we used for the button closure. If you’re using a keyring and chain, you can just open the jump ring and slip it through a stitch at the top or you can sew it in place using matching yarn.
not ready to make this yet?
Pin this post for later

I love seeing your creations! Feel free to send me a photo or tag me on Instagram @stitchbyfay and use the hashtag #stitchbyfaypatterns.

This pattern is for personal use only and may not be copied, reproduced, altered, published or distributed in any way. If you wish to share this pattern, you may link to this pattern but please do not reprint it on your site.
You can sell finished products made from this pattern in small quantities. Do NOT use our photos as your sale photos.