Moustache Crochet Bookmark – Gift Idea for Men
Need a quick gift? This crochet bookmark pattern is a fun project that you can whip up in a hurry.

I don’t know about you but I always find men so hard to crochet for so I wanted to create an easy pattern with a more masculine vibe.
Whether it’s a birthday, Christmas or Father’s Day, this crochet bookmark would make a lovely gift. Pair it with a book for easy gifting.

Why Make a Crochet Bookmark?
Crochet bookmarks make a great project. They’re quick, practical and great for practicing new skills or stitches.
What Type of Yarn is Best for Crochet Bookmarks?
You want to use a relatively thin yarn like Fingering, Sport or DK weight. Thicker yarns will create a bulky bookmark which may risk damaging your book.
Fiber isn’t important. My personal preference is cotton as it’s a bit more sturdy and I love the stitch definition.
About the Pattern
This crochet bookmark is worked in tapestry crochet which is a type of colourwork used to create shapes, patterns or motifs in your finished piece.
We’ll be using two colours and working in flat rows without turning. This means that we’ll always be working on the right side of our work and we’ll be fastening off and cutting the yarn at the end of each row.
That does leave us with a lot of ends but that’s what creates the cute fringe.

More Patterns
If you love this crochet bookmark pattern, you might also like to check out these other colourwork patterns:
Moustache Crochet Bookmark Pattern
Materials
- Fingering weight yarn in 2 colours – main colour and contrasting colour (I used Hobbii Friends Cotton 8/4 in Lemon (23) and Charcoal (123))
- 3mm crochet hook
- Scissors
Abbreviations (US Terms)
- ch – chain
- sc – single crochet
Special Stitches
Standing single crochet: Start with a slip knot on your hook. Insert hook in stitch indicated by pattern. Yarn over and pull up a loop, yarn over and pull through both loops on hook.
Finished Size
The finished crochet bookmark measures approximately 5.5″ (14cm) long x 1.75″ (4.5cm) wide not including the fringe. Size may vary depending on tension and materials used.
Gauge
Gauge is not important in this pattern.
Notes
- You will be working off a crochet chart.
- Row 1 is worked in the back bump only of the starting chain.
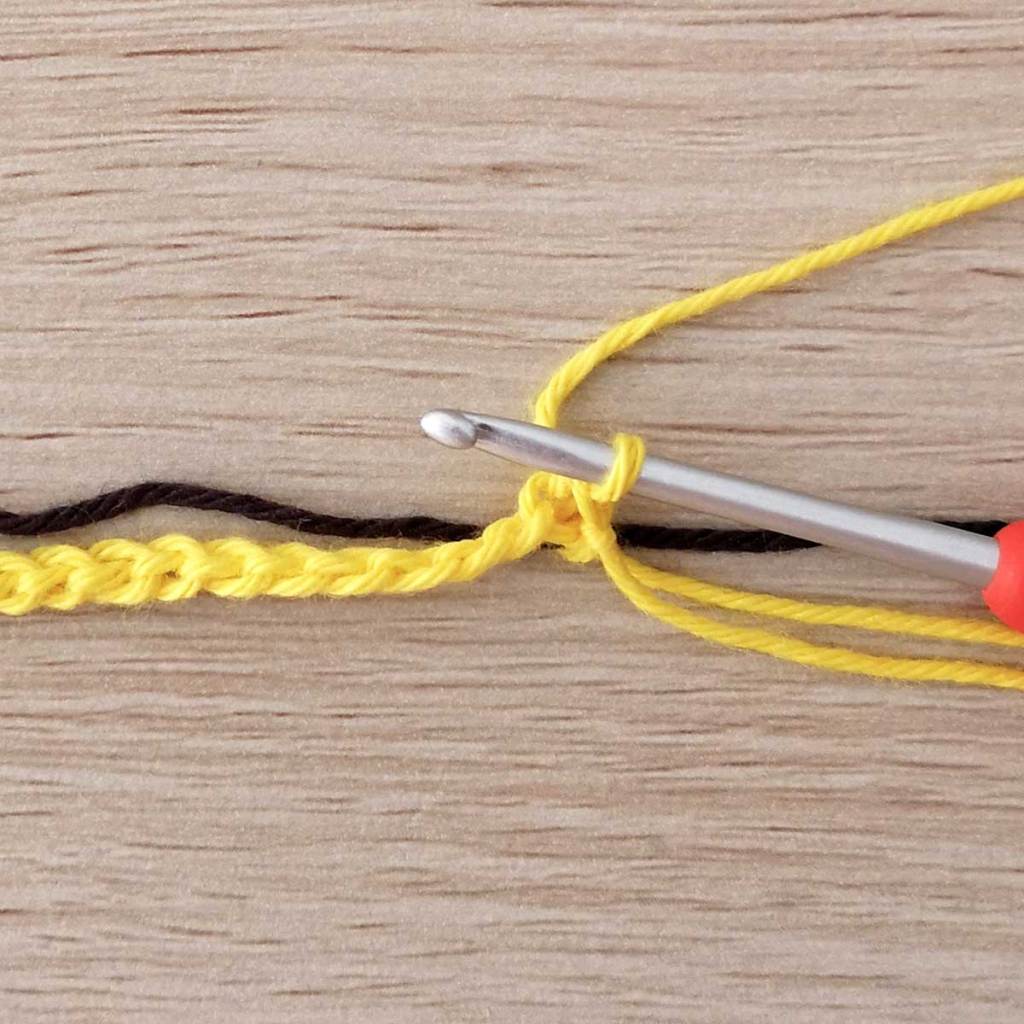
- The entire pattern is worked in rows of single crochet in the back loop only minus the first and last st of each row which is worked in both loops. You will be crocheting over the unused colour throughout the pattern including rows that do not require colour changes.
- You will cut your yarn at the end of each row and reattach at the beginning of the row with a standing single crochet in the first stitch of the row.
- When starting and fastening off each row, make sure to leave tails of approximately 3″ for the fringe.
- Change colour by drawing the new colour through the last yarn over of the stitch before the new colour is needed.
- Blocking is recommended.
Identifying the Back Bump of the Chain
If you look at the front of your starting chain you will see the front loop and back loop of your chain stitches. Flip your chain over so you’re looking at the back. You will see a line of stitches running down the center, these are the back bumps of each chain.


LET’S GET STARTED!
Bookmark (starting with main colour)
Ch 42, fasten off. Tighten the last ch down to a knot.
Join main colour with a standing single crochet in the back bump of the first chain on the right – this is the first stitch of row 1 of the chart. Work the remainder of row 1 in the back bumps only (remember to carry the contrasting colour behind your stitches).


How to Read the Chart
The chart is worked from the bottom up and reads from right to left.
Each square equals one stitch and it’s colour.

Blocking
Blocking is definitely recommended for this project to fix any curling and remove kinks from the fringe.
Materials required for blocking:
- Blocking mat
- Rust proof pins
- Spray bottle filled with water
- Ruler
Pin your crochet bookmark to the blocking mat in an even rectangle. The use of a ruler can be helpful here.
Spray with water until damp and leave to air dry completely.
Finishing
- Trim the ends down to approximately 1.5″ long. You can use scissors and just eyeball it or a rotary cutter and ruler for more precise cutting.
not ready to make this yet?
Pin this post for later
I love seeing your creations! Feel free to send me a photo or tag me on Instagram @stitchbyfay.

This pattern is for personal use only and may not be copied, reproduced, altered, published or distributed in any way. If you wish to share this pattern, you may link to this pattern but please do not reprint it on your site.
You can sell finished products made from this pattern in small quantities. Do NOT use our photos as your sale photos.


