

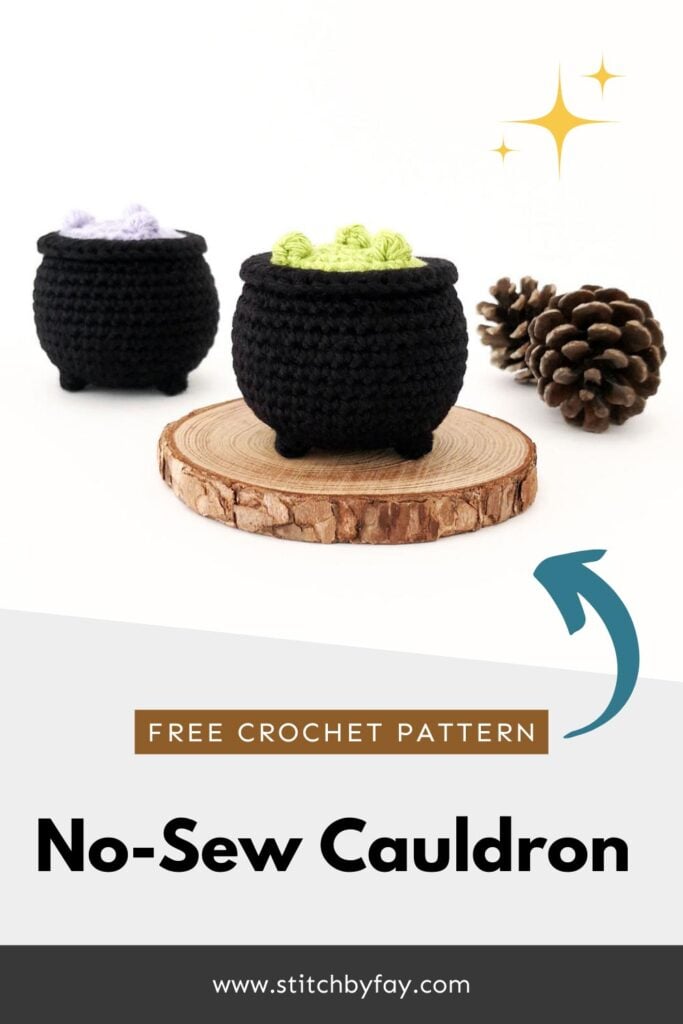
No-Sew Mini Crochet Cauldron Pattern
Brew up some crochet magic with this quick and easy crochet cauldron pattern.

I love crocheting minis for Halloween and this crochet cauldron ticks all the boxes – it’s quick, easy, no-sew and super cute!
The little bobble stitch feet are worked into the body of the cauldron and the optional bubbles are added at the end by crocheting onto the top of the piece.

How to Use this Crochet Cauldron
- Use as a candy alternative at Halloween.
- Add a keychain for a quick gift.
- Crochet only the cauldron part and it makes a cute mini basket – use it to store small jewelry items, hair ties or loose change.
- Add a hanging loop and turn it into a car hanger.
- String them together with some other minis for a fun garland.
- Use super bulky yarn and add a face to make a huggable Halloween plushie.

More Patterns
If you love this crochet cauldron pattern, you might also like to check out these other Halloween patterns:


Mini Crochet Cauldron Pattern
Prefer the PDF version?
where to buy
The ad-free PDF includes detailed instructions and photos as well as easy print pages.
Materials
- DK weight yarn in black and potion brew colour (I used Paintbox Yarns Cotton DK in Pure Black and Lime Green/Pale Lilac)
- 2.5mm crochet hook
- Polyester fiberfill
- Stitch marker, yarn needle, scissors
Abbreviations (US Terms)
- ch – chain
- sc – single crochet
- inc – increase
- invdec – invisible decrease
- bo – bobble stitch
- FLO – front loop only
- hdc – half double crochet
- hdc-inc – half double crochet increase
- 3dctog – 3 double crochet together
- sl st – slip stitch
- st/s – stitch/es
- […] – repeat the instructions in brackets
- (…) – indicates stitch count at end of round
Special Stitches
Bobble stitch (bo): [Yarn over and insert hook in indicated stitch. Yarn over and pull up a loop, yarn over and pull through 2 loops on hook] x4, yarn over and pull through all 5 loops on hook. Push bobble to right side of fabric.
3 double crochet together (3dctog): [Yarn over and insert hook in indicated stitch. Yarn over and pull up a loop, yarn over and pull through 2 loops on hook] x3, yarn over and pull through all 4 loops on hook.
Useful Links
Finished Size
The finished crochet cauldron measures approximately 1.75″ (4.5cm) tall. Size may vary depending on tension and materials used.
Gauge
Gauge is not important in this pattern. Use a hook size to match your chosen yarn. Make sure that your stitches are tight enough to prevent stuffing showing through and adjust hook size if necessary.
Notes
- Pieces are worked in a continuous spiral starting with a magic ring unless otherwise specified. Mark the first stitch of each round with a removable stitch marker.
LET’S GET STARTED!
Cauldron (black)
R1: 6 sc in magic ring (6)
R2: [Inc] x6 (12)
R3: [Sc, inc] x6 (18)
R4: Sc, inc, [2 sc, inc] x5, sc (24)
R5: Sc, inc, 3 sc, inc, sc, bo, sc, inc, 3 sc, inc, sc, bo, sc, inc, 3 sc, inc, sc, bo (30)
R6: 2 sc, inc, [4 sc, inc] x5, 2 sc (36)
R7: [5 sc, inc] x6 (42)
R8-14: [Sc] x42 (42) 7 rounds
R15: [5 sc, invdec] x6 (36)
R16: 2 sc, invdec, [4 sc, invdec] x5, 2 sc (30)
R17: FLO 2 hdc, hdc-inc, [4 hdc, hdc-inc] x5, 2 hdc (36)
Sc in next st, fasten off invisibly and weave in ends.
Fold the last round of the cauldron down so that the leftover back loops are exposed.
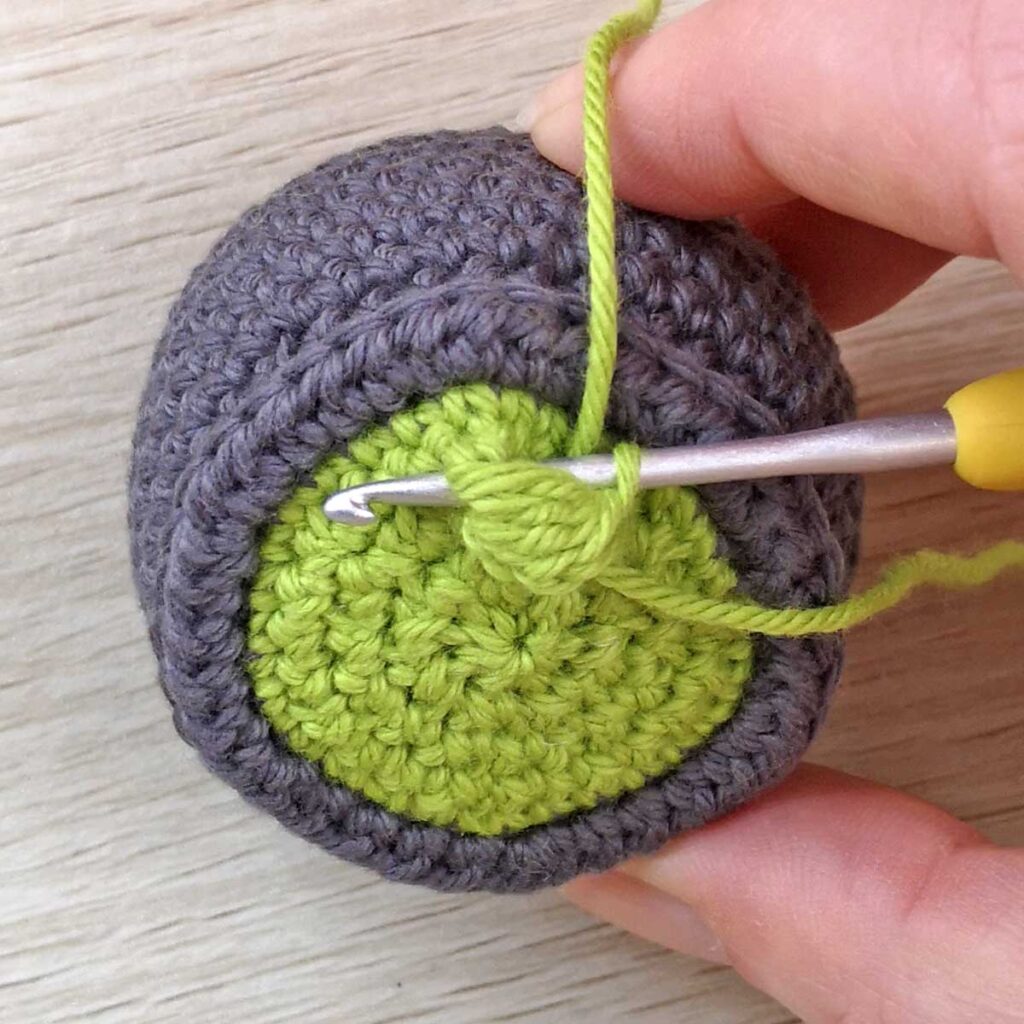
Potion Brew
Join yarn in first leftover back loop from R17 of the cauldron.
R1: Ch 1, sc in same space and in each back loop around (30)
R2: [3 sc, invdec] x6 (24)
Start stuffing and continue to stuff as you go.
R3: [Sc, invdec] x8 (16)
R4: [Invdec] x8 (8)
Cut the yarn leaving a tail and pull through last st. Weave the yarn tail through the front loops only of the final round and pull to close. Hide the end inside the cauldron.
Bubbles (optional)
Insert hook in any stitch of the potion brew and pull up a loop of yarn in the same colour.
Ch 2, 3dctog in same st. Sl st from back to front through the same stitch.
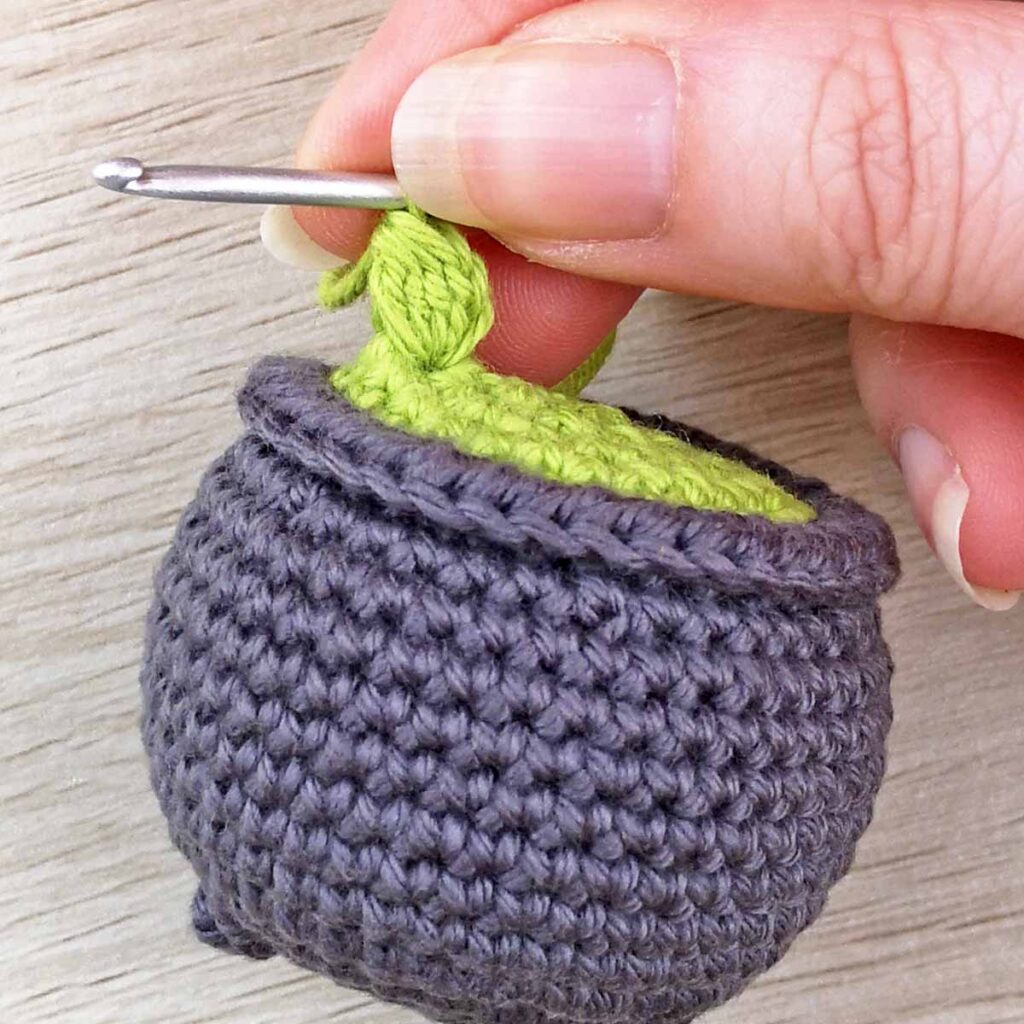
Fasten off by cutting the yarn and pulling the tail through the last st.
Weave in ends by taking the ending tail through the same st as the 3dctog and out through the body of the cauldron and the starting tail through a st underneath the bubble.
Repeat as many times as you like, placing them randomly. I chose to make 3 bubbles.
not ready to make this yet?
Pin this post for later
I love seeing your creations! Feel free to send me a photo or tag me on Instagram @stitchbyfay.

This pattern is for personal use only and may not be copied, reproduced, altered, published or distributed in any way. If you wish to share this pattern, you may link to this pattern but please do not reprint it on your site.
You can sell finished products made from this pattern in small quantities. Do NOT use our photos as your sale photos.