

Crochet Halloween Basket Trio Pattern
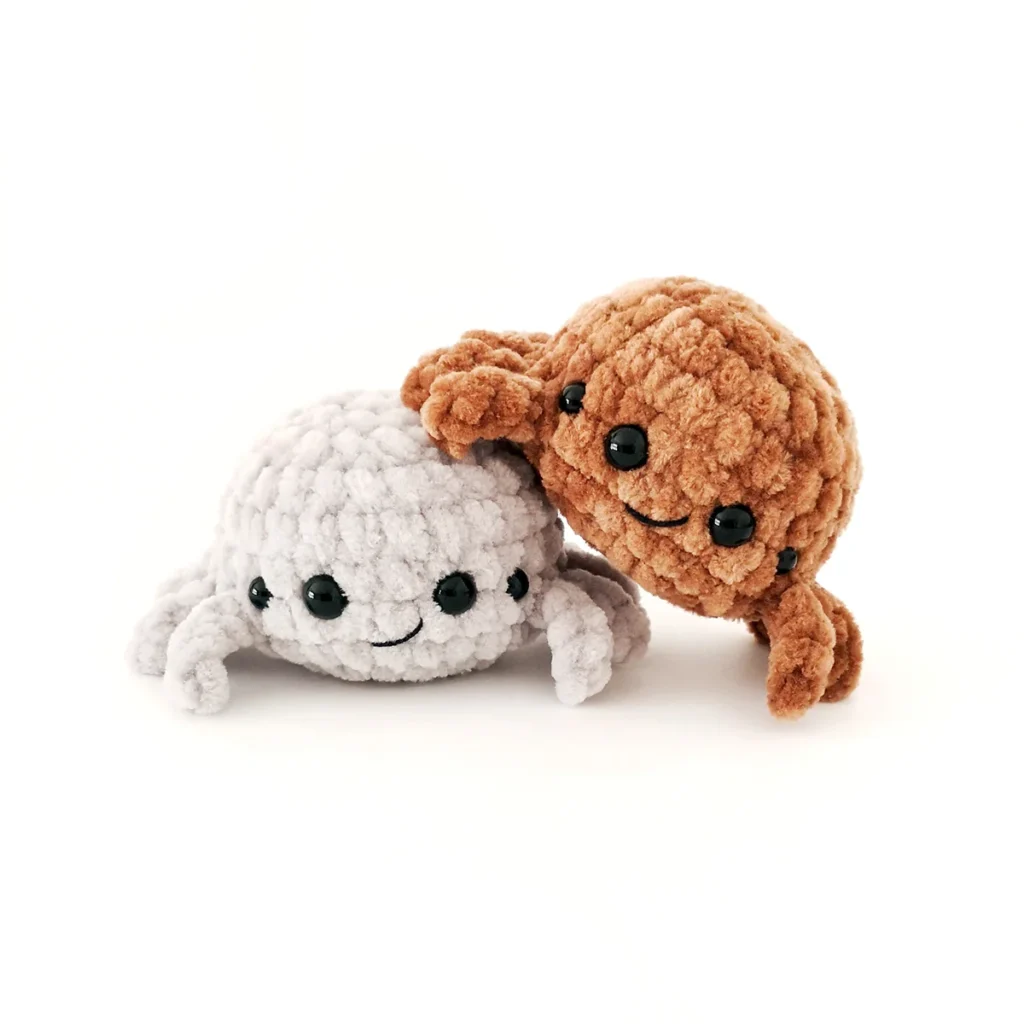
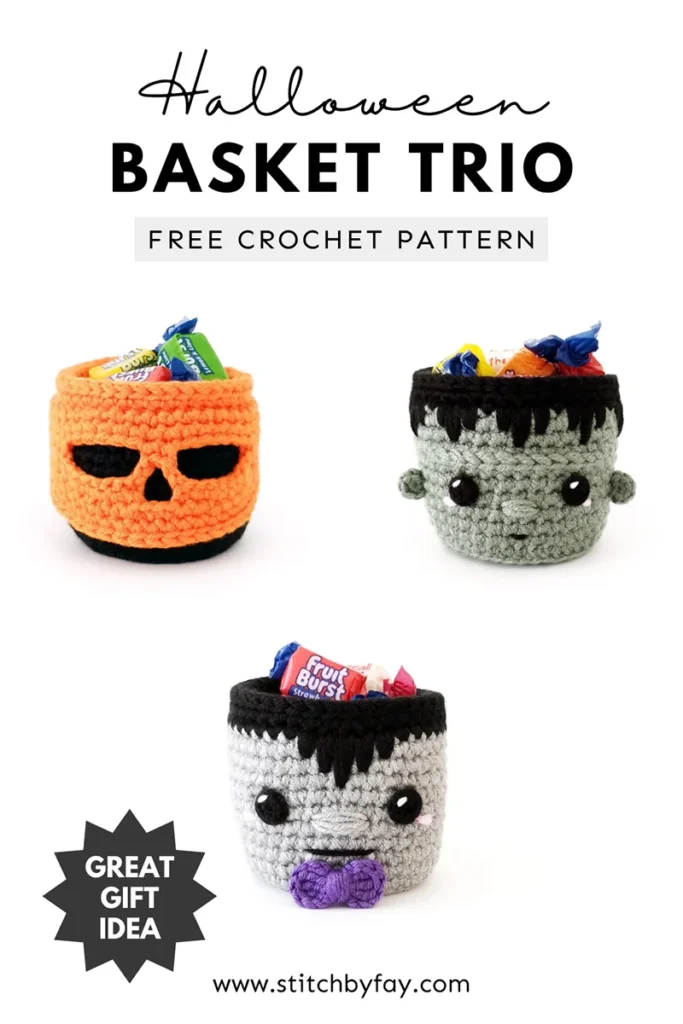
Get ready for Halloween with this crochet Halloween basket trio! With three different designs to choose from, you can make the whole set or pick your favourite.
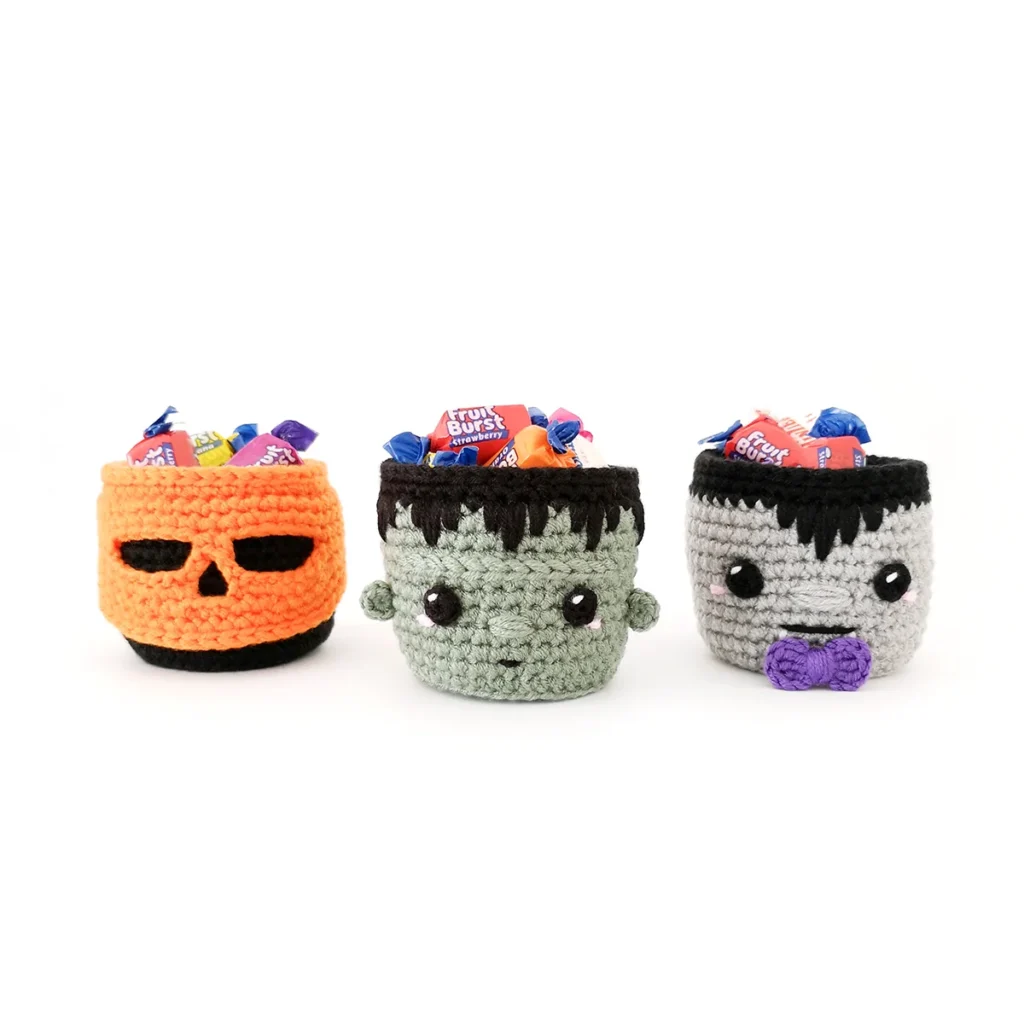
This pattern includes three Halloween-inspired basket designs, all made using the same basic construction.
These crochet Halloween baskets are practical, fun to make and perfect for gifting.
About the Pattern
This crochet Halloween baskets are worked in a spiral using single crochet stitches with 2 strands of yarn held together.
Additional features such as the eyes and ears are worked with a single strand and a smaller hook.
Some details are sewn in place, while others are glued, keeping sewing to a minimum.
Recommended Yarn
I used Hobbii Kind Feather for my baskets but any DK weight yarn should work.
Since we’re using 2 strands held together, you can use 2 separate skeins of yarn or a single skein and pull yarn from both the inside and the outside.
Easy Gifting
If you’re making these crochet Halloween baskets for Halloween gifts, don’t forget to grab the Halloween themed gift tags from the Stitch by Fay freebie library.
Freebie Library
Join our newsletter to gain access to exclusive freebies and keep up to date.
Already a member? Login here.
Why You’ll Love This Crochet Halloween Basket Trio Pattern
More Crochet Patterns
If you love this crochet Halloween basket pattern, you might also like to check out these other Halloween patterns:


Crochet Halloween Basket Trio Pattern
Grab the free downloadable PDF from the freebie library. The ad-free PDF includes detailed instructions and photos as well as easy print pages.
Freebie Library
Join our newsletter to gain access to exclusive freebies and keep up to date.
Already a member? Login here.
Materials
- DK weight yarn in light grey, black, purple, green, orange, white and a small amount of pink (I used Hobbii Kind Feather in Medium Grey, Black, Dark Purple, Dusty Green, Orange, White and Light Pink)
- 4mm crochet hook
- 3mm crochet hook
- Fabric glue or black embroidery floss
- Stitch marker, yarn needle, scissors
Abbreviations (US Terms)
- BLO – back loop only
- ch – chain
- inc – increase
- invdec – invisible decrease
- sc – single crochet
- sk – skip
- sl st – slip stitch
- SPsc – single crochet spike stitch
- st/s – stitch/es
- tr – treble crochet
- […] – repeat the instructions in brackets
- (…) – indicates stitch count at end of round
Special Stitches
Single Crochet Spike Stitch (SPsc)
- Insert hook in indicated stitch.
- Draw up a loop to the height of the stitches of the working round.
- Yarn over and pull through both loops on hook.
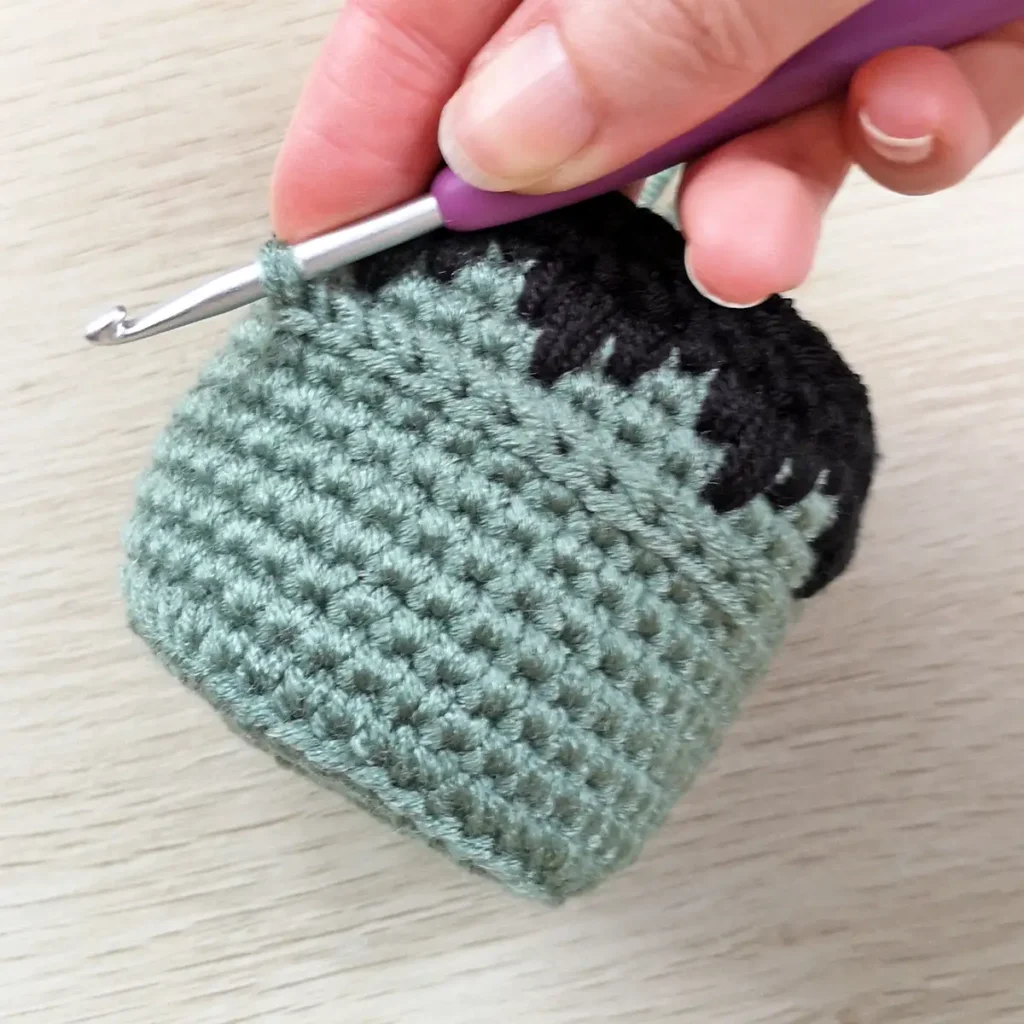
Surface Slip Stitch
- Insert your hook from right side to wrong side where you would like your surface slip stitches to start and pull up a loop of yarn.
- Insert hook into next stitch.
- Yarn over and pull through, you should have 2 loops on your hook.
- Pull through the loop on your hook to complete the stitch.
- Repeat as many times as indicated by the pattern.
Useful Links
- Magic Ring
- Single Crochet Spike Stitch
- How to Change Colours
- Invisible Decrease
- Invisible Fasten Off
Finished Size
The finished baskets measure approximately 2.75″ (7 cm) x 2.75″ (7 cm). Size may vary depending on tension and materials used.
Gauge
Gauge is not important in this pattern. However, using a different yarn and hook size will change the size of the finished item. Use the measurement below as a guide.
Gauge = 2.5” (6.5cm) after R5
Notes
- Pieces are worked in a continuous spiral, starting with a magic ring and using the traditional YO (yarn over) method, unless otherwise specified. Mark the first stitch of each round with a removable stitch marker.
- The baskets are worked with 2 strands of yarn held together and a 4mm hook.
- Additional details (eyes, ears, bow tie) are worked with a single strand and a 3mm hook.
Pattern Instructions
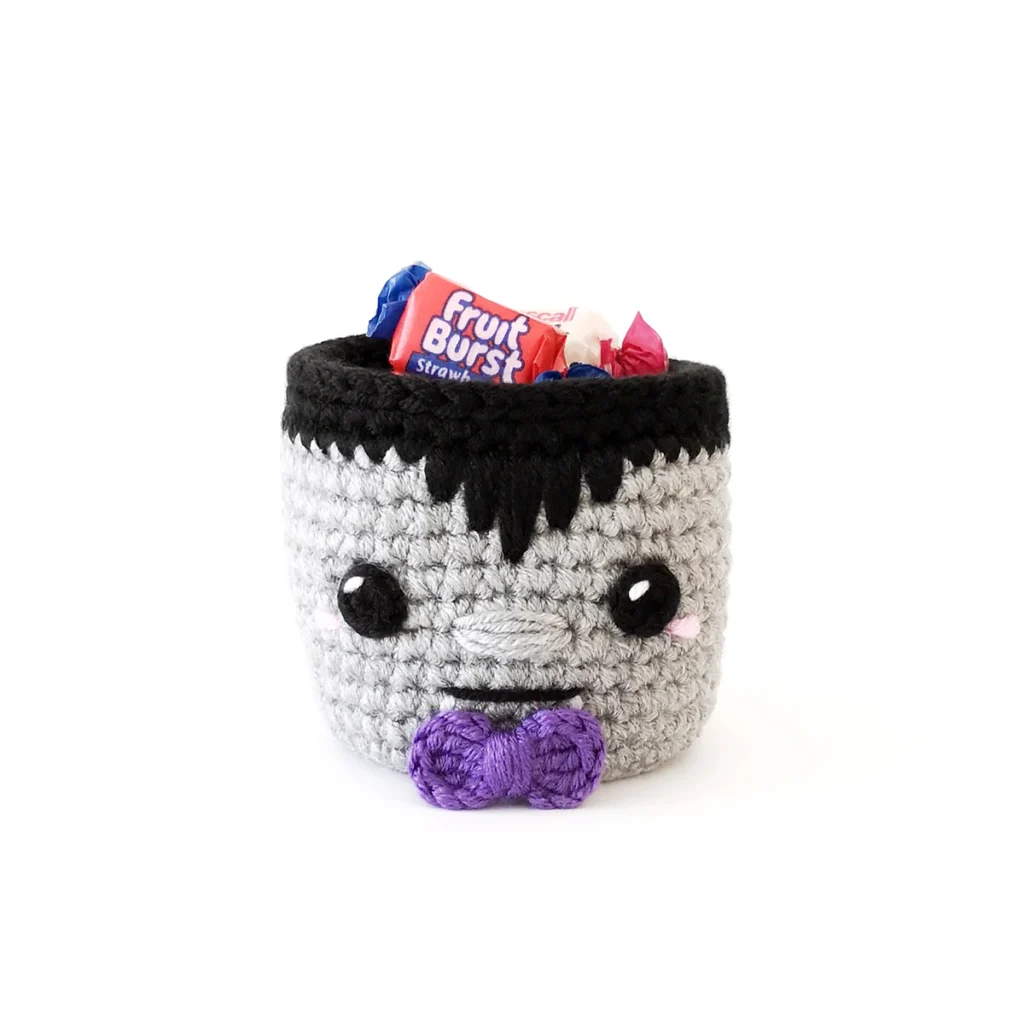
Vampire Basket (4mm hook, grey, 2 strands held together)
R1: 8 sc in magic ring (8)
R2: [Inc] x8 (16)
R3: [Sc, inc] x8 (24)
R4: Sc, inc, [2 sc, inc] x7, sc (32)
R5: [3 sc, inc] x8 (40)
R6: [BLO sc] x40 (40)
R7-15: [Sc] x40 (40) 9 rounds – change colour to black in last st of R15
In the next round we will create the widow’s peak using spike single crochet stitches.
R16: 18 sc, SPsc 1 round below, SPsc 2 rounds below, SPsc 3 rounds below, SPsc 2 rounds below, SPsc 1 round below, 17 sc (40)
R17: [Sc] x40 (40)
R18: [Sl st] x40 (4)
Fasten off invisibly and weave in ends.
Eyes (3mm hook, make 2, black, single strand)
R1: 6 sc in magic ring (6)
Fasten off invisibly and weave in ends.
Using white yarn, sew a highlight over a single stitch. Weave in ends.
Bow Tie (3mm hook, purple, single strand)
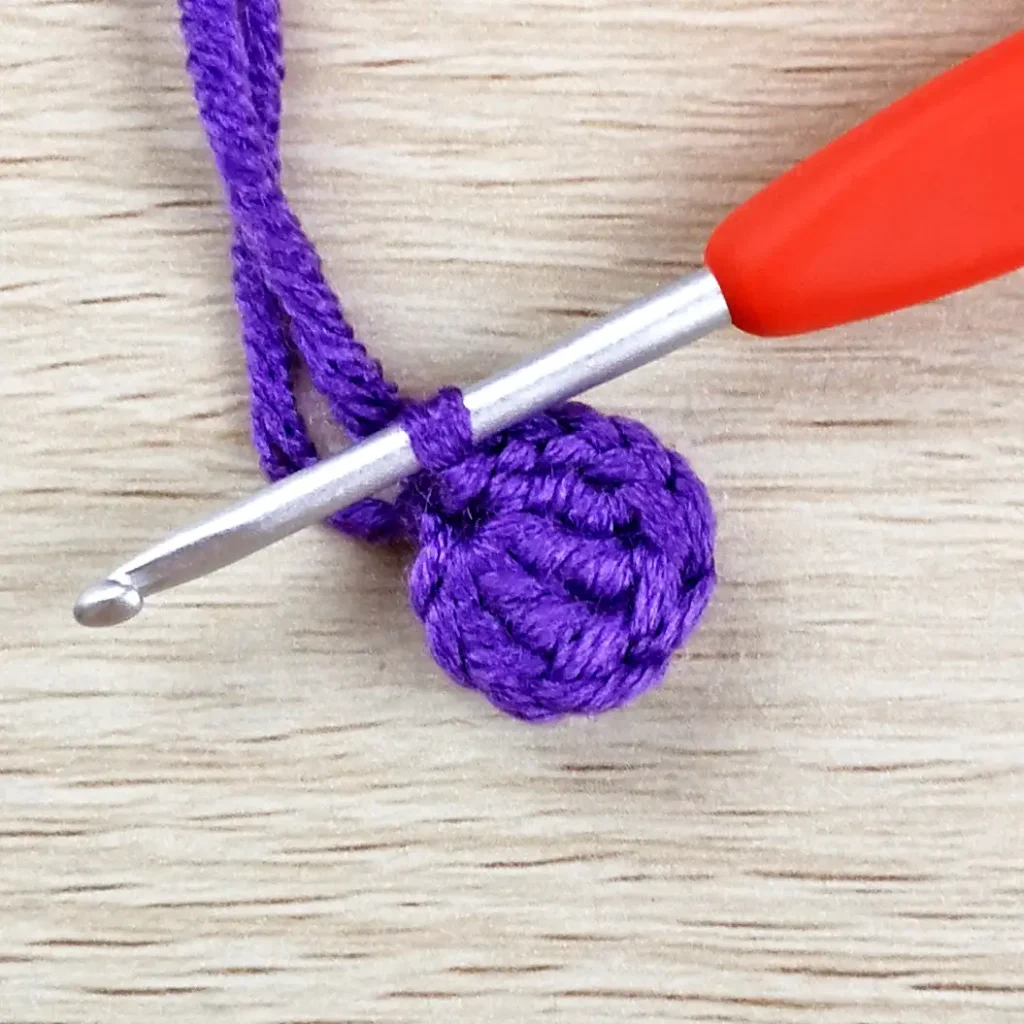
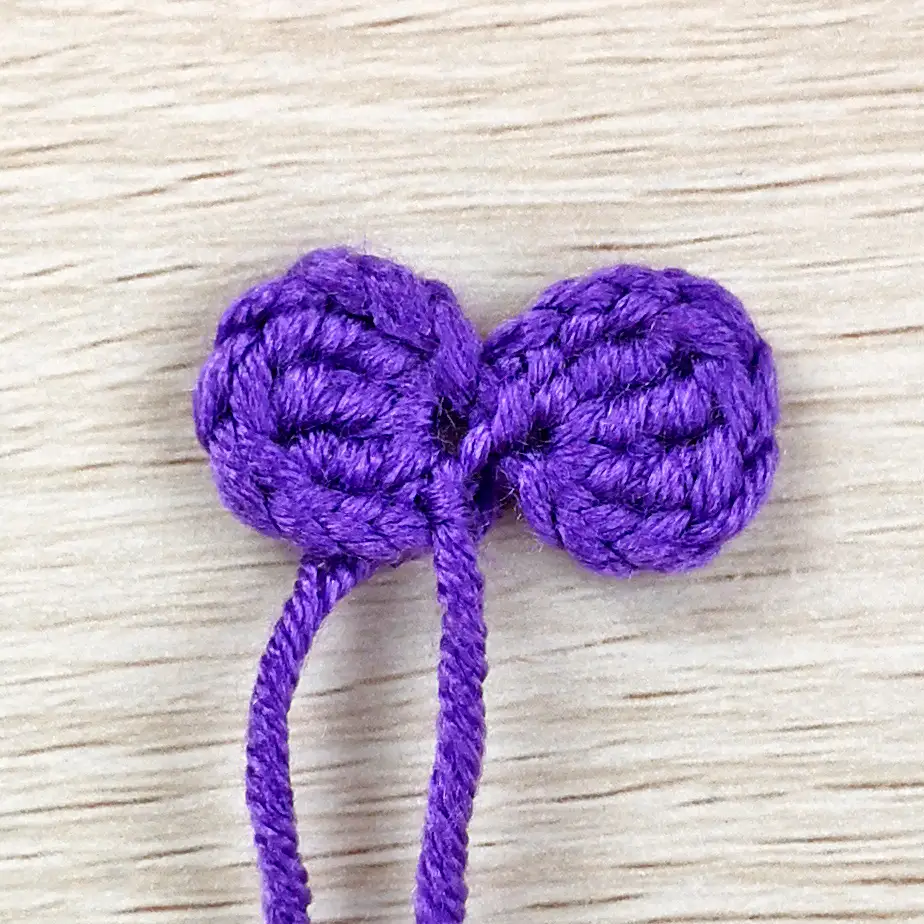
Leaving a long starting tail of approximately 15cm – [ch 4, 3 tr in 4th ch from hook, ch 3, sl st into same ch] x2
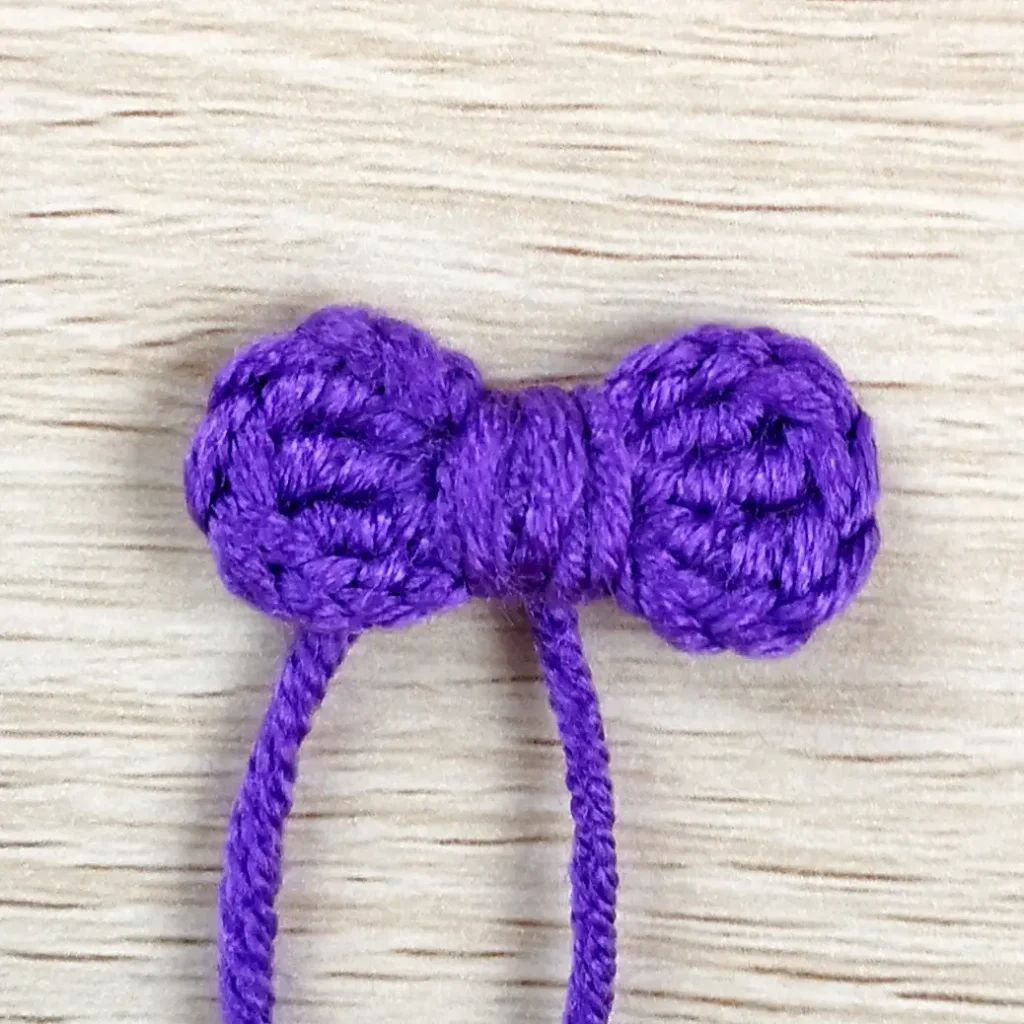
Fasten off leaving a long tail of approximately 30cm. Use the long tail to form the centre of the bow. Wrap the tail around the centre 8-10 times or until you have your desired look. Tie the tails in a knot at the back and leave for sewing.
Assembly
- Using grey yarn, sew a nose centred with the widow’s peak between R10 and R11, 4 stitches long. Stitch over it 4-5 times or until you have your desired look.
- Using black yarn, sew a horizontal line for the mouth, 5 stitches long, between R8 and R9 centred with the nose.
- Using white yarn, sew the fangs at each corner of the mouth over a single stitch.
- Sew the bow tie between R6 and R7 centred below the mouth.
- Position the eyes over R11 and R12 approximately 1 stitch away from the nose and with the highlight on the upper left side. Glue or sew in place using a single strand of embroidery floss.
- Using pink yarn, sew cheeks just under and to the side of each eye going over a single stitch twice.
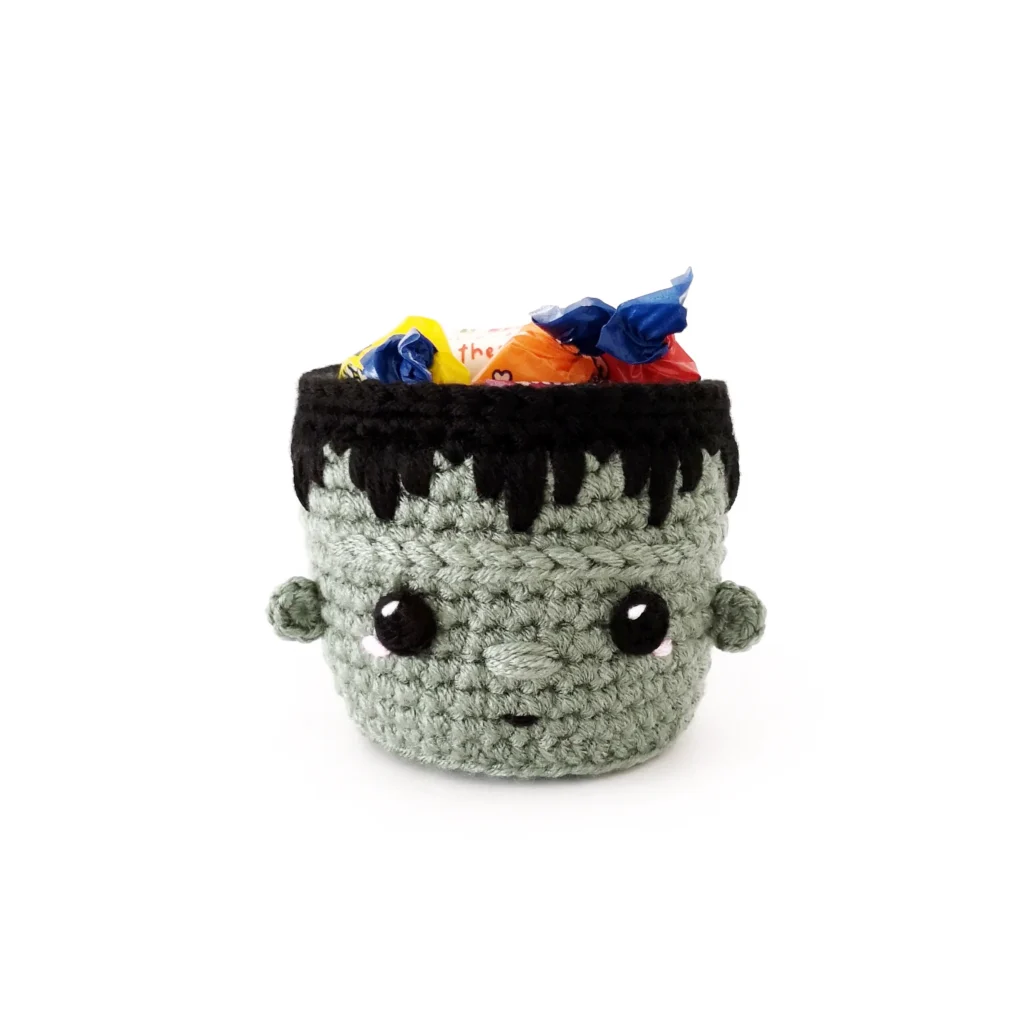
Frankenstein Basket (4mm hook, green, 2 strands held together)
R1: 8 sc in magic ring (8)
R2: [Inc] x8 (16)
R3: [Sc, inc] x8 (24)
R4: Sc, inc, [2 sc, inc] x7, sc (32)
R5: [3 sc, inc] x8 (40)
R6: [BLO sc] x40 (40)
R7-15: [Sc] x40 (40) 9 rounds – change colour to black in last st of R15
In the next round we will be using spike single crochet stitches to create the hair.
R16: [SPsc 1 round below, SPsc 2 rounds below, SPsc 1 round below, sc] x10 (40)
R17: [Sc] x40 (40)
R18: [Sl st] x40 (40)
Fasten off invisibly and weave in ends.
Eyes (3mm hook, make 2, black, single strand)
R1: 6 sc in magic ring (6)
Fasten off invisibly and weave in ends.
Using white yarn, sew a highlight over a single stitch. Weave in ends.
Ears (3mm hook, make 2, green, single strand)
R1: 5 sc in magic ring (5)
Fasten off leaving a long tail for sewing.
Brow (4mm hook, green, 2 strands held together)
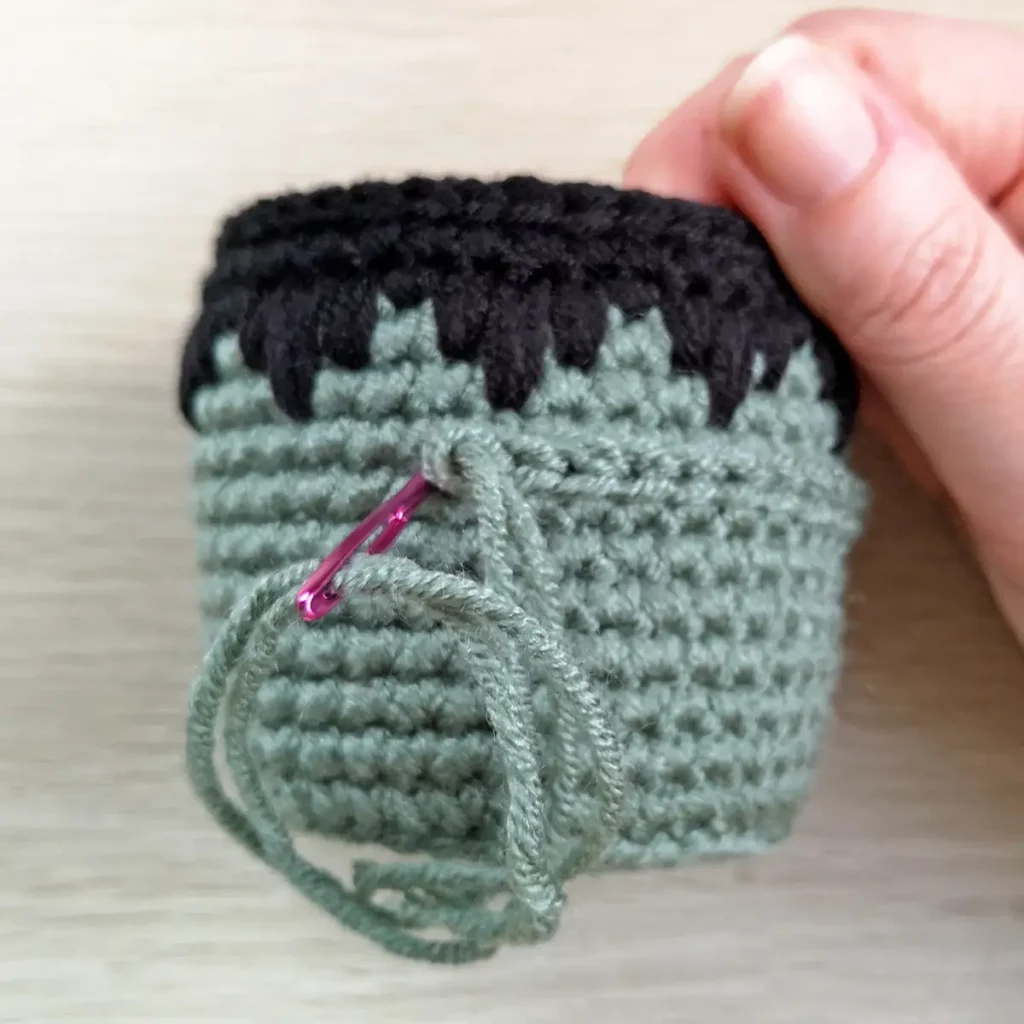
We will be making a line of surface slip stitches to create the brow.
Start with the front of the basket facing up at you (the colour change should be in the centre of the back). Join yarn on the far right-hand side between R12 and R13. Make 12 surface sl sts.
tip
Mark out the placement first with pins if needed.
Fasten off by cutting the yarn and pulling through the last st. Thread the tail onto a yarn needle. Insert the needle through the same st that the yarn is coming out of. Weave in ends.
Assembly
- Using green yarn, sew a nose centred with the brow between R9 and R10, 3 stitches long. Stitch over it 4-5 times or until you have your desired look.
- Using black yarn, sew a mouth over a single stitch between R7 and R8.
- Sew the ears to each side of the basket over R10 approximately 2 stitches away from the brow. Alternatively attach the eyes first if it helps with placement.
- Position the eyes over R10 and R11 approximately 1 stitch away from the nose and with the highlight on the upper left side. Glue or sew in place using a single strand of black embroidery floss.
- Using pink yarn, sew cheeks just under and to the side of each eye going over a single stitch twice.
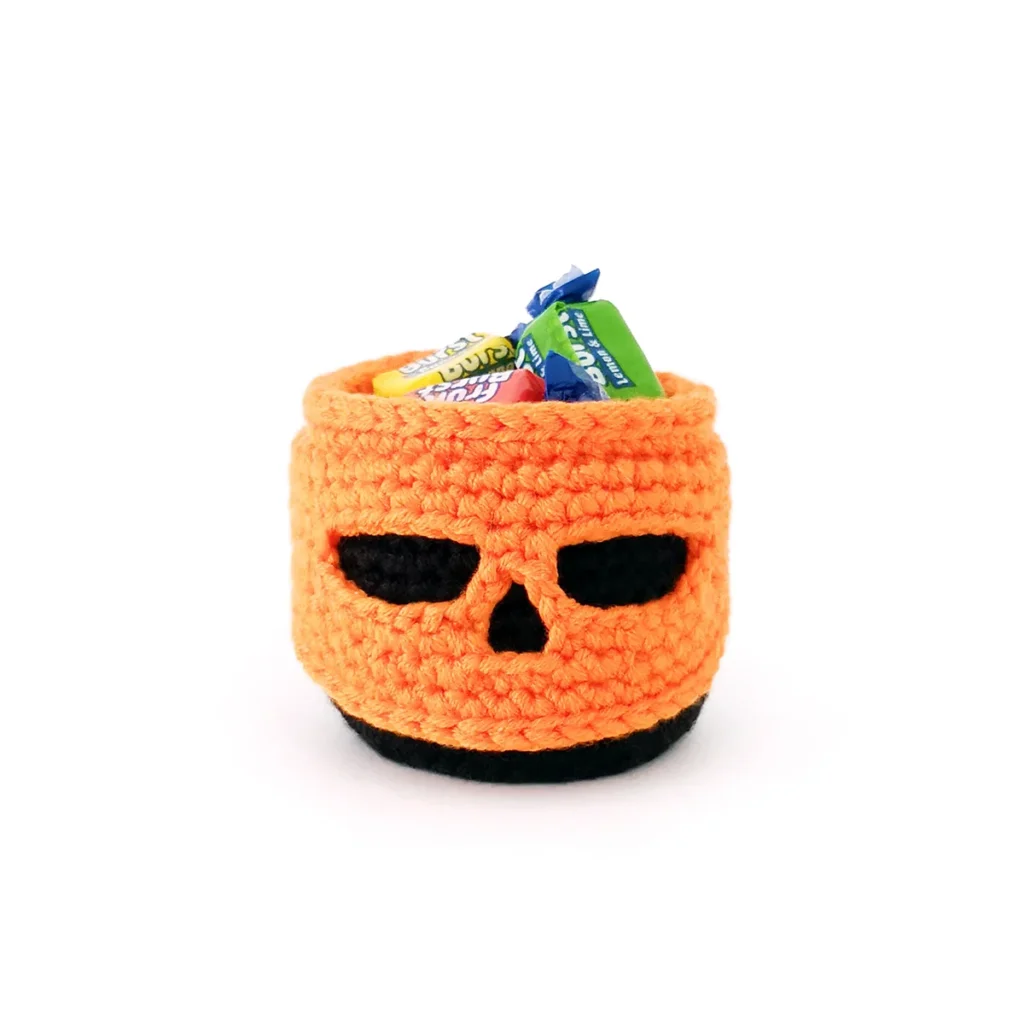
Pumpkin Skull Basket (4mm hook, black, 2 strands held together)
R1: 8 sc in magic ring (8)
R2: [Inc] x8 (16)
R3: [Sc, inc] x8 (24)
R4: Sc, inc, [2 sc, inc] x7, sc (32)
R5: [3 sc, inc] x8 (40)
R6: [BLO sc] x40 (40)
R7-15: [Sc] x40 (40) 9 rounds – change colour to orange in last st of R15
R16: [Sc] x40 (40)
R17: [BLO sc] x40 (40)
R18: [Sl st] x40 (40)
Fasten off invisibly and weave in ends.
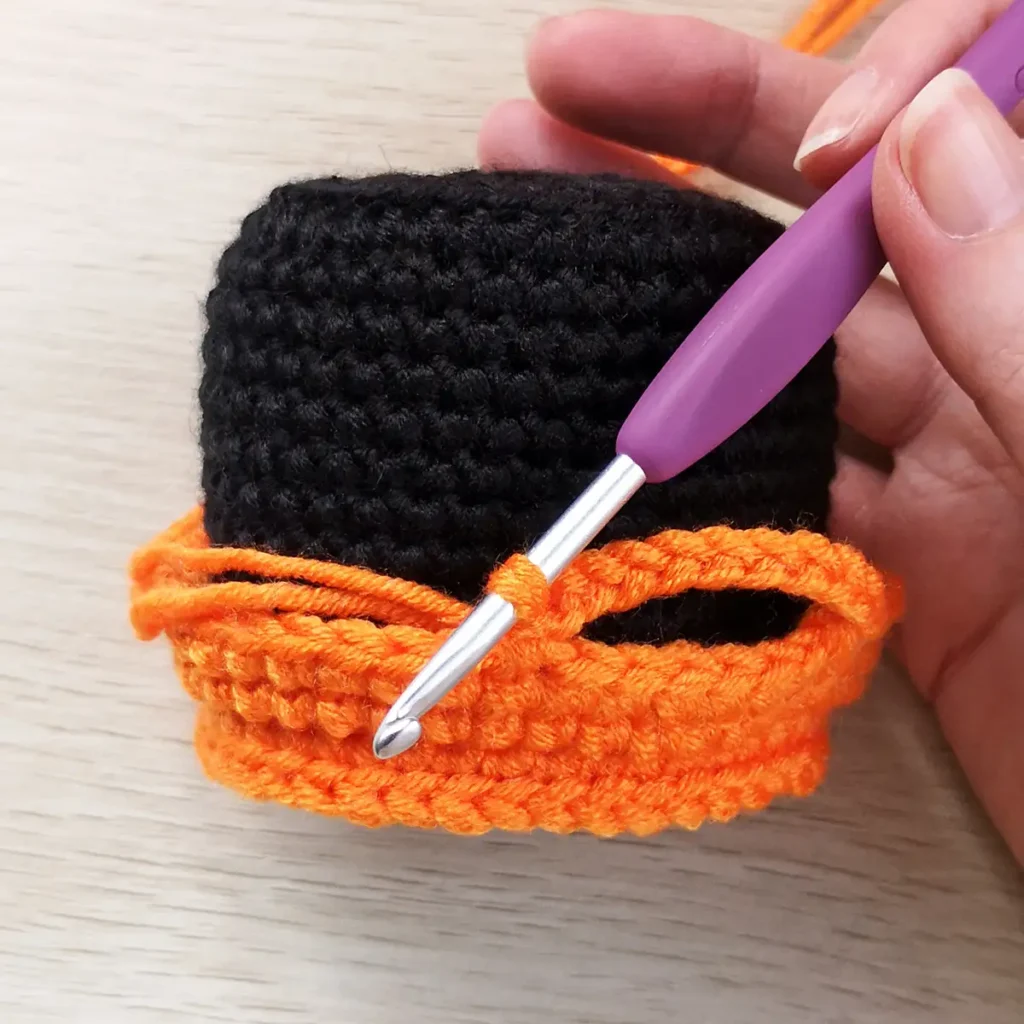
The next round is worked into the leftover front loops from R17.
Join orange yarn in the first leftover front loop from R17 by inserting your hook and pulling up a loop of yarn. Ch 1 and start R1 in the same front loop.
R19-20: [Sc] x40 (40)
R21: 14 sc, ch 10, sk 5, 2 sc, ch 10, sk 5, 14 sc (30 sc + 20 chs)
R22: 14 sc, 8 sc along the chain sts, sk last 2 chs, ch 3, sk the 2 sc from the previous round and the first 2 ch spaces, 8 sc along the ch sts, 14 sc (44 sc + 3 chs)
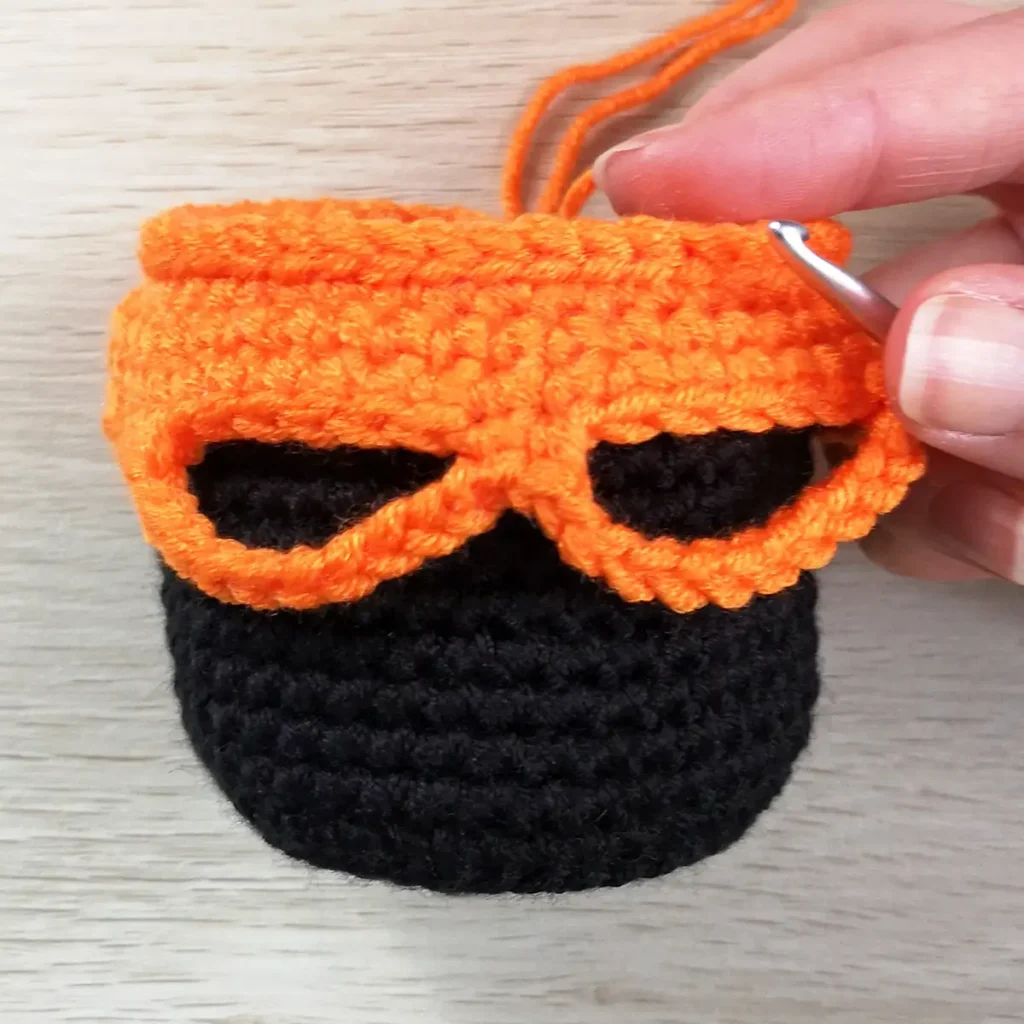
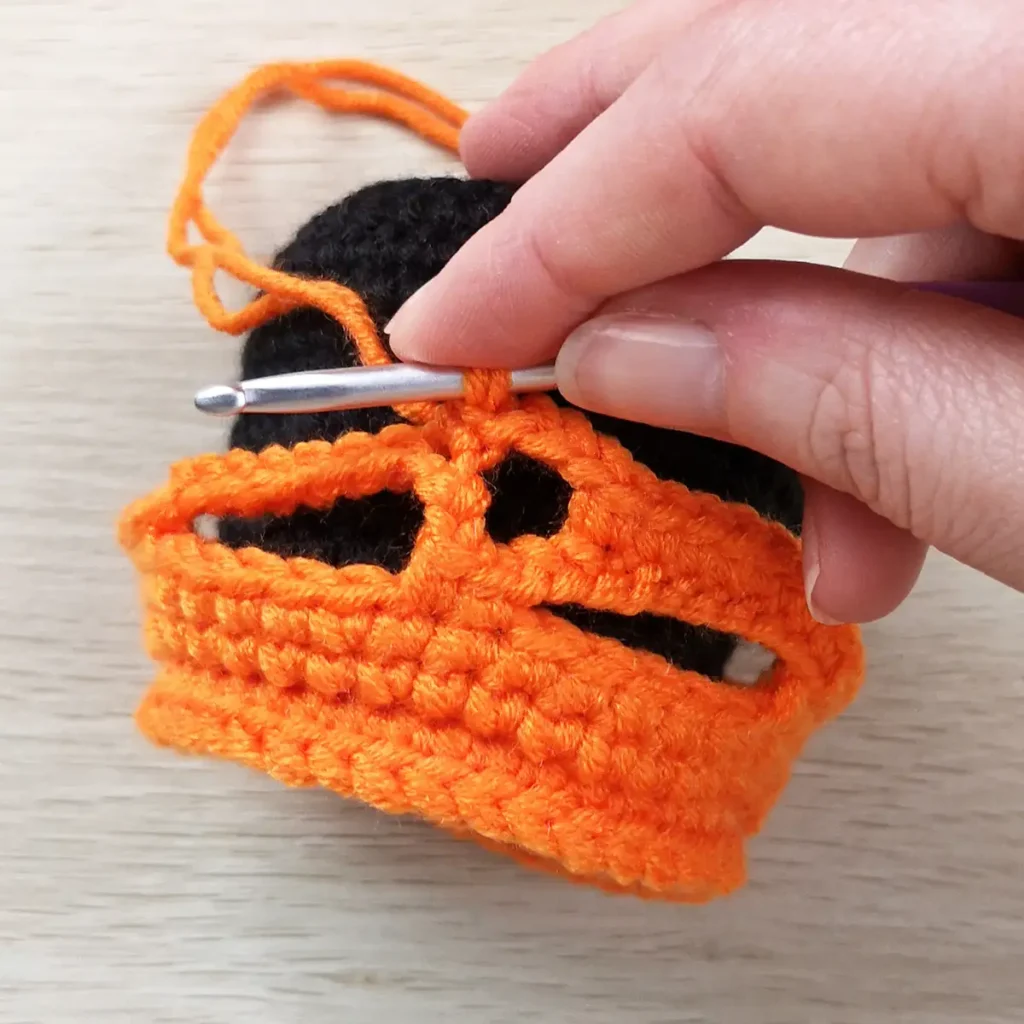
R23: Invdec, [7 sc, invdec] x5 (41)
R24: [Sc] x41 (41)
R23: [Sl st] x41 (41)
Fasten off and weave in ends.
Use your hands to gently shape the eyes and nose. Glue or sew to hold in place if desired.
not ready to make this yet?
Pin this post for later
Explore More Crochet Patterns
After you crochet these Halloween baskets, here are some more crochet patterns to try:
What’s Next?
Invitation to our Private Community
We hope you enjoyed this pattern. Come and hang out in our Stitch by Fay Community. We created this space for you to share pictures, ask questions and support each other.

This pattern is for personal use only and may not be copied, reproduced, altered, published or distributed in any format (including video). If you wish to share this pattern, you may link to this pattern but please do not reprint it on your site.
You can sell finished products made from this pattern in small quantities. Do NOT use our photos as your sale photos.