

Crochet Elf Bauble Pattern
Looking for a fun Christmas ornament to add to your collection? Check out this sweet crochet elf bauble pattern.
It’s Day 10 of the 12 Days of Crochet Christmas! Here’s another one for the character bauble collection.

About the Pattern
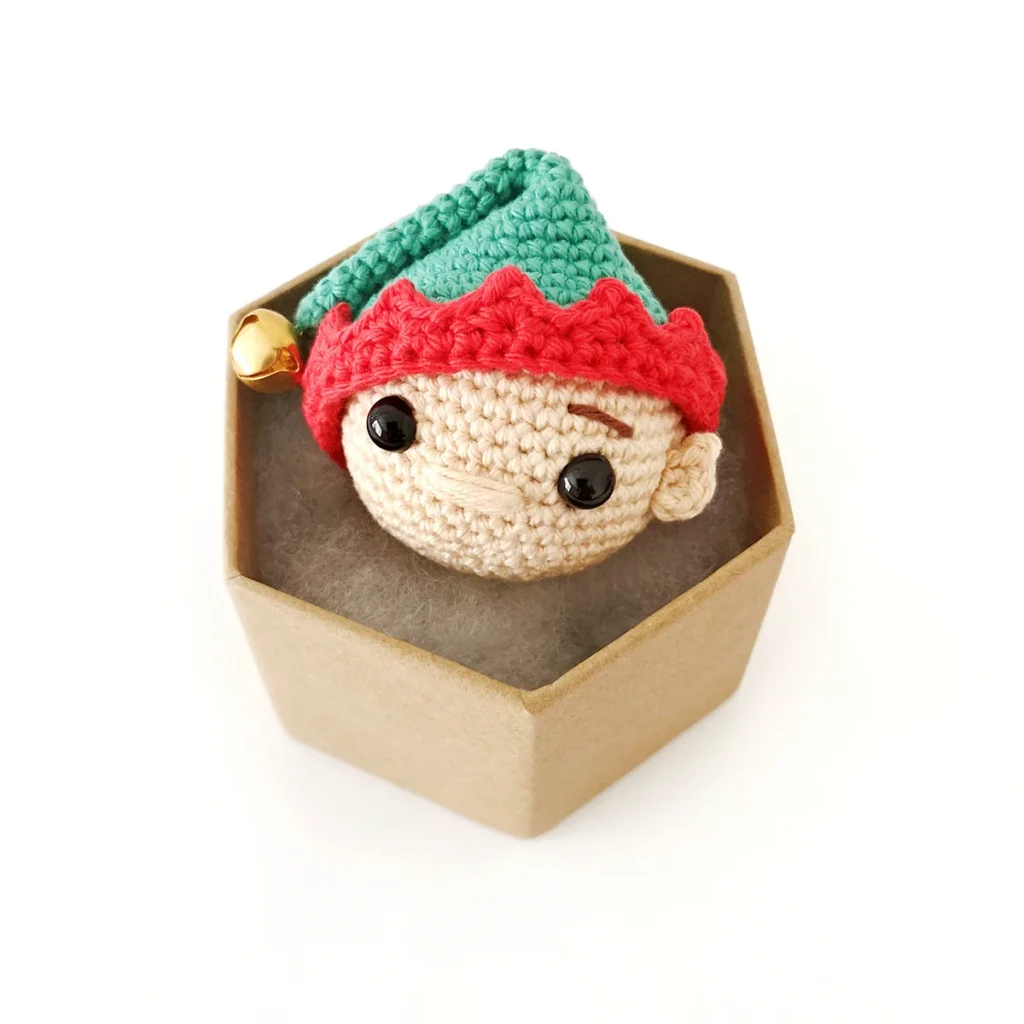
This crochet elf bauble is made up of three separate parts – the head, ear and hat.
The hat takes a little bit of time and has a fun contrasting trim. The gold bell on the end is the perfect finishing touch.
I placed his hat at an angle which means you only need to make one ear.
Why You’ll Love This Elf Bauble Crochet Pattern

More Patterns
If you love this crochet elf bauble pattern, you might also like to check out these other Christmas patterns:


Crochet Elf Bauble Pattern
Materials
- DK weight yarn in skin colour, red, green and a small amount of dark brown (I used Paintbox Yarns Cotton DK in Light Caramel, Pillar Red, Slate Green and Coffee Bean)
- 2.5mm crochet hook
- 8mm safety eyes
- Polyester fiberfill
- 1cm gold bell
- Yarn/twine for hanging
- Stitch marker, yarn needle, scissors
Abbreviations (US Terms)
- ch – chain
- sc – single crochet
- inc – increase
- invdec – invisible decrease
- dc – double crochet
- BLO – back loop only
- sk – skip
- sl st – slip stitch
- st/s – stitch/es
- […] – repeat the instructions in brackets
- (…) – work the instructions between (…) into the same stitch
Special Stitches
Picot: Ch 2, sl st in second ch from hook.
Useful Links
Finished Size
The finished elf bauble measures approximately 2.5″ long x 3″ wide (6.5cm x 8cm). Size may vary depending on tension and materials used.
Gauge
Gauge is not important in this pattern. Use a hook size to match your chosen yarn. Make sure that your stitches are tight enough to prevent stuffing showing through and adjust hook size if necessary.
Notes
- Pieces are worked in a continuous spiral starting with a magic ring unless otherwise specified. Mark the first stitch of each round with a removable stitch marker.
Pattern Instructions
Head (skin colour)
R1: 6 sc in magic ring (6)
R2: [Inc] x6 (12)
R3: [Sc, inc] x6 (18)
R4: Sc, inc, [2 sc, inc] x5, sc (24)
R5: [3 sc, inc] x6 (30)
R6: 2 sc, inc, [4 sc, inc] x5, 2 sc (36)
R7: [5 sc, inc] x6 (42)
R8-15: [Sc] x42 (42) 8 rounds
R16: [5 sc, invdec] x6 (36)
R17: 2 sc, invdec, [4 sc, invdec] x5, 2 sc (30)
Insert safety eyes between R11 and R12, 7 sts apart.
R18: [3 sc, invdec] x6 (24)
Start stuffing and continue to stuff as you go.
R19: Sc, invdec, [2 sc, invdec] x5, sc (18)
R20: [Sc, invdec] x6 (12)
R21: [Invdec] x6 (6)
Cut the yarn leaving a tail and pull through last st. Weave the yarn tail through the front loop only of the final round and pull to close. Hide the end inside the head.
Hat (starting with green)
R1: 5 sc in magic ring (5)
R2: [Sc] x5 (5)
R3: [Inc] x5 (10)
R4-5: [Sc] x10 (10) 2 rounds
R6: [Sc, inc] x 5 (15)
R7-8: [Sc] x15 (15) 2 rounds
R9: Sc, inc, [2 sc, inc] x4, sc (20)
R10-11: [Sc] x20 (20) 2 rounds
R12: [3 sc, inc] x5 (25)
R13-14: [Sc] x25 (25) 2 rounds
R15: 2 sc, inc, [4 sc, inc] x4, 2 sc (30)
R16-17: [Sc] x30 (30) 2 rounds
R18: [5 sc, inc] x5 (35)
R19-20: [Sc] x35 (35) 2 rounds
R21: 3 sc, inc, [6 sc, inc] x4, 3 sc (40)
R22-23: [Sc] x40 (40) 2 rounds
R24: [7 sc, inc] x5 (45)
R25: [Sc] x45 (45) – change to red in last st
R26: Sl st in first st, ch 2 (does not count as a st), dc in same st. [Dc] x44, join with sl st to first dc (45)
R27: Turn, ch 1. BLO [14 sc, inc] x3, join with sl st to first sc (48)
R28: [Sk next sc, (2 sc, picot, 2 sc) in next st, sk 1, sl st] x11, sk next sc, (2 sc, picot, 2 sc) in next st, sk 1
Fasten off invisibly to first sc. Weave in ends.
Using green yarn, sew a gold bell to the end of the hat.
Ear (skin colour)
Make a magic ring.
R1: 3 sc, picot, sc
Fasten off leaving a long tail for sewing.
Assembly
- Using skin colour yarn, sew a nose centred between the eyes between R12 and R13. Stitch over the nose until you get your desired look (approximately 5 times).
- Using dark brown yarn, sew a single stitch at an angle above the right eye over R9 for the eyebrow.
- Sew the ear to the right side of the head, over R11 and R12, approximately 4 sts away from the eye. (It can be helpful to put the hat on the head to get a better idea of placement).
- Place the hat on the head at an angle (it should sit just above the ear and the eyebrow on the right hand side). Bend the top of the hat to the side away from the ear and using some green yarn, sew in place to hold the fold.
- Using red yarn, sew the hat to the head. I sewed it down underneath the brim over R27.
- Attach a hanging loop.
not ready to make this yet?
Pin this post for later

Explore More Crochet Patterns
After you crochet this elf bauble, here are some more crochet patterns to try!
- Mrs Claus Ornament Crochet Pattern
- Gingerbread Ornament Crochet Pattern
- Snowman Ornament Crochet Pattern
Did you make this project?
Share a photo on social media and tag me @stitchbyfay. We love seeing your creations!
Have questions? Join the Facebook group!
We hope you enjoyed this pattern. Come and hang out with me in the Stitch by Fay Community Facebook group. We created this space for you to share pictures, ask questions and support each other.

This pattern is for personal use only and may not be copied, reproduced, altered, published or distributed in any way. If you wish to share this pattern, you may link to this pattern but please do not reprint it on your site.
You can sell finished products made from this pattern in small quantities. Do NOT use our photos as your sale photos.