

Candy Crochet Christmas Tree Pattern
Looking for a fun and whimsical addition to your holiday celebrations? This crochet Christmas tree is here to sleigh your seasonal decor!
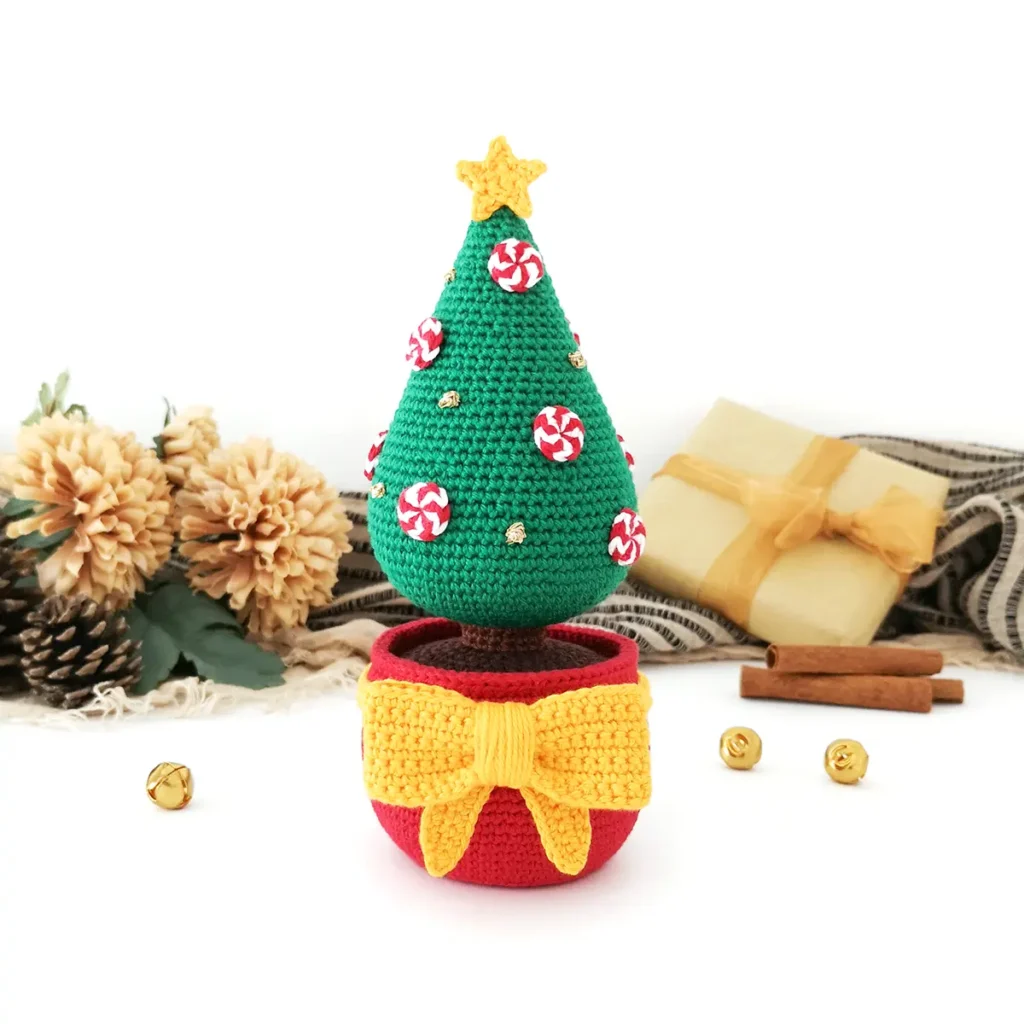
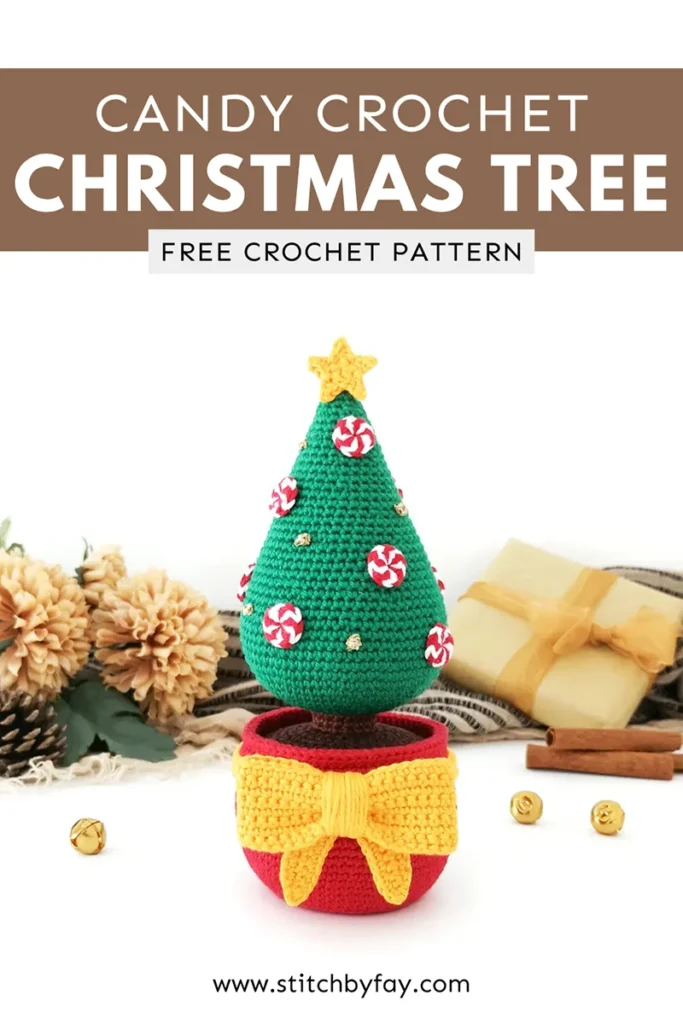
This crochet Christmas tree is so cute and fun! It’s perfect for adding to a tablescape, displaying on a shelf/mantel or gift giving.
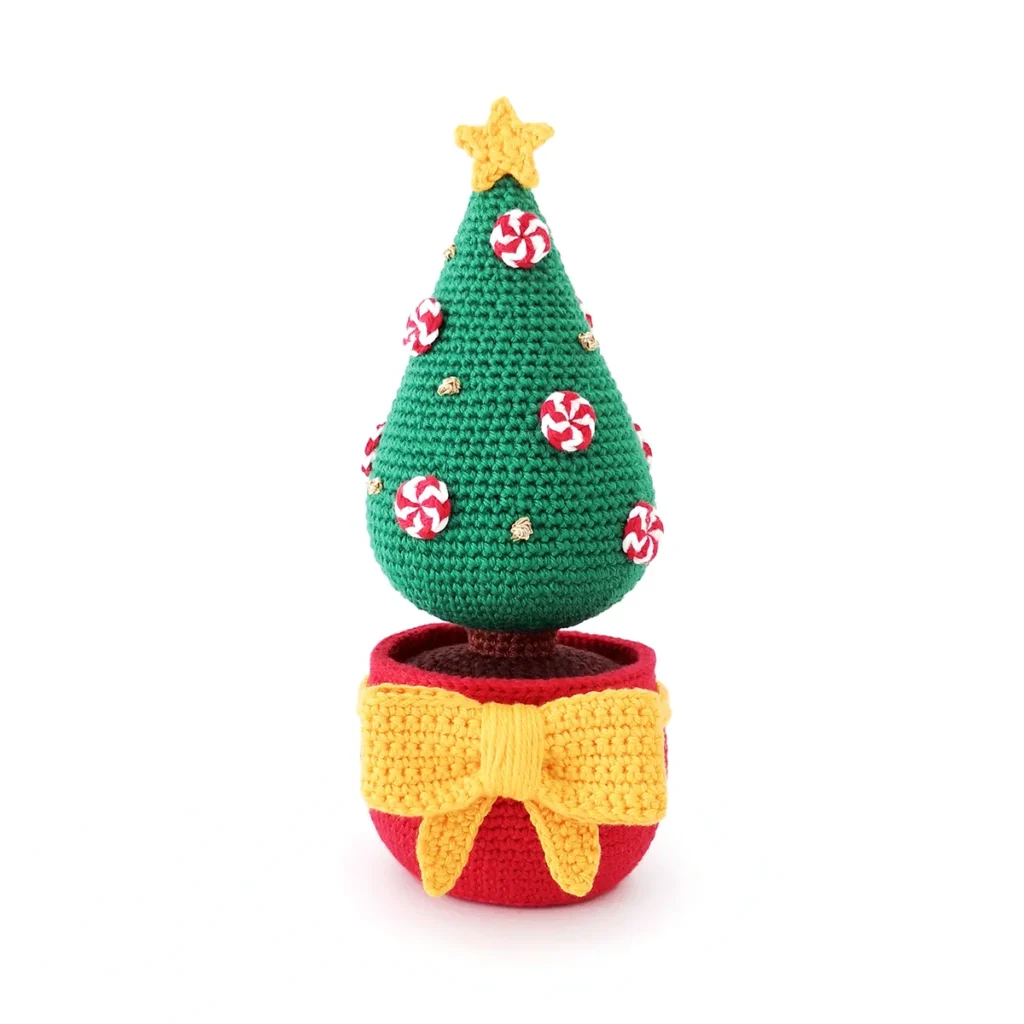
I love all of the details from the large bow to the tiny French knots and the festive peppermints.
Don’t be overwhelmed by the level of detail – it comes together easier than you think.
About the Pattern
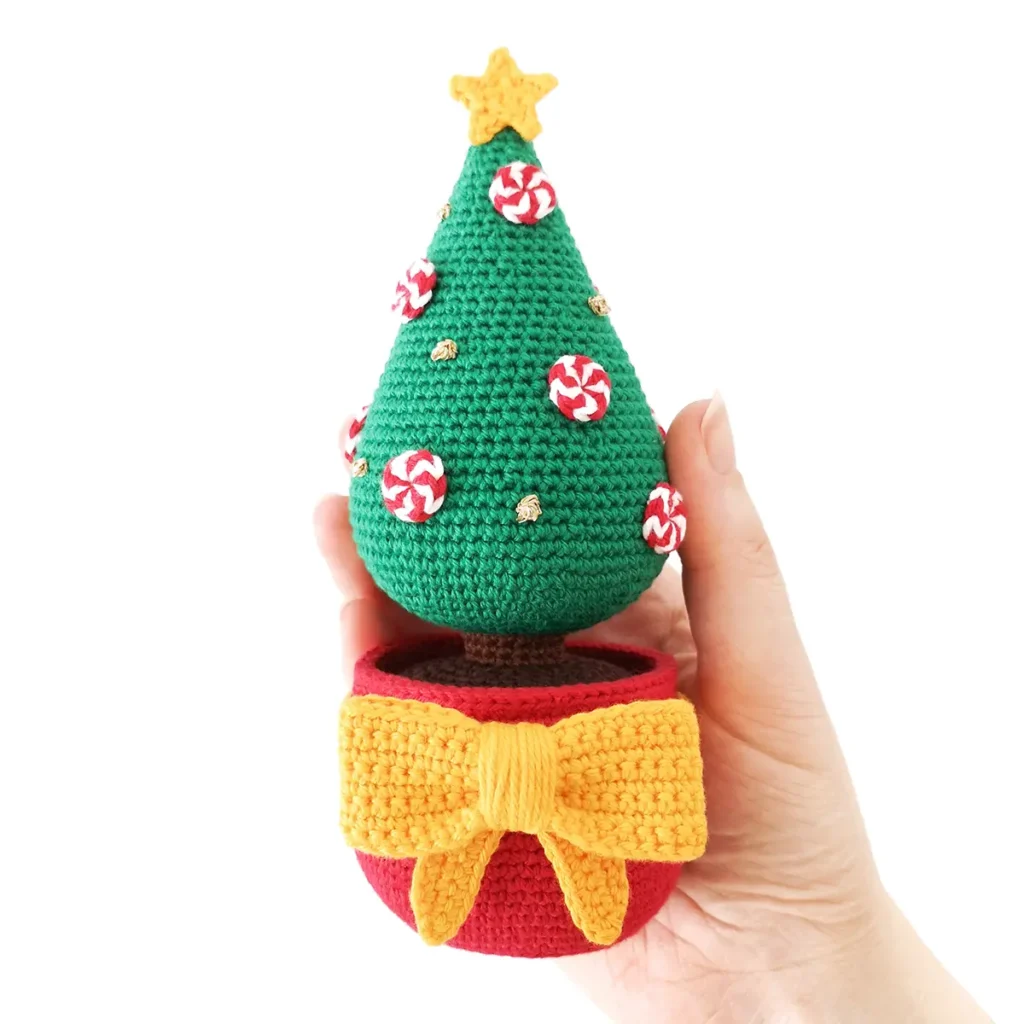
This crochet Christmas tree pattern is worked in a few separate parts using basic stitches.
The tree and pot are crocheted in one piece from the bottom up and the peppermints are glued on to keep sewing to a minimum.
I added French knots for a bit of sparkle but you could use sequins, beads or small buttons instead.
Recommended Yarn
I used Hobbii Friends Cotton 8/4 with a 2mm hook for my crochet Christmas tree. Cotton is my go-to for amigurumi as I love the crisp stitch definition plus it’s easy to work with and holds its shape well.
You can use other similar weight yarns or try a thicker yarn for a larger tree. However, you may want to add poly pellets to the base and/or a piece of dowel to the centre of the tree for additional support and stability.
Why You’ll Love This Crochet Christmas Tree Pattern
More Crochet Patterns
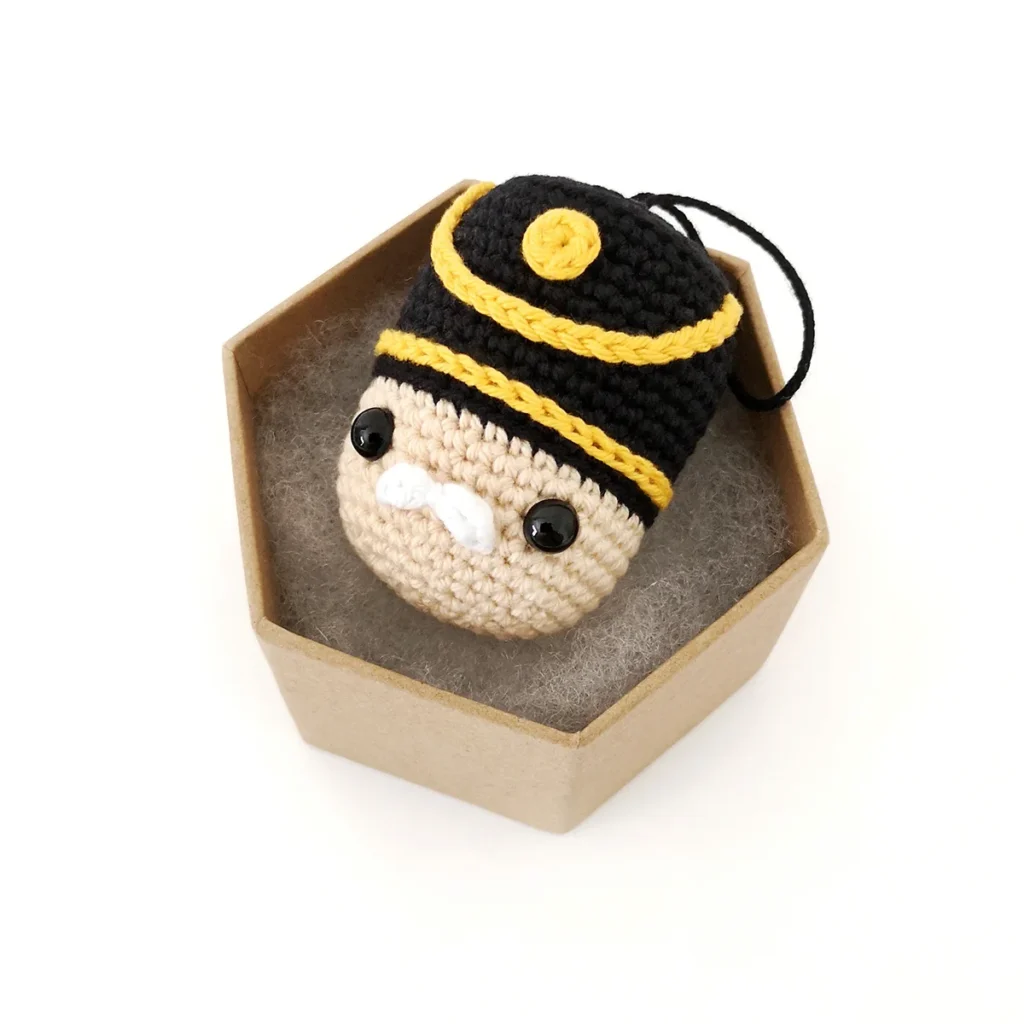
If you love this crochet Christmas tree pattern, you might also like to check out these Christmas patterns:


Crochet Christmas Tree Pattern
Prefer the PDF version?
where to buy
The ad-free PDF includes detailed instructions and photos as well as easy print pages.
Materials
- Fingering weight yarn in red, dark brown, brown, green, yellow and white (I used Hobbii Friends Cotton 8/4 in Pomegranate (41), Americano (20), Chestnut (11), Malachite (106), Dark Yellow (26) and White (01))
- Fingering weight glitter yarn in gold (I used Go Handmade Cocktail Deluxe), gold embroidery floss or other fingering weight yarn in colour of your choice
- 2mm crochet hook
- Thin cardboard (tissue box, cereal box, etc)
- Polyester fiberfill
- Fabric glue or hot glue
- Stitch marker, yarn needle, scissors
Abbreviations (US Terms)
- ch – chain
- BLO – back loop only
- dec – decrease
- FLO – front loop only
- hdc – half double crochet
- inc – increase
- invdec – invisible decrease
- sc – single crochet
- sk – skip
- sl st – slip stitch
- st/s – stitch/es
- […] – repeat the instructions in brackets
- (…) – indicates stitch count at end of round
Special Stitches
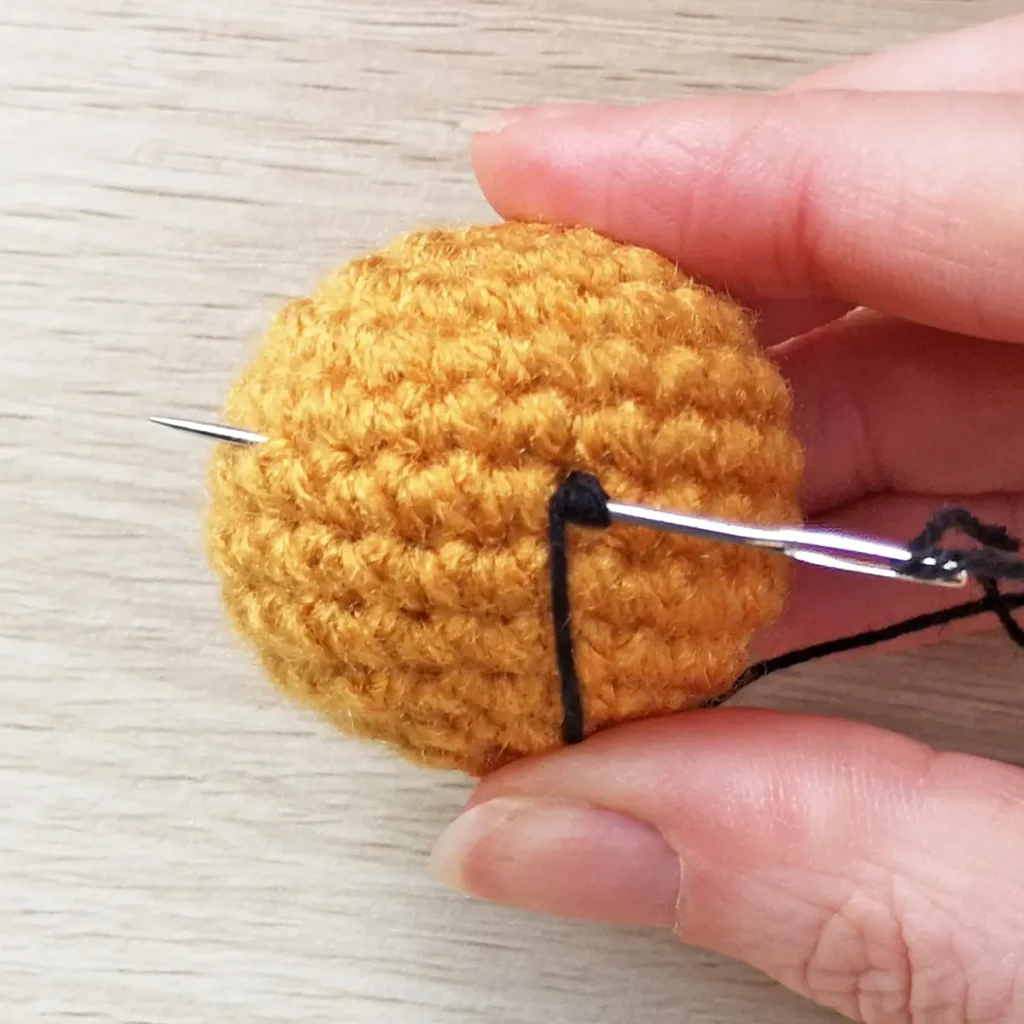
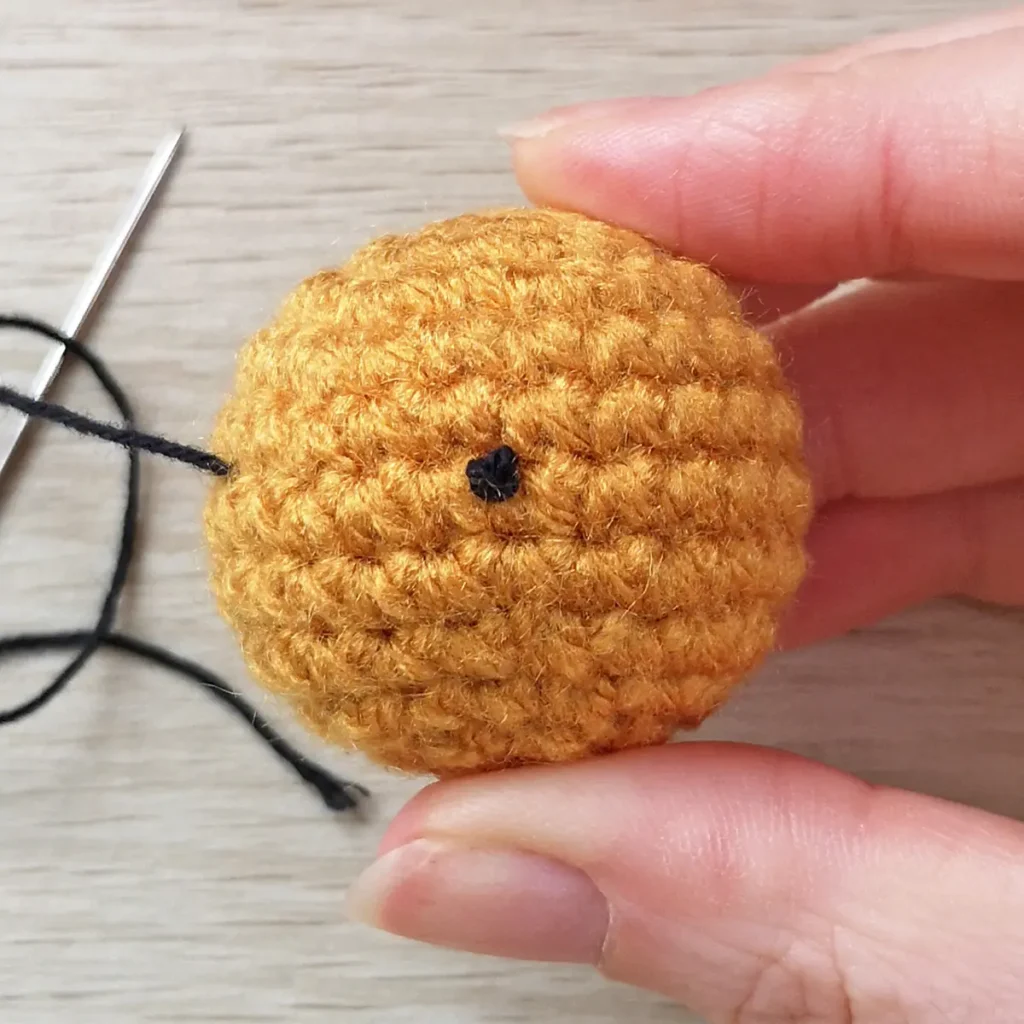
French Knots
- Bring the needle up through the piece where you want to place the knot.
- Lay the needle behind the thread.
- Wrap the thread around the needle 3 times.
- Take the needle partway down through your piece, close to where the thread is coming out.
- Slowly pull the needle and the working thread through the wraps to complete your French knot
Useful Links
- Magic Ring
- Invisible Decrease
- Invisible Fasten Off
- How to Close Amigurumi
- How to Change Colours in Amigurumi
Finished Size
The finished Christmas tree measures approximately 7″ (18cm) tall. Size may vary depending on tension and materials used.
Gauge
Gauge is not important in this pattern. Use a hook size to match your chosen yarn. Make sure that your stitches are tight enough to prevent stuffing showing through and adjust hook size if necessary.
Notes
- Pieces are worked in a continuous spiral using the traditional YO (yarn over) method, unless otherwise specified. Mark the first stitch of each round with a removable stitch marker.
Pattern Instructions
Pot (red)
R1: 6 sc in magic ring (6)
R2: [Inc] x6 (12)
R3: [Sc, inc] x6 (18)
R4: Sc, inc, [2 sc, inc] x5, sc (24)
R5: [3 sc, inc] x6 (30)
R6: 2 sc, inc, [4 sc, inc] x5, 2 sc (36)
R7: [5 sc, inc] x6 (42)
R8: 3 sc, inc, [6 sc, inc] x5, 3 sc (48)
R9: [7 sc, inc] x6 (54)
R10: BLO 4 sc, inc, [8 sc, inc] x5, 4 sc (60)
R11: [Sc] x60 (60)
R12: [9 sc, inc] x6 (66)
R13: [Sc] x66 (66)
R14: [21 sc, inc] x3 (69)
R15: [Sc] x69 (69)
R16: 11 sc, inc, [22 sc, inc] x2, 11 sc (72)
R17-25: [Sc] x72 (72) 9 rounds
R26: FLO [sc] x72 (72)
Pause here but do not cut the yarn. Remove your hook and use a stitch marker to hold your place.
Measure the base of the pot and cut a circle out of card. Place in the bottom of the pot.
Soil (dark brown)
Join dark brown yarn in the first leftover back loop from R26 of the pot by inserting your hook and pulling up a loop of yarn. Ch 1 and start R1 in the same back loop.
R1: Work the entire round in the leftover back loops – 5 sc, dec, [10 sc, dec] x5, 5 sc (66)
R2: [9 sc, invdec] x6 (60)
R3: 4 sc, invdec, [8 sc, invdec] x5, 4 sc (54)
R4: 2 sc, invdec, [4 sc, invdec] x8, 2 sc (45)
R5: [3 sc, invdec] x9 (36)
R6: 2 sc, invdec, [4 sc, invdec] x5, 2 sc (30)
R7: [3 sc, invdec] x6 (24)
Start stuffing and continue to stuff as you go.
R8: Sc, invdec, [2 sc, invdec] x5, sc (18)
R9: BLO [sc, invdec] x6 (12)
R10: [Invdec] x6 (6)
Cut the yarn leaving a tail and pull through the last stitch. Weave the yarn tail through the front loops only of the final round and pull gently to close. Hide the end inside the pot.
Finishing the Pot
Picking up where we left off on the pot, remove the stitch marker and place the yarn back on your hook.
R27-28: [Sc] x72 (72) 2 rounds
R29: [Sl st] x72 (72)
Fasten off invisibly and weave in ends.
Tree (starting with brown)
Join brown yarn in the first leftover front loop from R9 of the soil by inserting your hook and pulling up a loop of yarn. Ch 1 and start R1 in the same front loop.
R1: Work the entire round in the leftover front loops – [sc] x18 (18)
R2-4: [Sc] x18 (18) 3 rounds – change colour to green in the last st of R4
R5: [Inc] x18 (36)
R6: [5 sc, inc] x6 (42)
R7: 3 sc, inc, [6 sc, inc] x5, 3 sc (48)
R8: [7 sc, inc] x6 (54)
R9: 4 sc, inc, [8 sc, inc] x5, 4 sc (60)
R10: [9 sc, inc] x6 (66)
R11: 5 sc, inc, [10 sc, inc] x5, 5 sc (72)
R12-13: [Sc] x72 (72) 2 rounds
R14: 5 sc, invdec, [10 sc, invdec] x5, 5 sc (66)
R15-16: [Sc] x66 (66) 2 rounds
R17: [9 sc, invdec] x6 (60)
R18-19: [Sc] x60 (60) 2 rounds
R20: 4 sc, invdec, [8 sc, invdec] x5, 4 sc (54)
R21-22: [Sc] x54 (54) 2 rounds
R23: [7 sc, invdec] x6 (48)
R24-25: [Sc] x48 (48) 2 rounds
R26: 3 sc, invdec, [6 sc, invdec] x5, 3 sc (42)
R27-28: [Sc] x42 (42) 2 rounds
Start stuffing and continue to stuff as you go.
R29: [5 sc, invdec] x6 (36)
R30-31: [Sc] x36 (36) 2 rounds
R32: 2 sc, invdec, [4 sc, invdec] x5, 2 sc (30)
R33-34: [Sc] x30 (30) 2 rounds
R35: [3 sc, invdec] x6 (24)
R36-37: [Sc] x24 (24) 2 rounds
R38: Sc, invdec, [2 sc, invdec] x5, sc (18)
R39-40: [Sc] x18 (18) 2 rounds
R41: [Sc, invdec] x6 (12)
R42-43: [Sc] x12 (12) 2 rounds
R44: [Invdec] x6 (6)
Cut the yarn leaving a tail and pull through the last stitch. Weave the yarn tail through the front loops only of the final round and pull gently to close. Hide the end inside the tree.
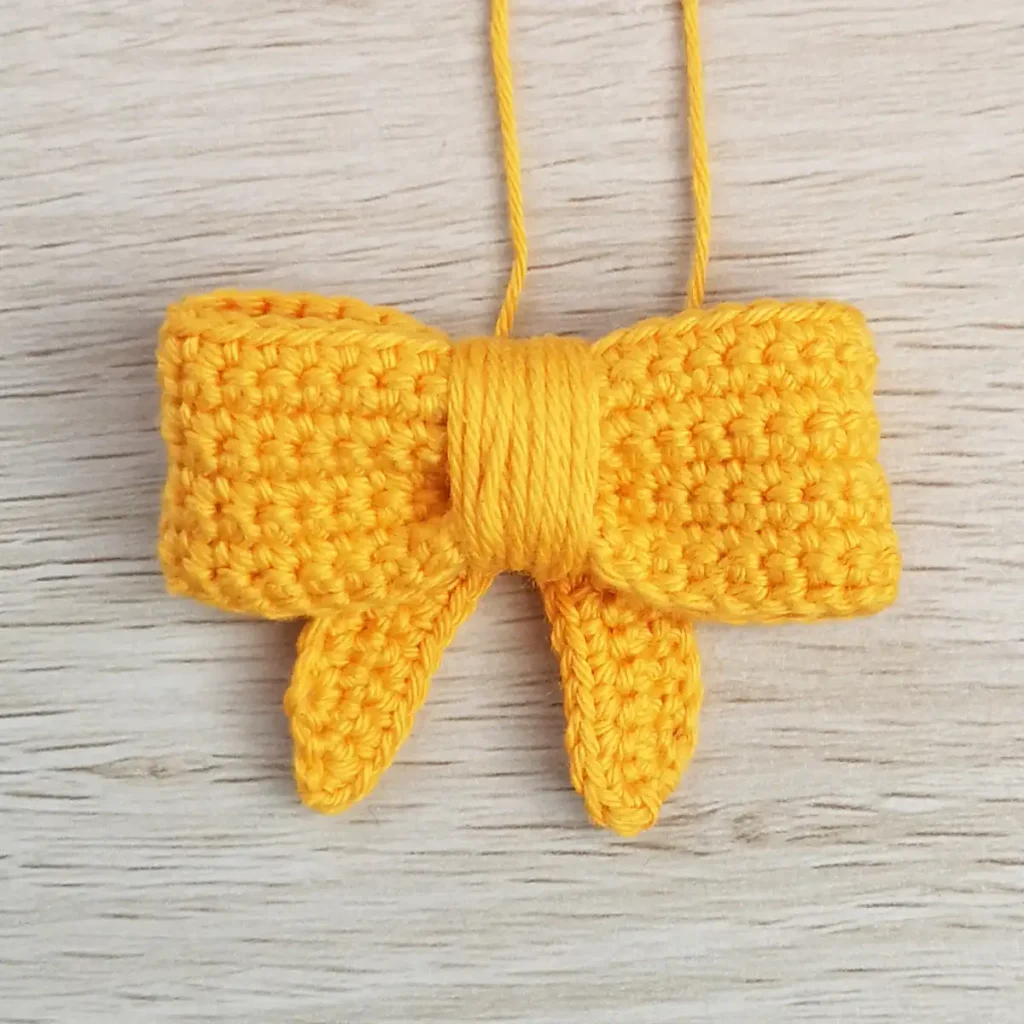
Bow (yellow)
R1: Ch 41, sc in second ch from hook and in each ch across (40)
R2-8: Ch 1, turn. [Sc] x40 (40) 7 rounds
Fasten off leaving a long tail for sewing.
Bow Ends (yellow)
R1: Ch 19, inc in second ch from hook, 7 sc, 2 sl st, 7 sc, inc in last ch (20)
R2: Ch 1, turn. Inc, 8 sc, sk the 2 sl sts, 8 sc, inc (20)
R3: Ch 1, turn. Inc, 9 sc, sl st in between the 2 sc from R2, 9 sc, inc (23)
Fasten off and weave in ends. Bend to accentuate the ‘V’ shape.
Bow Assembly
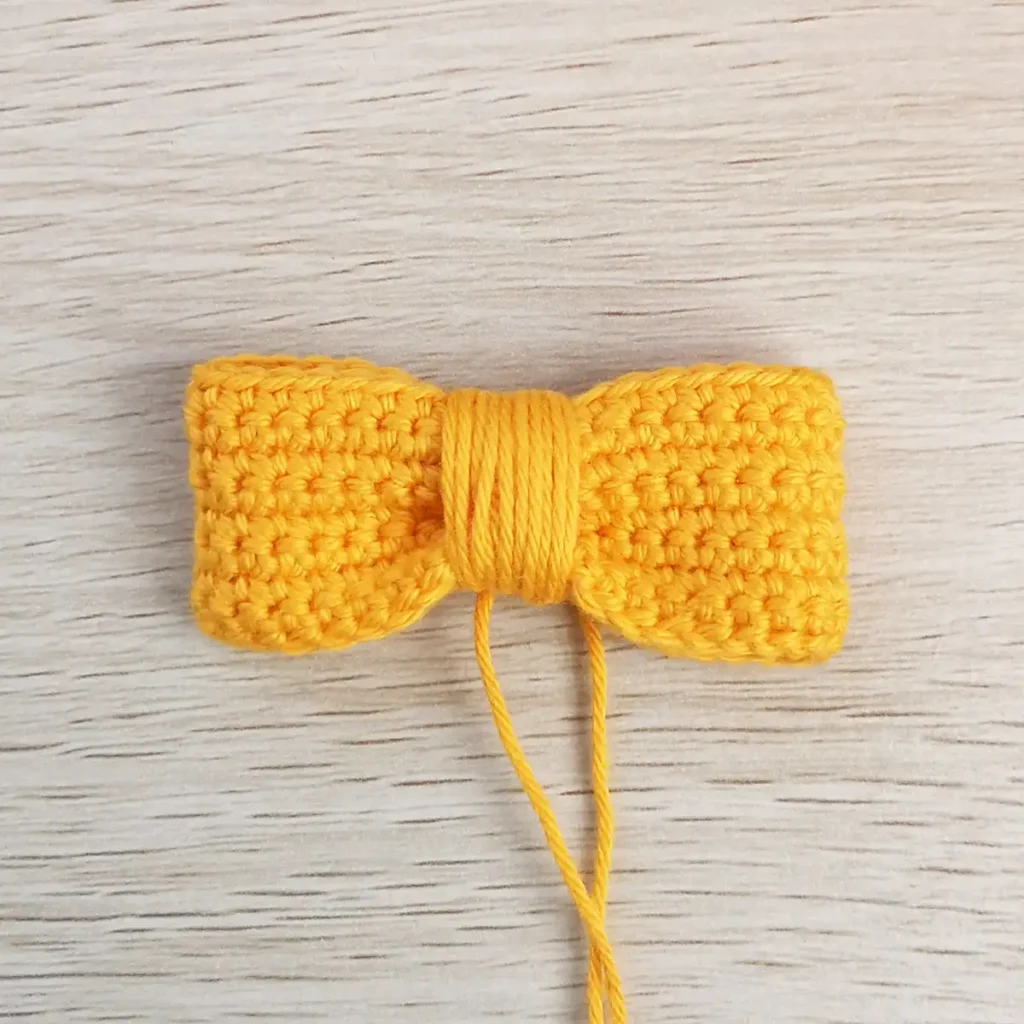
- Fold the short ends of the bow into the centre and sew together. Weave in ends.
- Pinch the bow in the centre and tie a long piece of yellow yarn (approximately 150cm) around it to hold in place.
- Wrap the tails around the middle of the bow approximately 18-20 times.
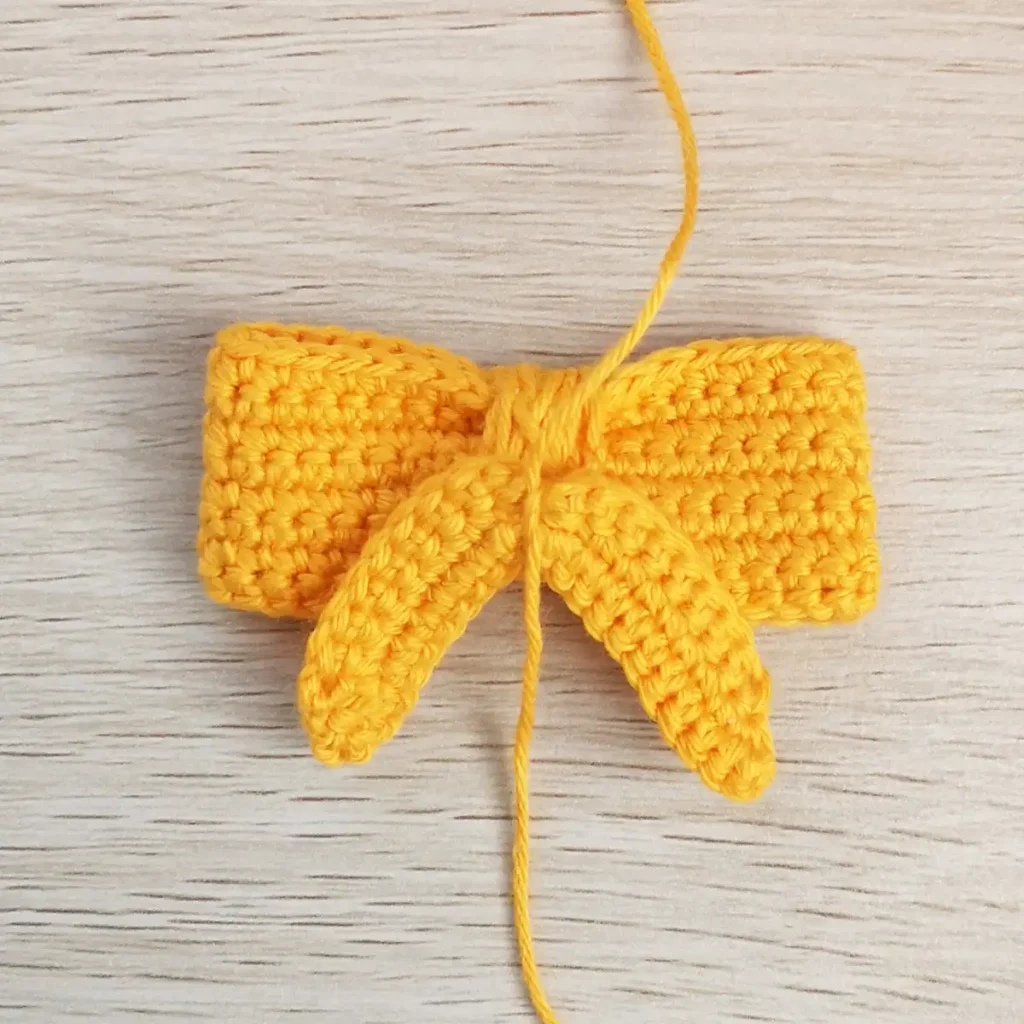
- With the back of the bow facing up, place the bow ends on top right side down and with the top edge in line with the centre of the bow. Tie in place with the long tails and wrap another couple of times around the middle of the bow to secure.
- Tie the ends in a knot at the back and leave them long for sewing.
Tie (yellow)
note
You may need more or less chains so adjust as necessary. The finished tie should fit snugly around the pot over R26.
Ch 65, hdc in third ch from hook and in each ch across (63)
Star (yellow)
R1: 5 hdc in magic ring, sl st to first hdc (5)
R2: [Ch 3, sl st in second ch from hook, sc in next ch, sl st in next hdc] x4, ch 3, sl st in second ch from hook, sc in next ch (5 points)
Fasten off invisibly to first ch of R2 leaving a long tail for sewing.
Peppermints (make 10-12 (or more if needed), starting with white)
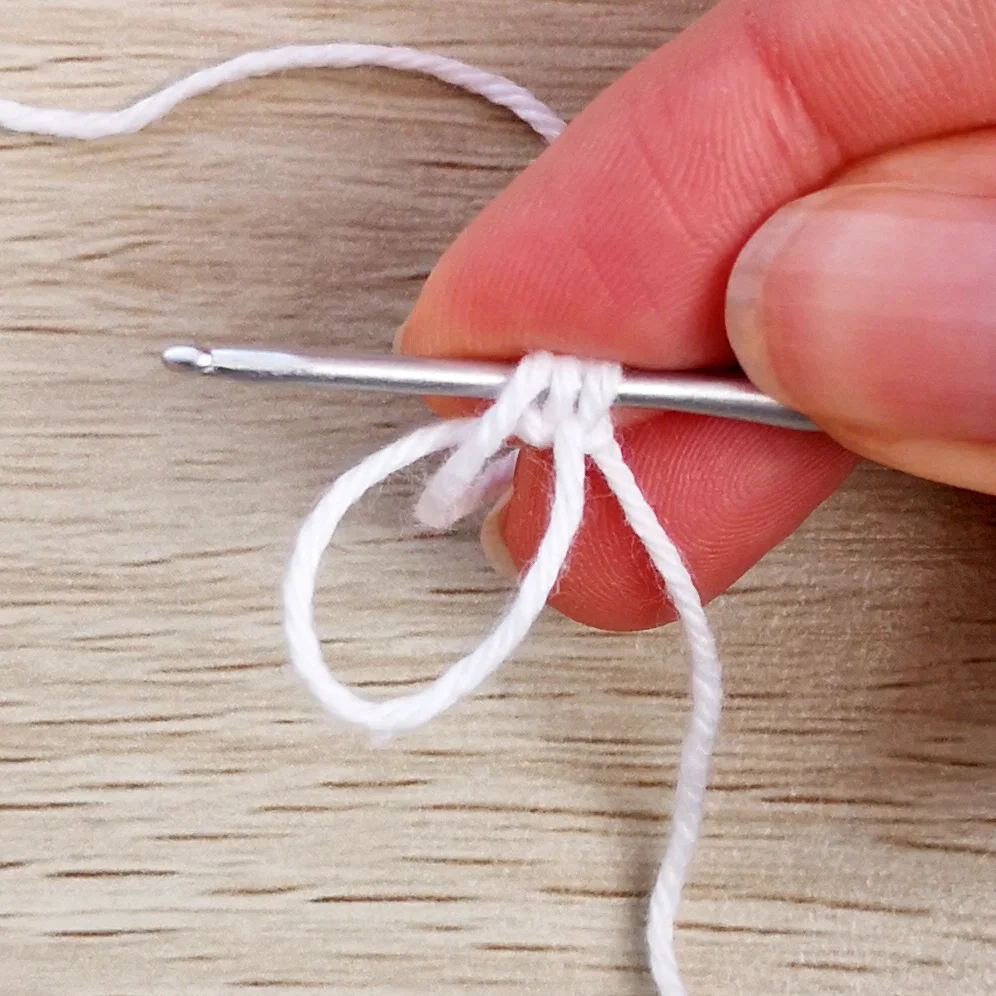
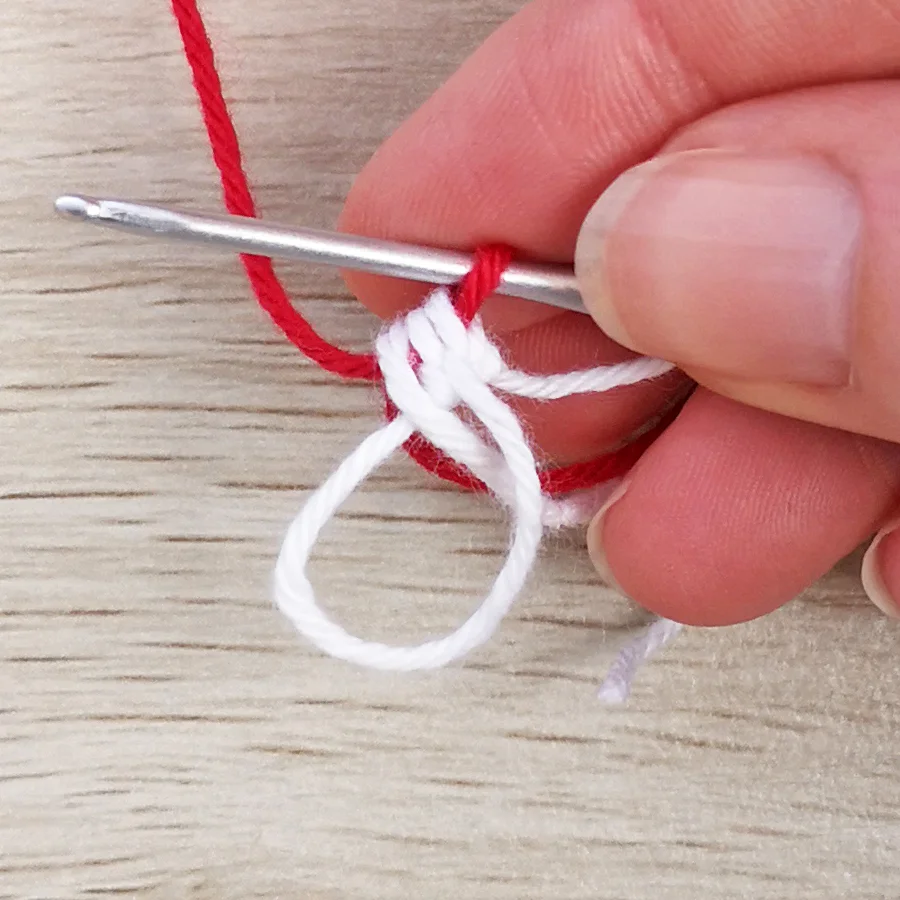
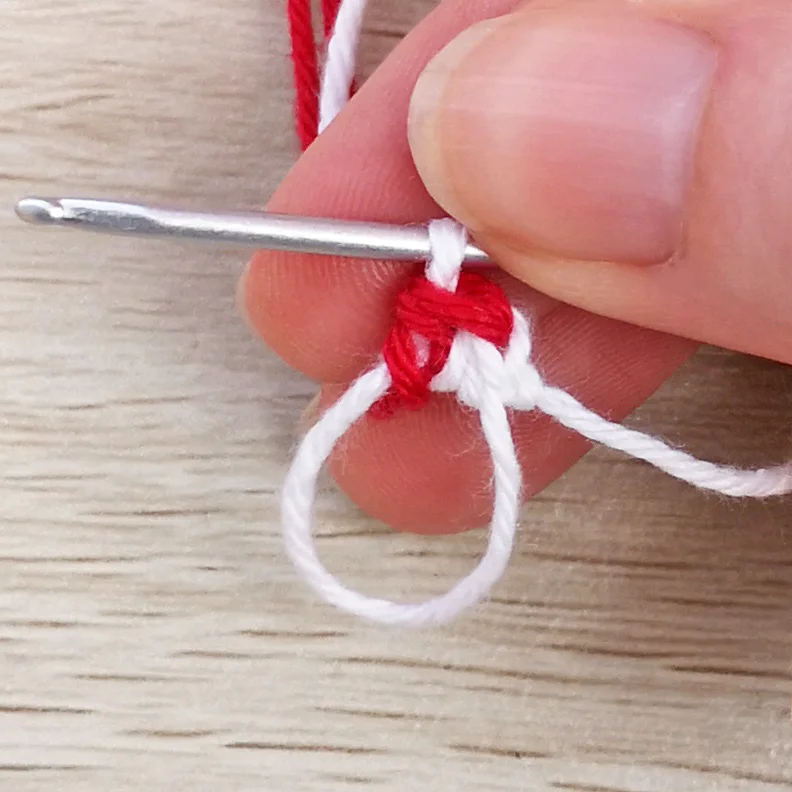
Each peppermint is made up of 10 hdc and you will be changing colours every st, ending with white on your hook. All colour changes take place in the last yarn over of the previous colour.
How to Change Colours:
- Yarn over and insert your hook into the magic ring.
- Yarn over and pull up a loop, 3 loops on hook.
- Drop your working yarn and pick up the new colour.
- Draw the new colour through all 3 loops on your hook to finish the stitch.
So, you will work 1 white hdc, 1 red hdc, 1 white hdc, 1 red hdc, etc.
R1: 10 hdc in magic ring (10)
Fasten off invisibly to first hdc and weave in ends.
Finishing Details
- Pin the peppermints to the tree in your desired placement and use more pins to mark out where you want to place your French knots.
- Using fingering weight glitter yarn or gold embroidery floss, make your French knots. Alternatively, instead of French knots you could use sequins, beads or small buttons.
- Glue the peppermints in place.
- Wrap the tie around the pot over R26 with the ends meeting at the centre front (the top edge of the tie should sit 2 rounds down from the top of the pot). Sew the ends together and weave in ends.
- Centre the bow over the tie covering the join and sew in place.
- Sew the star to the front of the tip of the tree between R43 and R44, in line with the bow.
not ready to make this yet?
Pin this post for later
Explore More Crochet Patterns
After you crochet this Christmas tree, here are some more crochet patterns to try:
What’s Next?
Have questions? Join the Facebook group!
We hope you enjoyed this pattern. Come and hang out with me in the Stitch by Fay Community Facebook group. We created this space for you to share pictures, ask questions and support each other.

This pattern is for personal use only and may not be copied, reproduced, altered, published or distributed in any format (including video). If you wish to share this pattern, you may link to this pattern but please do not reprint it on your site.
You can sell finished products made from this pattern in small quantities. Do NOT use our photos as your sale photos.