

Crochet Chick Pencil Topper Pattern
Add a little springtime cheer to your stationery with this quick and adorable crochet chick pencil topper!
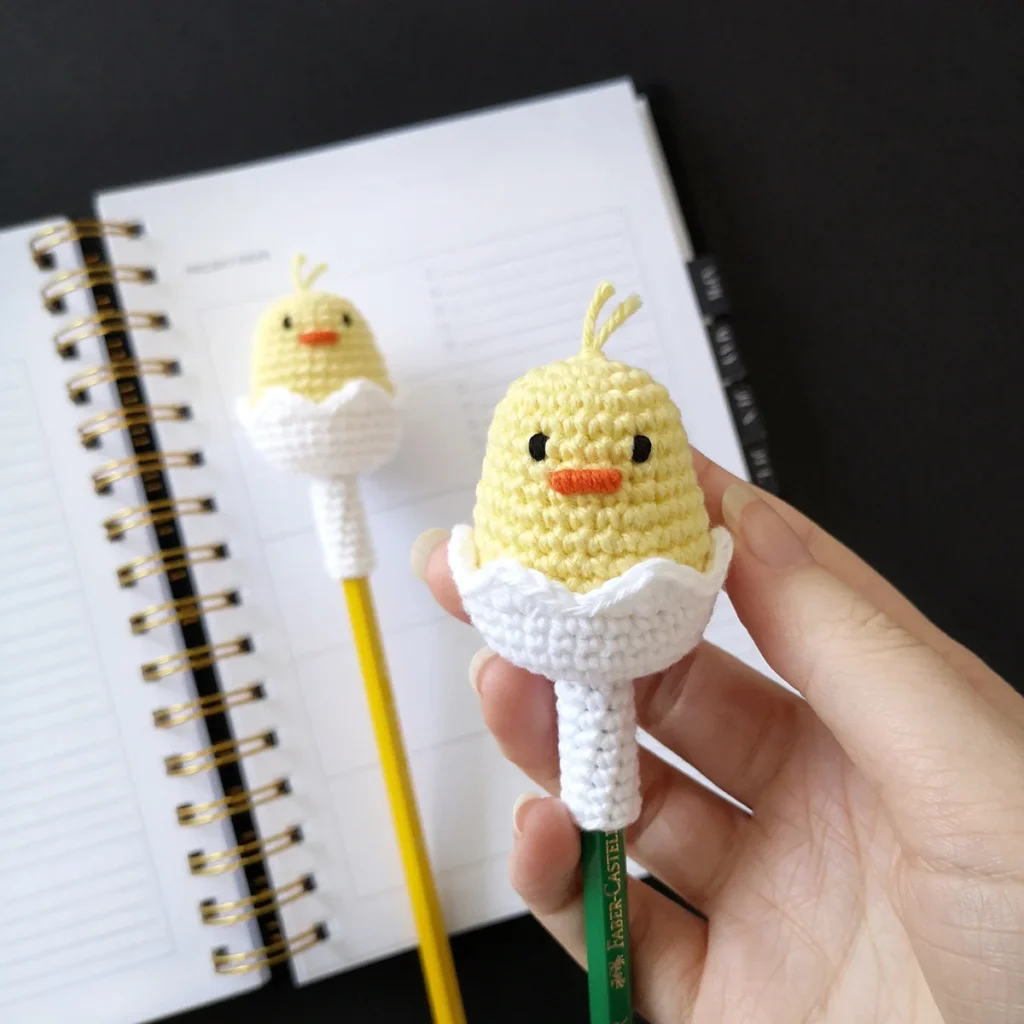
This crochet chick pencil topper is a super fun mini project that you can work up in a jiffy. Whether you’re stuffing Easter baskets or just want to brighten up your desk, this little chick is here to peep some joy into your day!
Easy Crochet Chick
This crochet chick pencil topper consists of two pieces, the shell and the chick.
The pencil stem is worked off the base of the shell using a round of leftover front loops. Keep trying it on your pencil as you go to ensure a good fit.
Avoid over-stuffing the chick so the pencil topper isn’t too top heavy and finish with a few simple embroidered details to really up the cute factor.
You can sew the chick to the shell if desired but I chose not to for an interactive experience.

Why You’ll Love This Crochet Chick Pencil Topper Pattern
More Crochet Patterns
If you love this crochet chick pencil topper pattern, you might also like to check out these other chick patterns:


Crochet Chick Pencil Topper Pattern
Grab the free downloadable PDF from the freebie library. The ad-free PDF includes detailed instructions and photos as well as easy print pages.
Freebie Library
Join our newsletter to gain access to exclusive freebies and keep up to date.
Already a member? Login here.
Materials
- DK weight yarn in yellow, white and a small amount of orange (I used Paintbox Yarns Cotton DK in Buttercup Yellow, Paper White and Blood Orange)
- 2.5mm crochet hook
- Black embroidery floss
- Polyester fiberfill
- Stitch marker, yarn needle, scissors
Abbreviations (US Terms)
- ch – chain
- sc – single crochet
- inc – increase
- invdec – invisible decrease
- BLO – back loop only
- hdc – half double crochet
- dc – double crochet
- sl st – slip stitch
- st/s – stitch/es
- […] – repeat the instructions in brackets
- (…) – all stitches are worked in the same space
- (…) – indicates stitch count at end of round
Useful Links
Finished Size
The finished pencil topper measures approximately 3.25” (8.5cm) long. Size may vary depending on tension and materials used.
Gauge
Gauge = 1.25” after R4 of the shell.
After completing 4 rounds of the stem, try it on your pencil. The fit should be snug but still easy to get on and off. If it is too big or too small adjust your hook size accordingly and try again.
Notes
- Pieces are worked in a continuous spiral starting with a magic ring unless otherwise specified. Mark the first stitch of each round with a removable stitch marker.
Pattern Instructions
Shell (white)
R1: 8 sc in magic ring (8)
R2: BLO [inc] x8 (16)
R3: [Sc, inc] x8 (24)
R4: [3 sc, inc] x6 (30)
R5-7: [Sc] x30 (30) 3 rounds
R8: [Sc, (hdc, dc, hdc) in same st, sc, 2 sl st] x5, sc, (hdc, dc, hdc) in same st, sc, sl st
Skip last st and fasten off invisibly to first sc. Weave in end.
Pencil Stem
Insert hook in first leftover front loop from R2 of the shell and pull up a loop of white yarn.
R1: Ch 1, sc in same st and in each st around (8)
R2-8: [Sc] x8 (8) 7 rounds
Fasten off invisibly and weave in end.
Chick (yellow)
R1: 6 sc in magic ring (6)
R2: [Inc] x6 (12)
R3: [Sc, inc] x6 (18)
R4: Sc, inc, [2 sc, inc] x5, sc (24)
R5-8: [Sc] x24 (24) 4 rounds
R9: [3 sc, inc] x6 (30)
R10-13: [Sc] x30 (30) 4 rounds
R14: [3 sc, invdec] x6 (24)
R15: Sc, invdec, [2 sc, invdec] x5, sc (18)
Start stuffing and continue to stuff as you go. Avoid over-stuffing.
R16: [Sc, invdec] x6 (12)
R17: [Invdec] x6 (6)
Cut the yarn leaving a tail and pull through last st. Weave the yarn tail through the front loop only of the final round and pull to close. Hide the end inside the chick.
Finishing
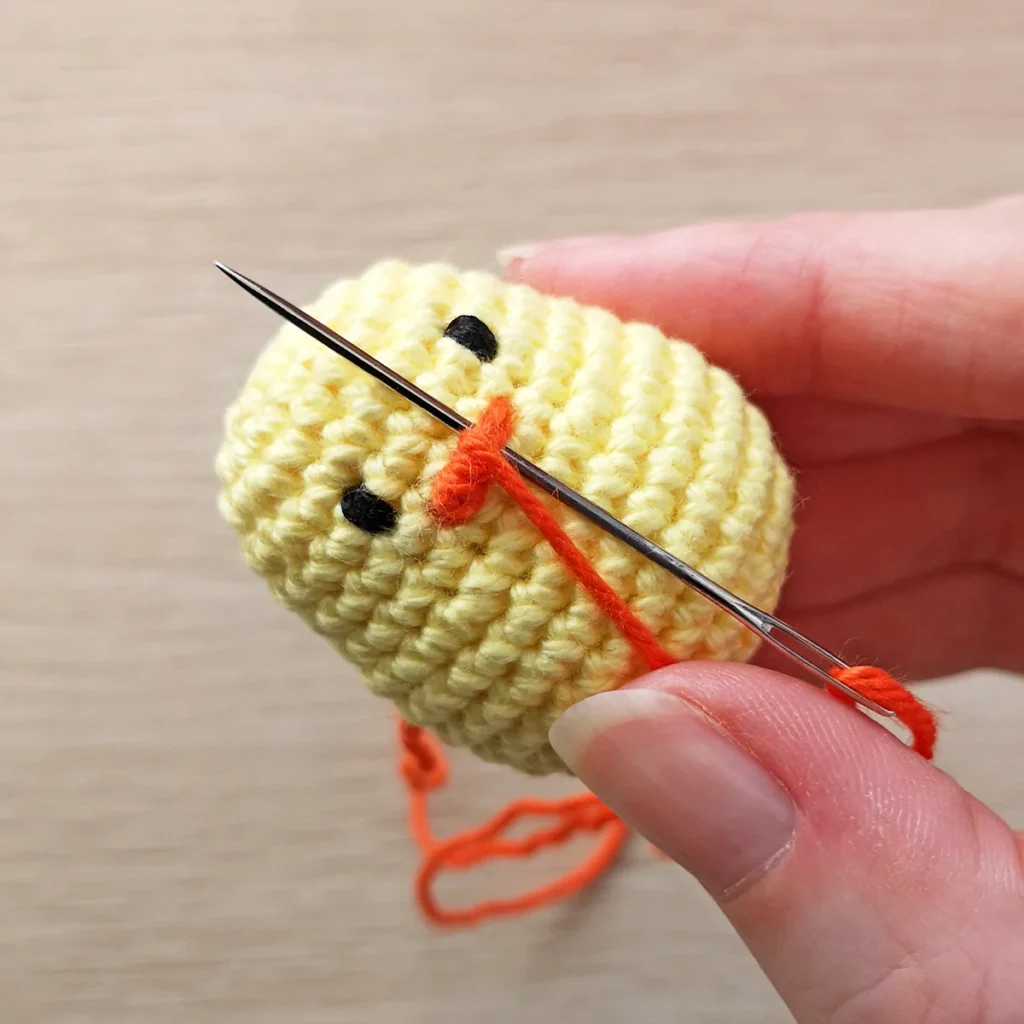
- Using a single strand of black embroidery floss doubled, sew eyes over a single st on R6 3 sts apart. Go over each eye until you get your desired look (approx. 6-8 times).
- Using orange yarn, sew beak centred below the eyes between R8 and R9 spanning over 2 sts. Make 2 horizontal sts and wrap yarn evenly along the length by going over and under the 2 horizontal sts.

- Take a strand of yellow yarn, fold in half and draw through a st on the top of the head leaving a loop. Draw ends through the loop and pull to tighten. Trim the ends to your desired length (approx. 1/2”).
- Place chick inside shell. Optional: using white yarn, sew the shell to the chick. Weave in ends.
not ready to make this yet?
Pin this post for later

Explore More Crochet Patterns
After you crochet this chick pencil topper, here are some more crochet patterns to try:
What’s Next?
Have questions? Join the Facebook group!
We hope you enjoyed this pattern. Come and hang out with me in the Stitch by Fay Community Facebook group. We created this space for you to share pictures, ask questions and support each other.

This pattern is for personal use only and may not be copied, reproduced, altered, published or distributed in any format (including video). If you wish to share this pattern, you may link to this pattern but please do not reprint it on your site.
You can sell finished products made from this pattern in small quantities. Do NOT use our photos as your sale photos.