

How to Crochet Surface Slip Stitch Tutorial
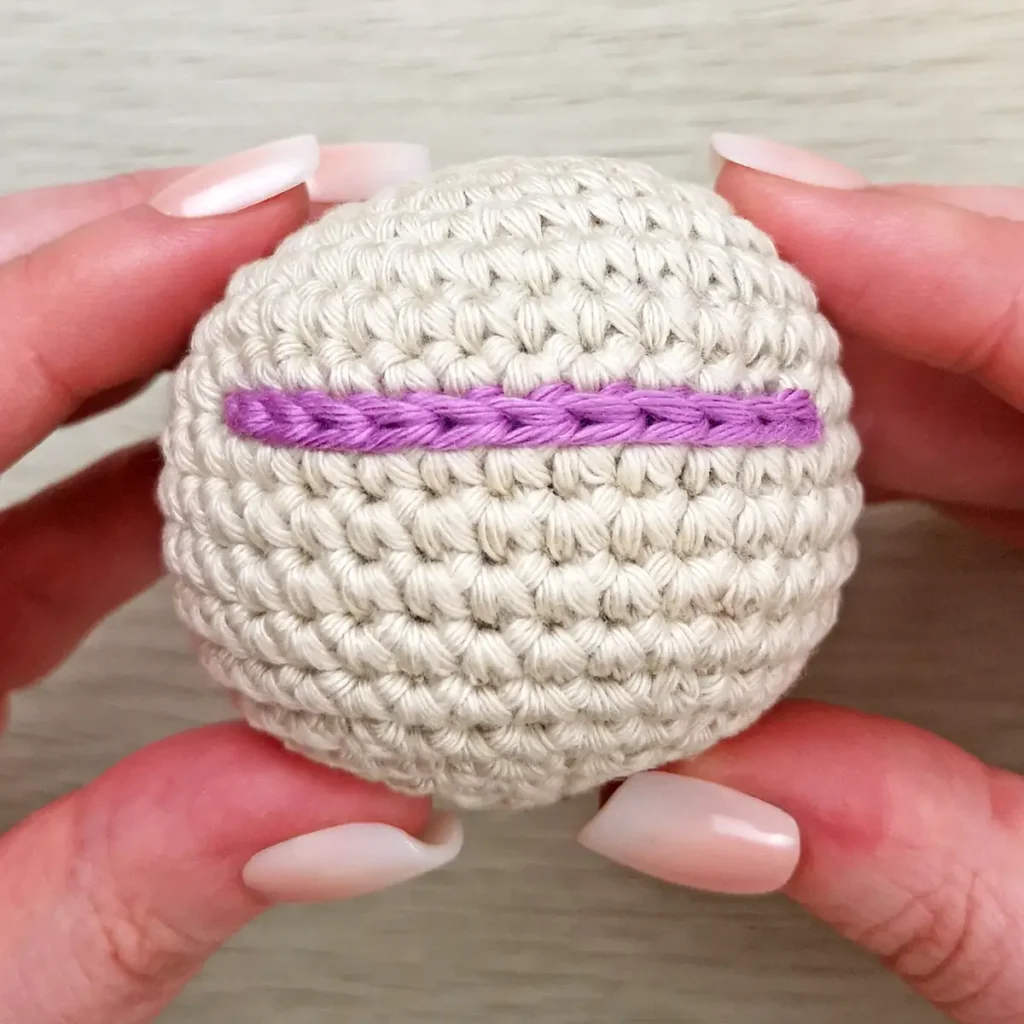
The crochet surface slip stitch is a technique used to add additional details to the surface of a crochet project.
In this tutorial, I’ll show you how to work the crochet surface slip stitch on both flat projects and amigurumi, as well as how to fasten off when you’re finished.
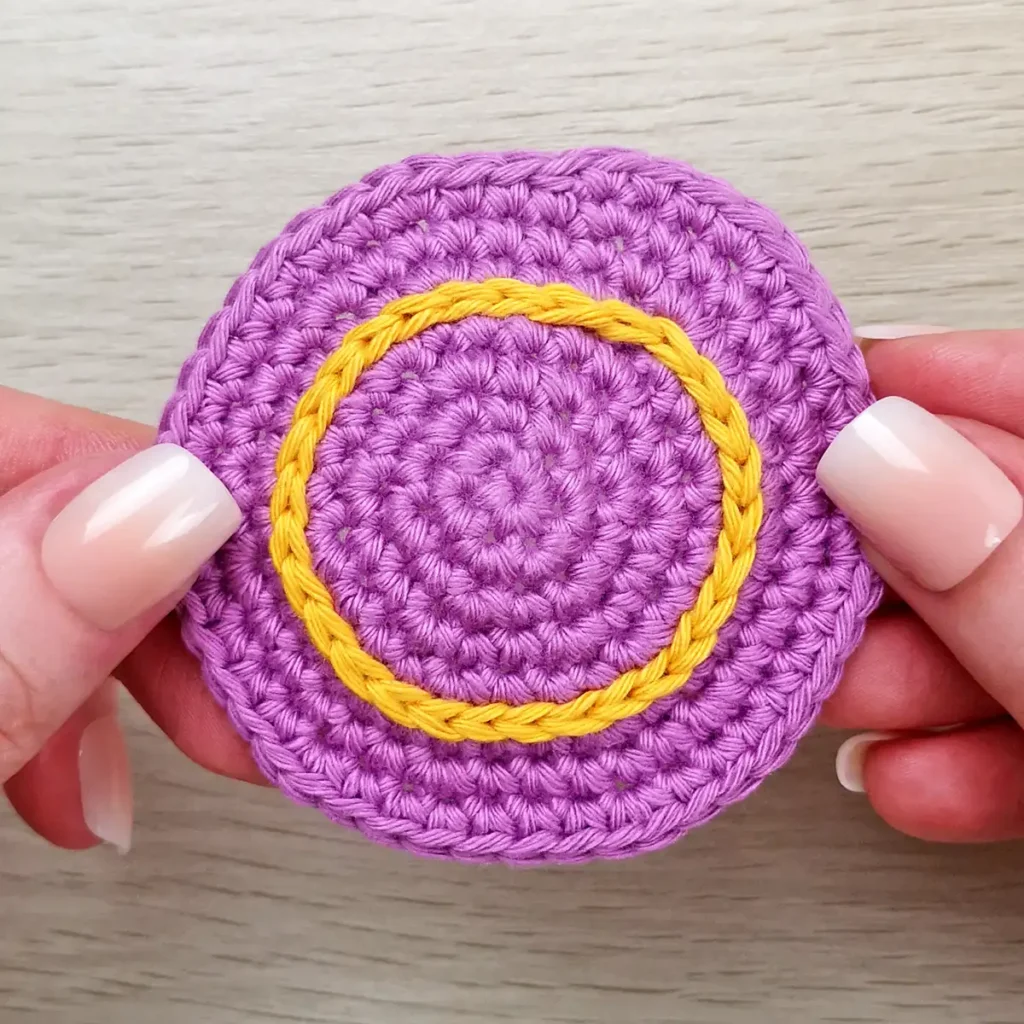
What is the Crochet Surface Slip Stitch?
The crochet surface slip stitch is worked directly onto the surface of your crochet fabric. Instead of working into the top loops of a stitch as you normally would, you insert your hook into the fabric, pull up a loop of yarn and draw it through the loop already on your hook.
This creates a line of slip stitches across the surface of your work.
You can work in straight lines, curves or simple shapes, making it a versatile technique for adding decorative details to both flat crochet projects and amigurumi.
How to Use the Crochet Surface Slip Stitch for Amigurumi
Surface slip stitch is a handy technique for adding simple details to amigurumi. It’s particularly useful for smaller projects, where you want to add detail, but sewing on tiny pieces can be fiddly or add unnecessary bulk.
I use this technique to add decorative details to my projects, including this lollipop ornament, jack o’ lantern coaster and angel ornament.
More Tutorials
If you love this crochet surface slip stitch tutorial, you might also like to check out these other tutorials:
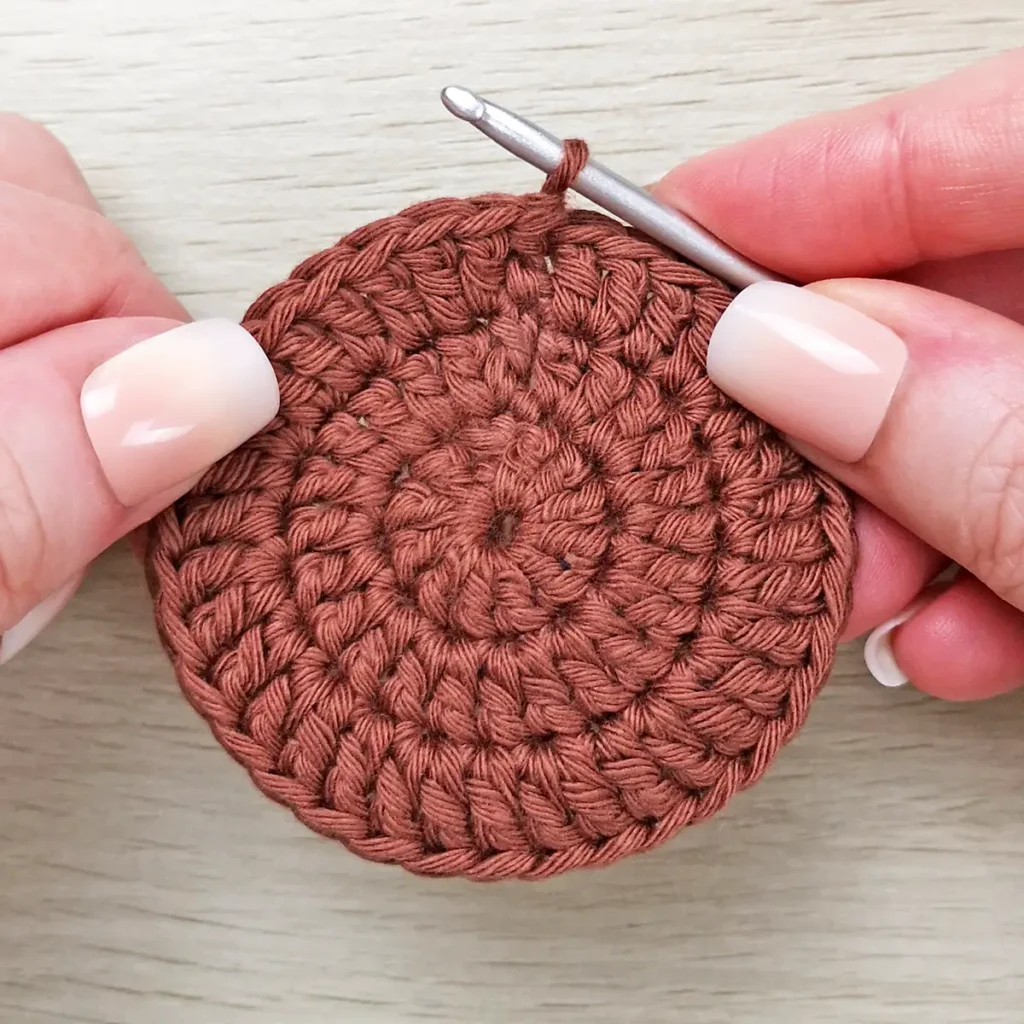
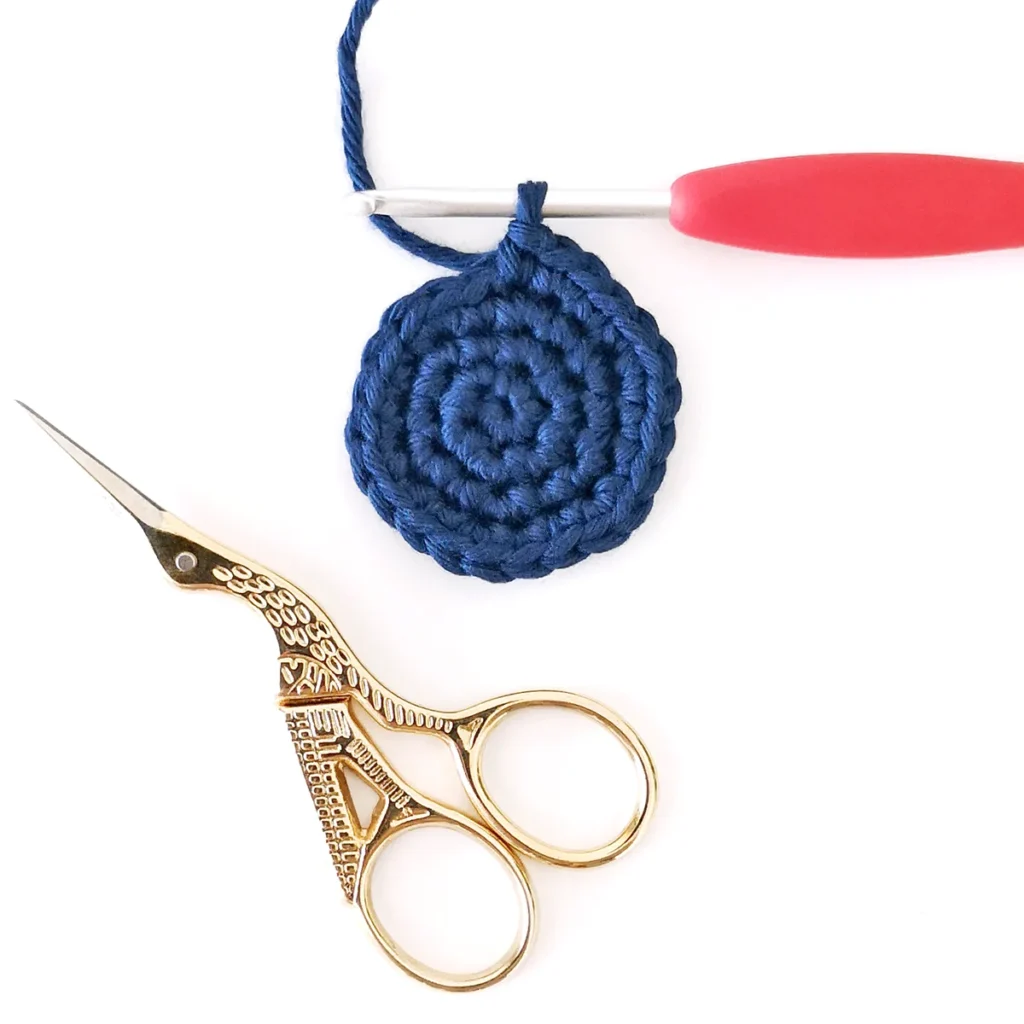
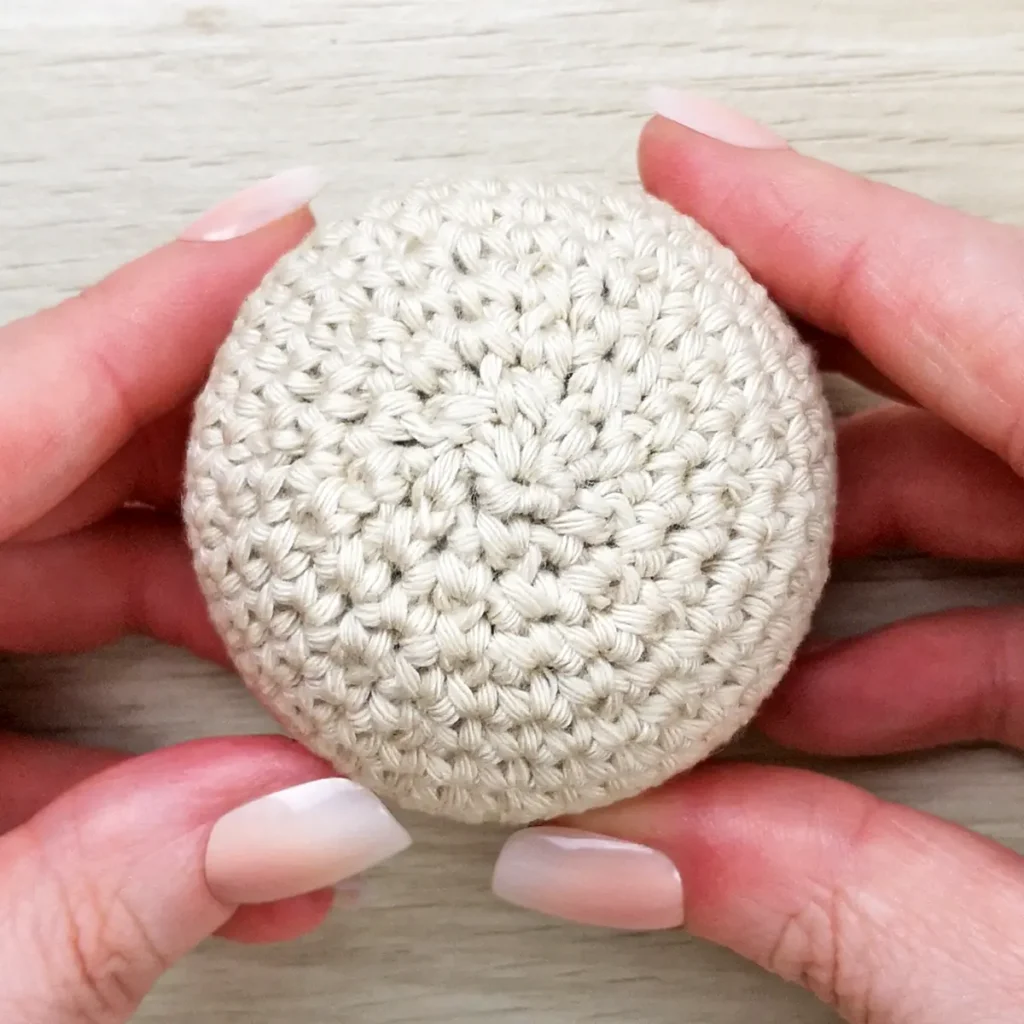
Step-by-Step Instructions
How to Crochet Surface Slip Stitch on a Flat or Open Piece
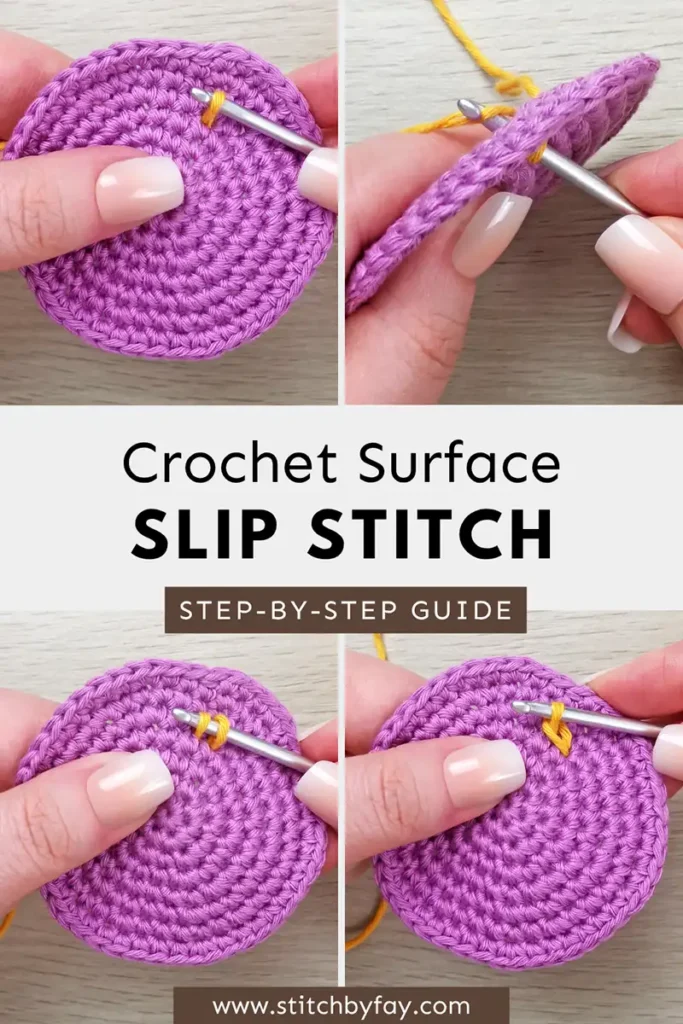
1. Decide where your want your surface slip stitches to start. Insert your hook from the front of your crochet fabric to the back.
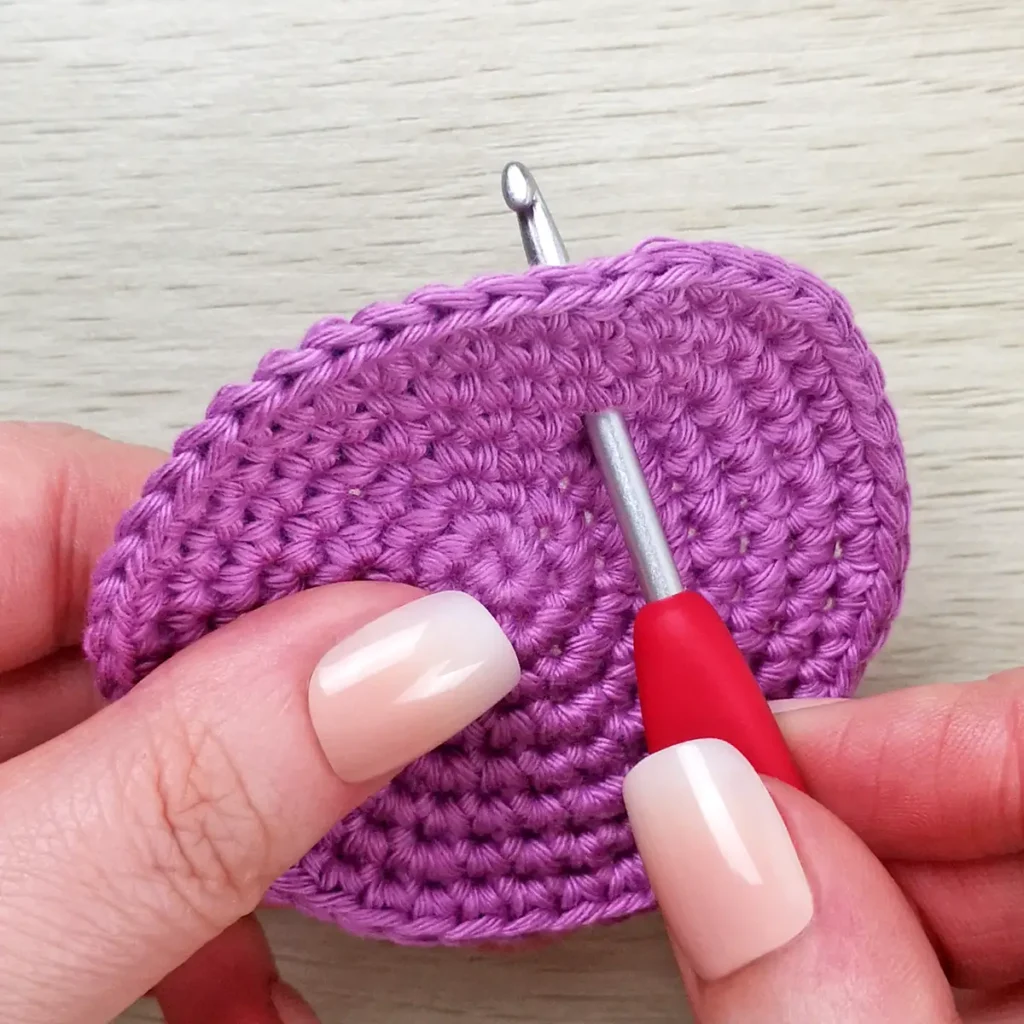
2. Place yarn over your hook and pull through your work.
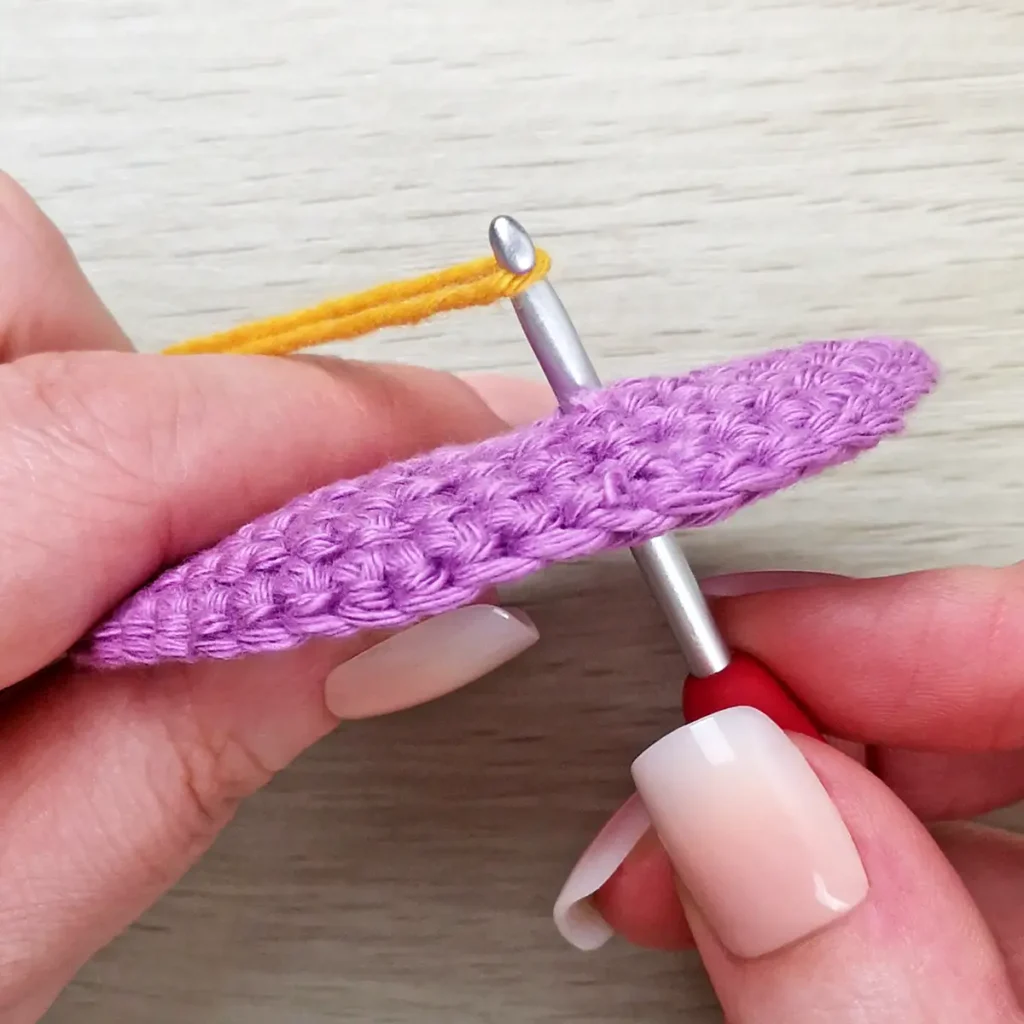
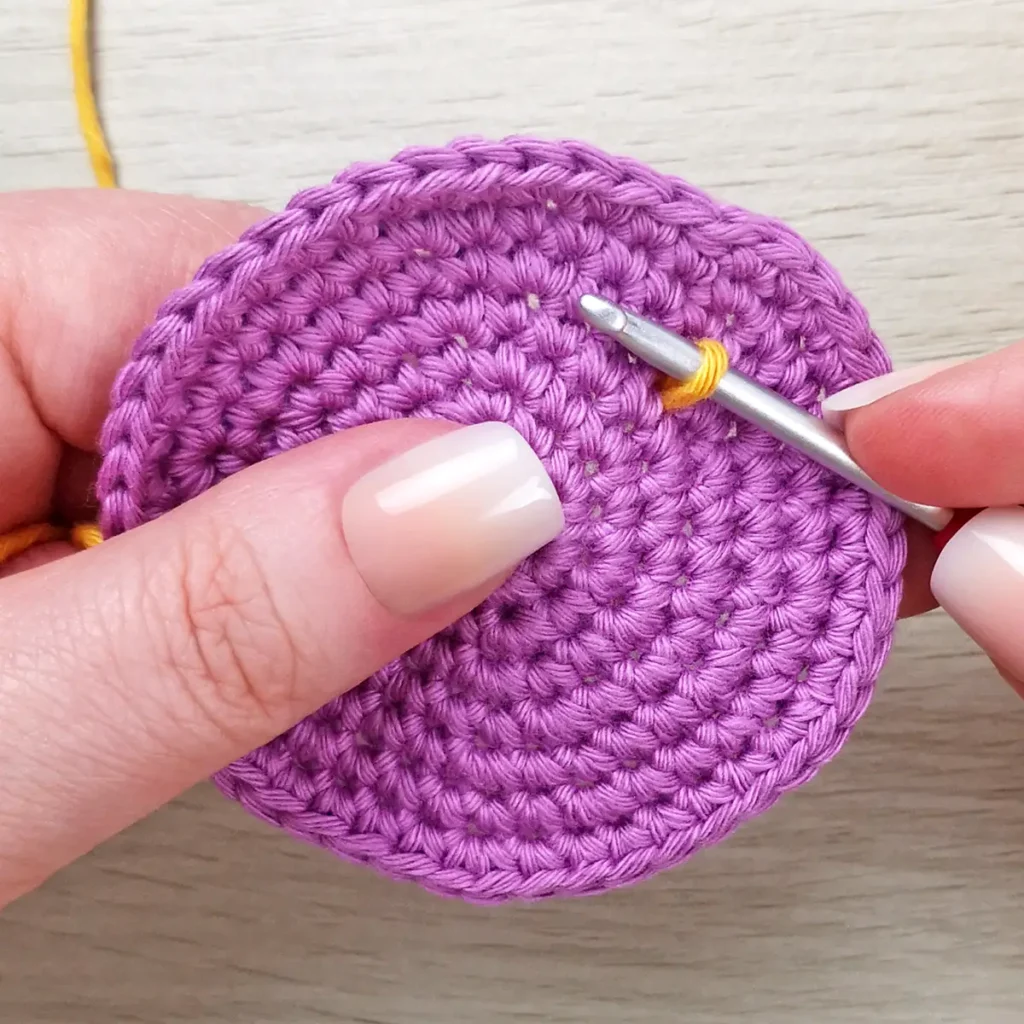
3. Insert your hook into the next stitch from front to back.
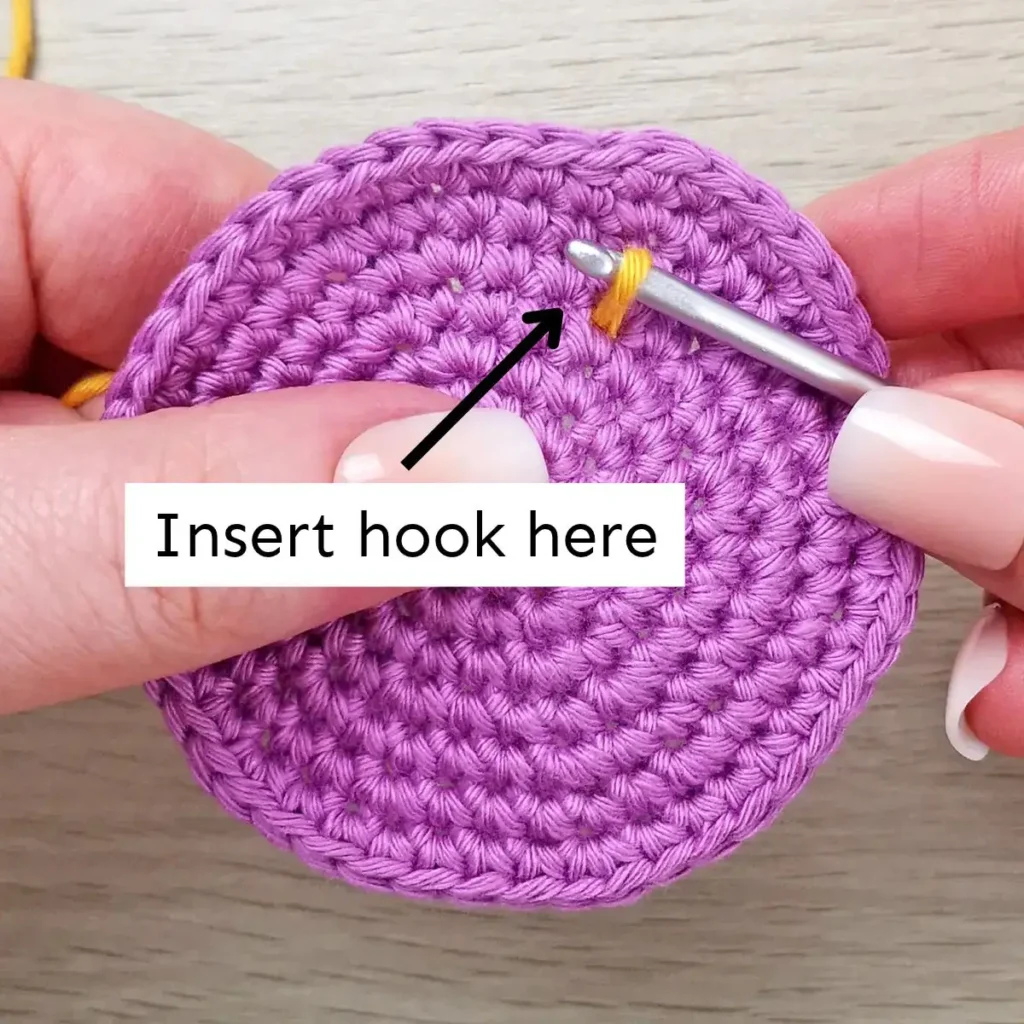
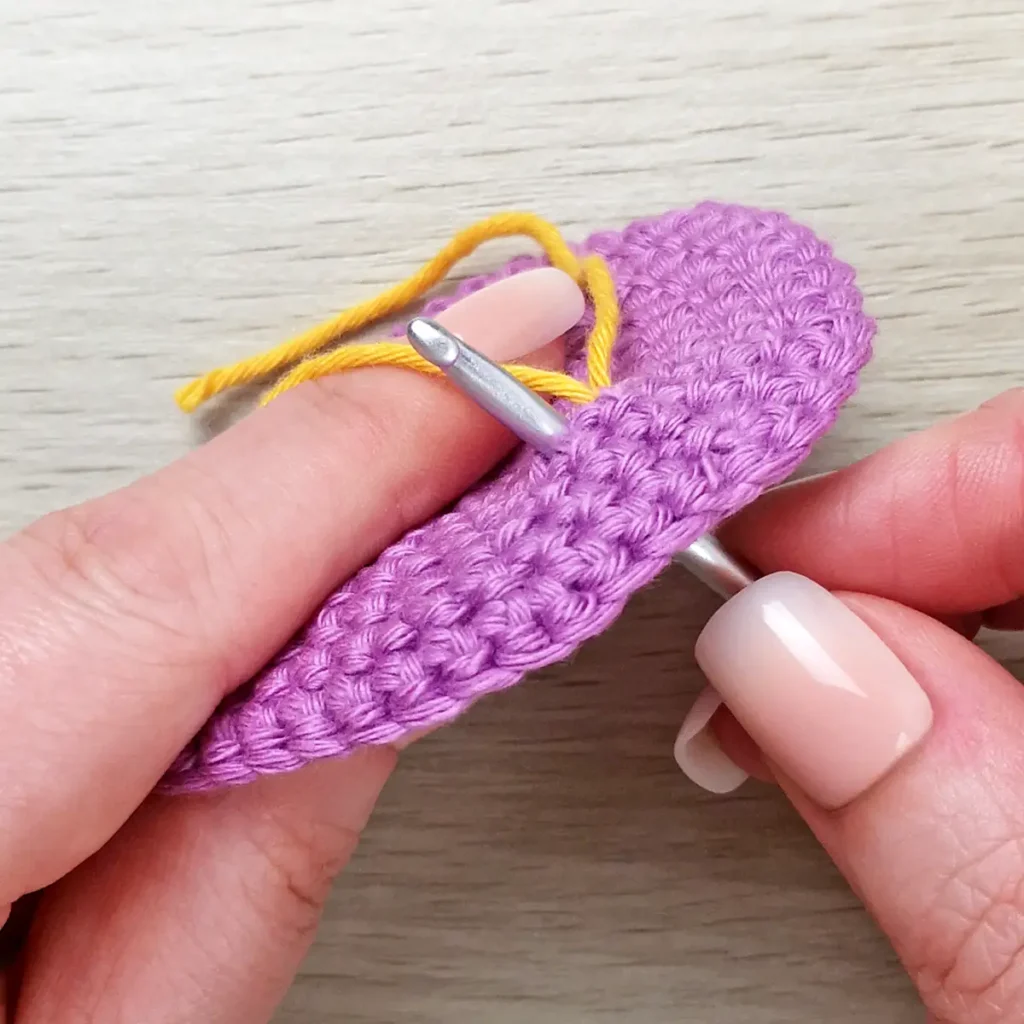
4. Yarn over and pull through your work, then the loop on your hook to complete the stitch.
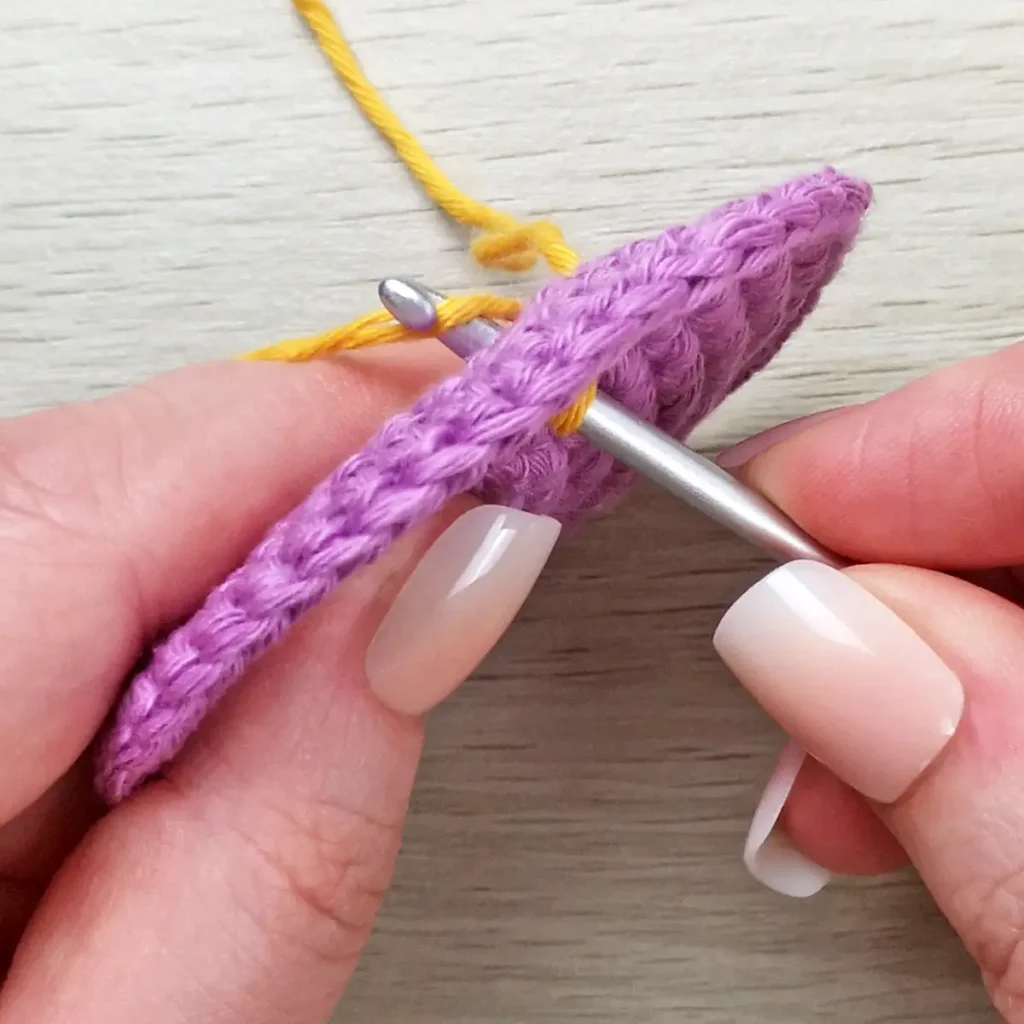
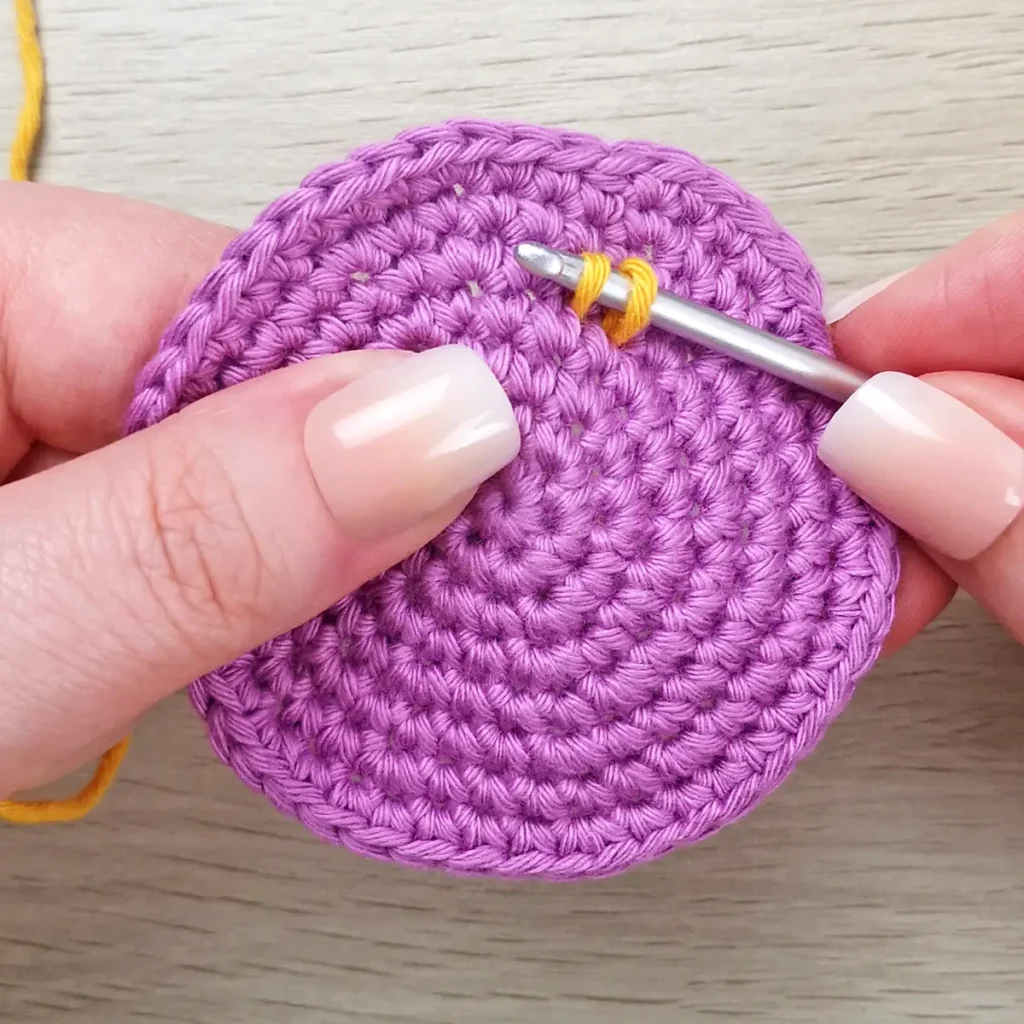
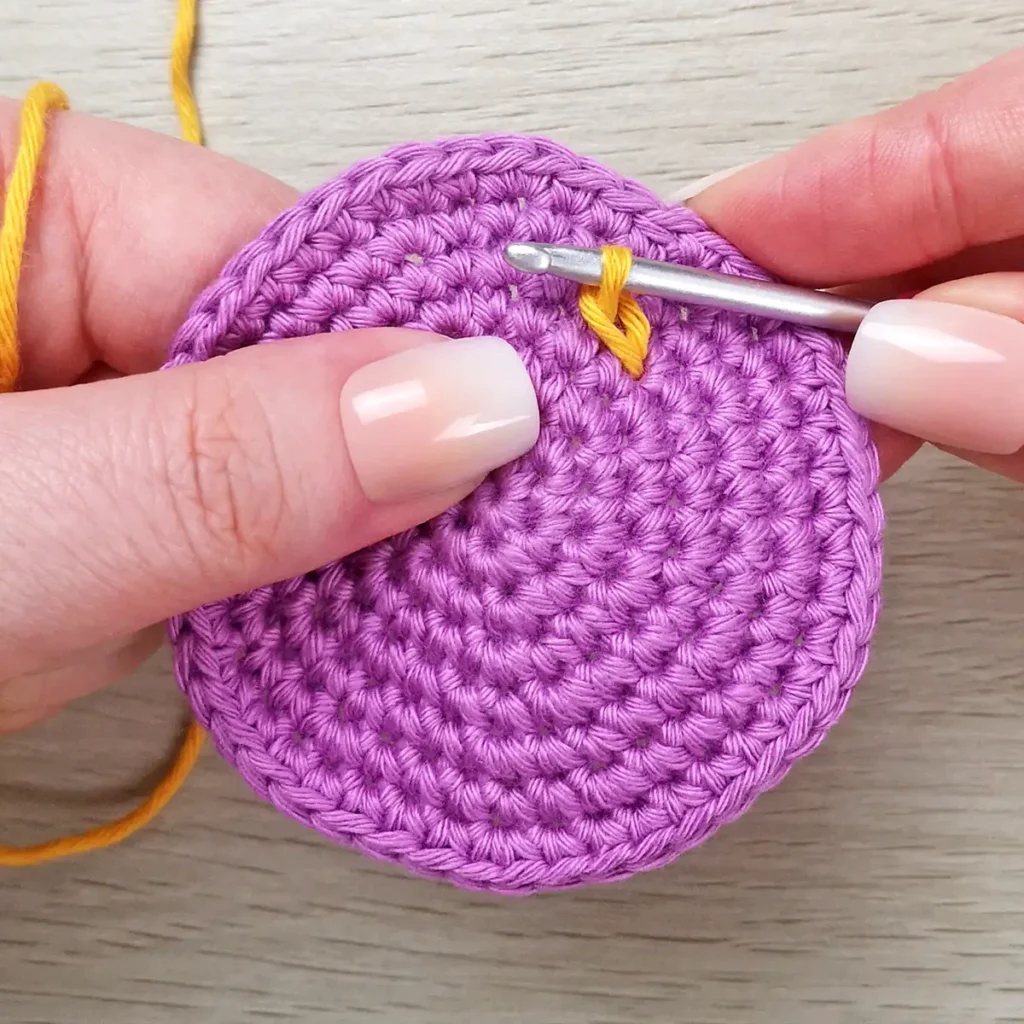
5. Keep working surface slip stitches by repeating steps 3 and 4.
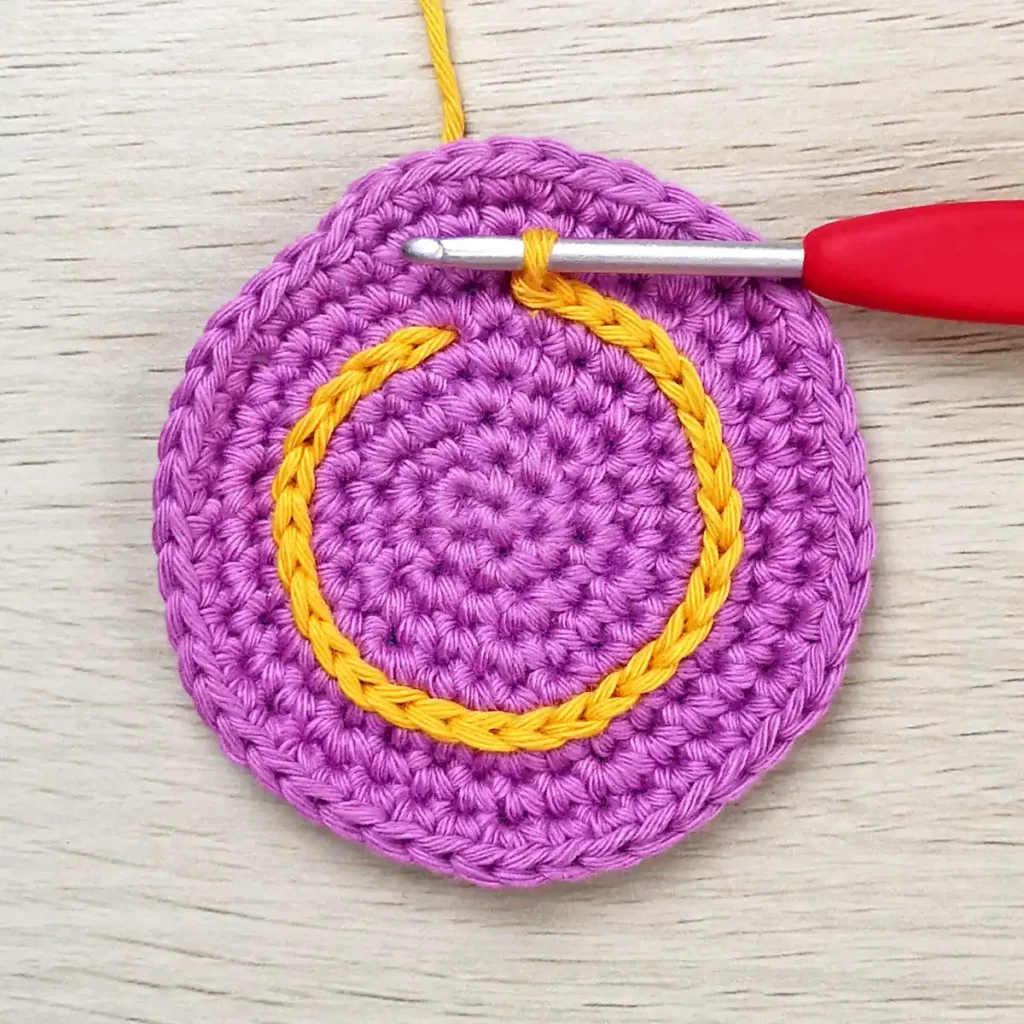
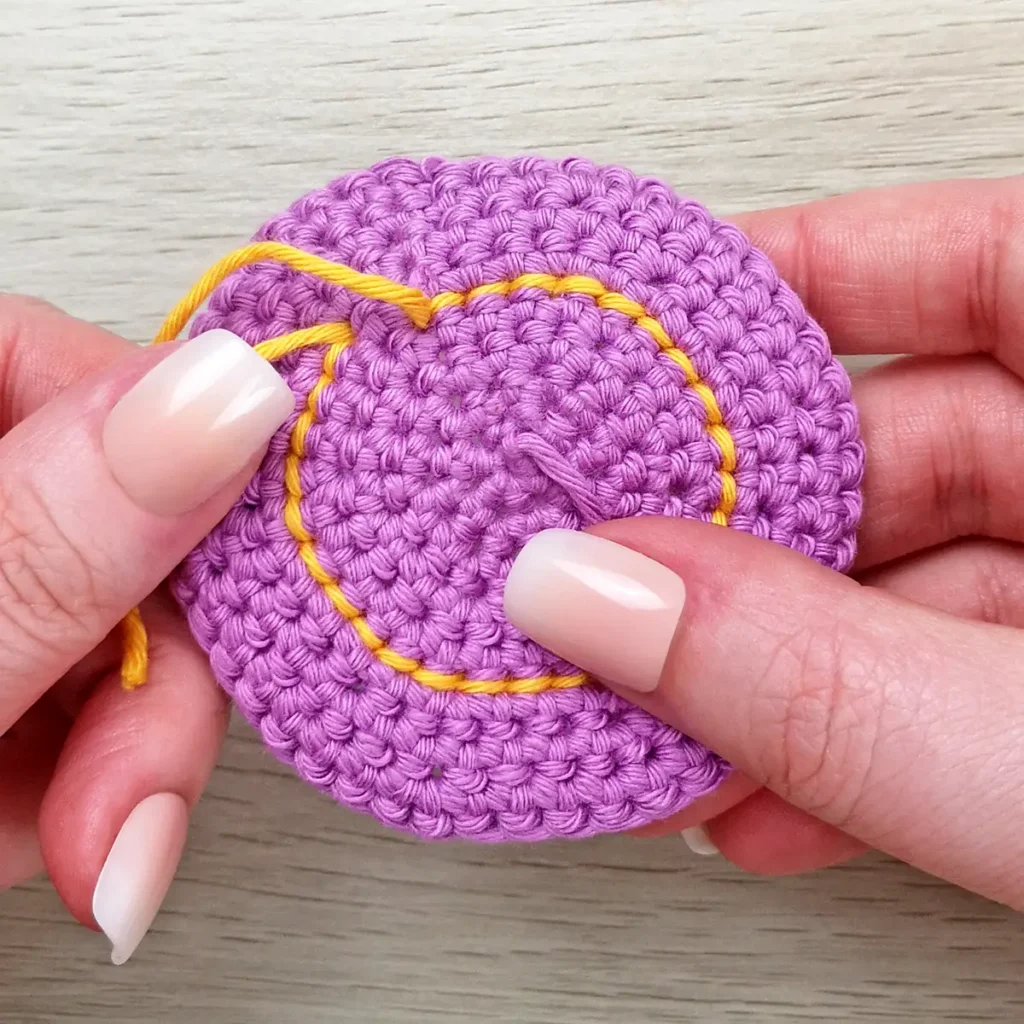
How to Crochet Surface Slip Stitch on a Closed or Stuffed Piece
1. Decide where your want your surface slip stitches to start. Insert your hook through a stitch on the front of your crochet piece.
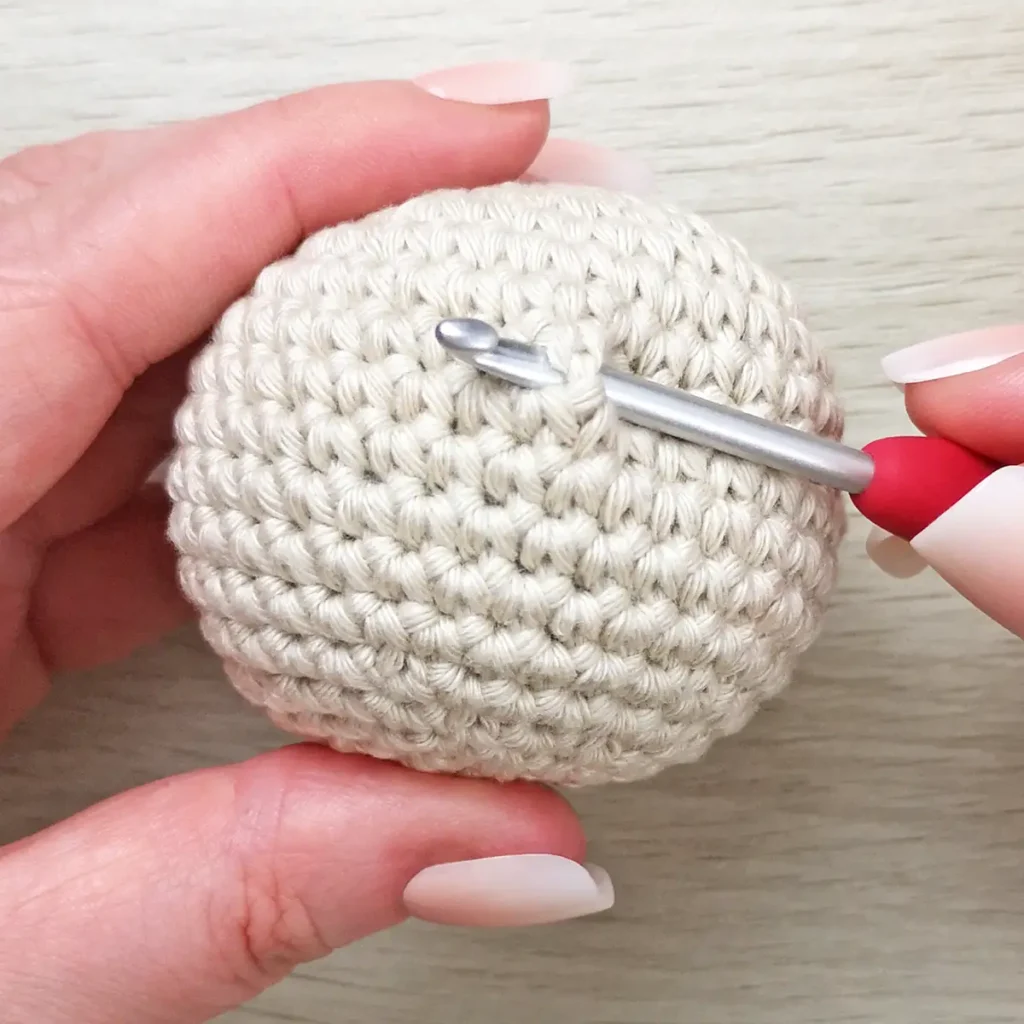
2. Place yarn over your hook and pull through the stitch.
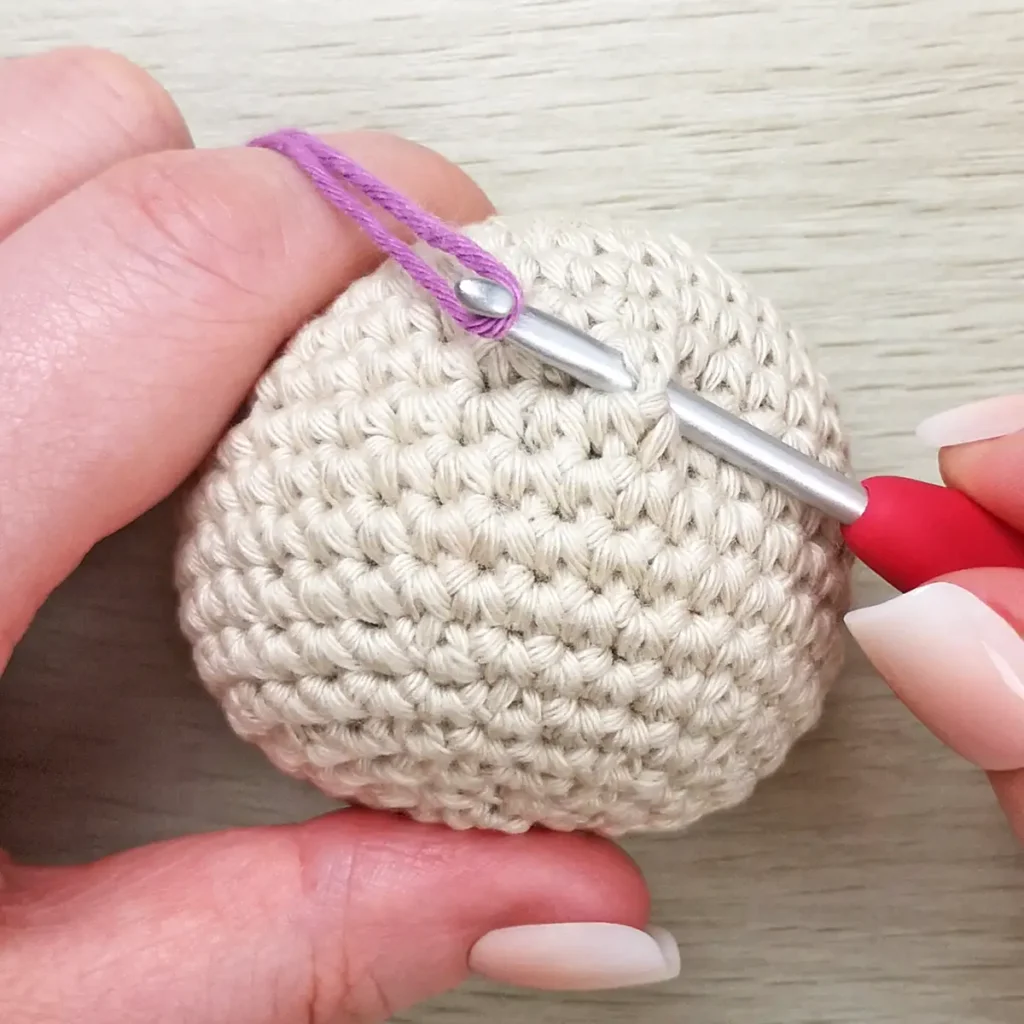
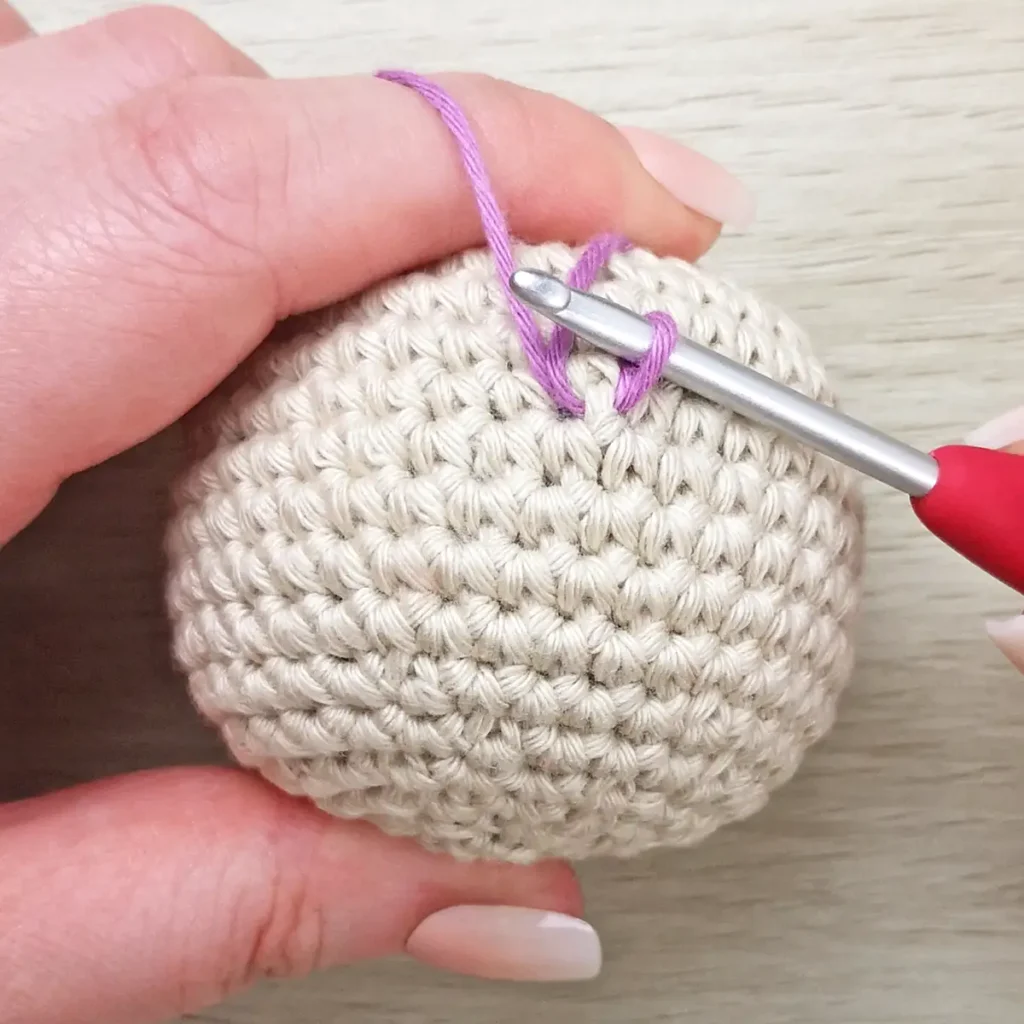
3. Insert your hook through the next stitch.
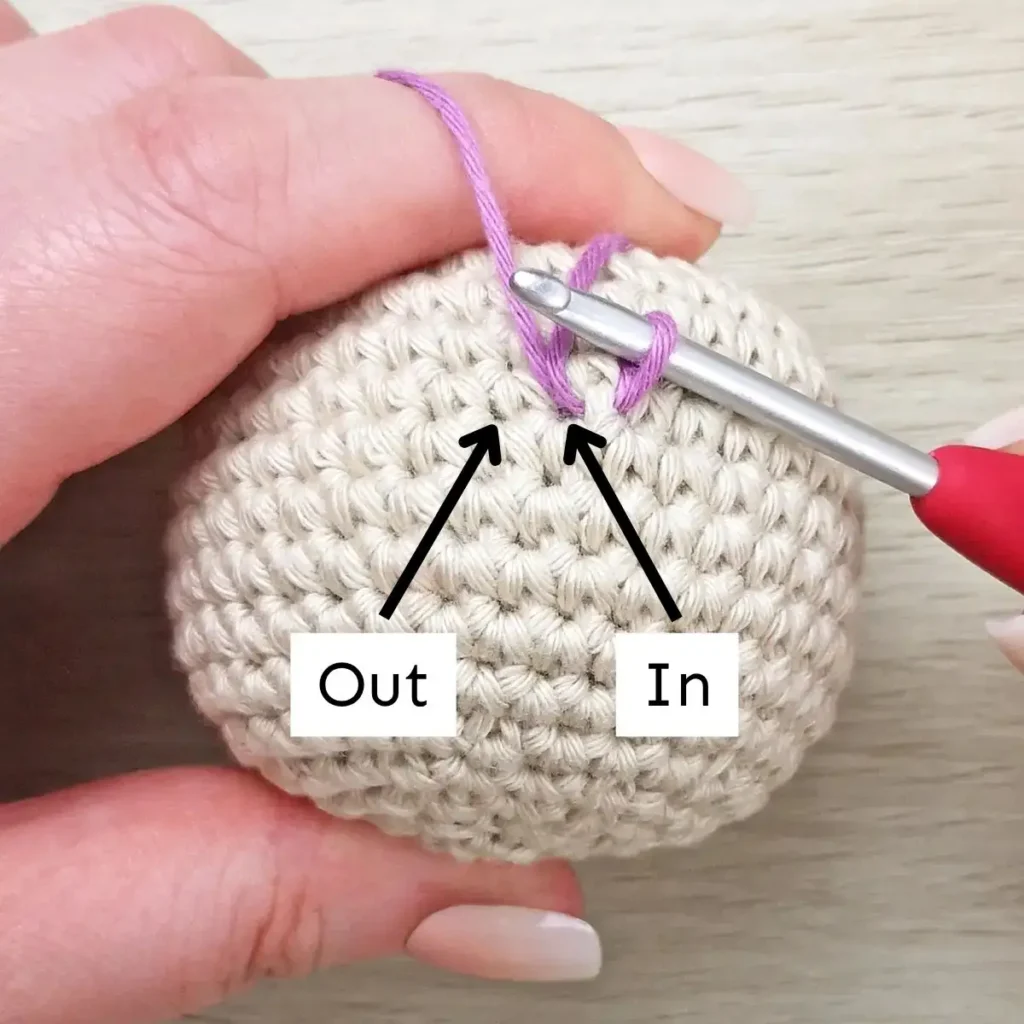
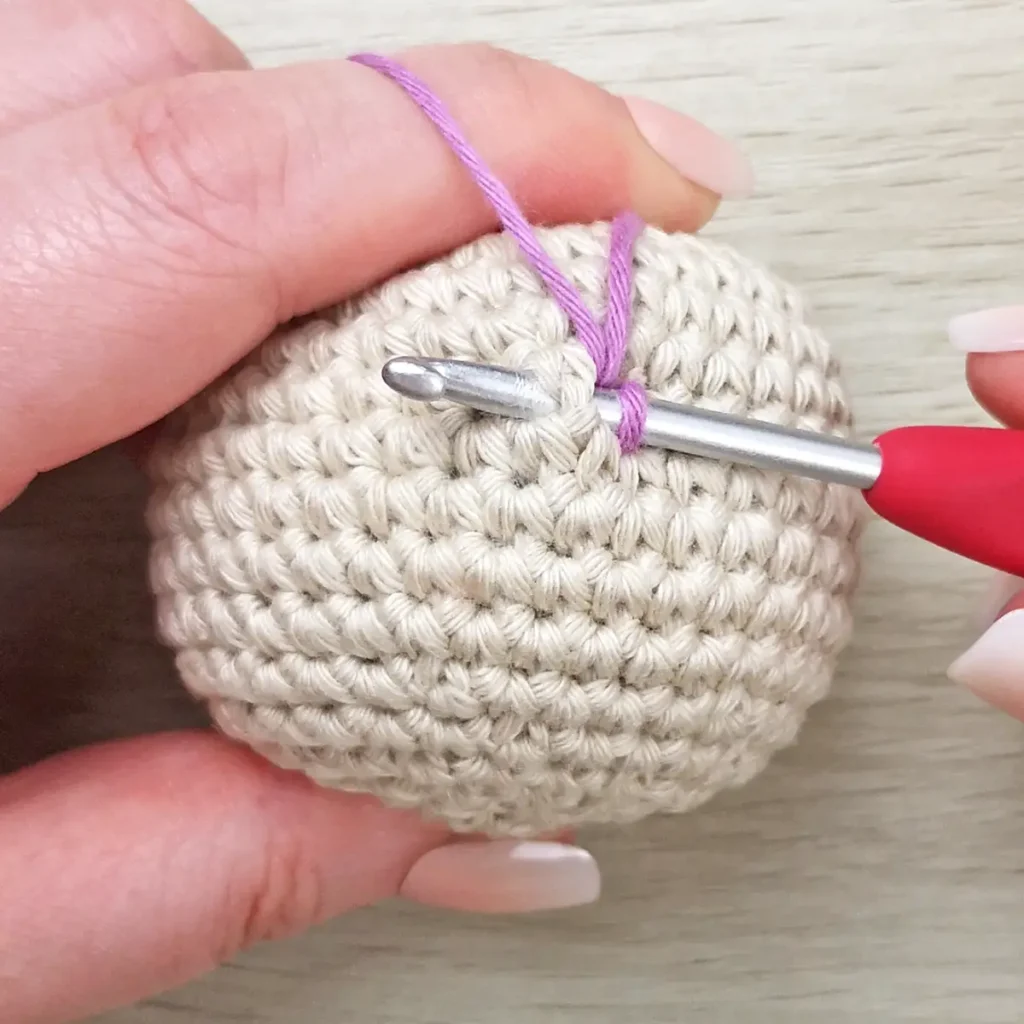
4. Yarn over and pull through the stitch, then the loop on your hook to complete the stitch.
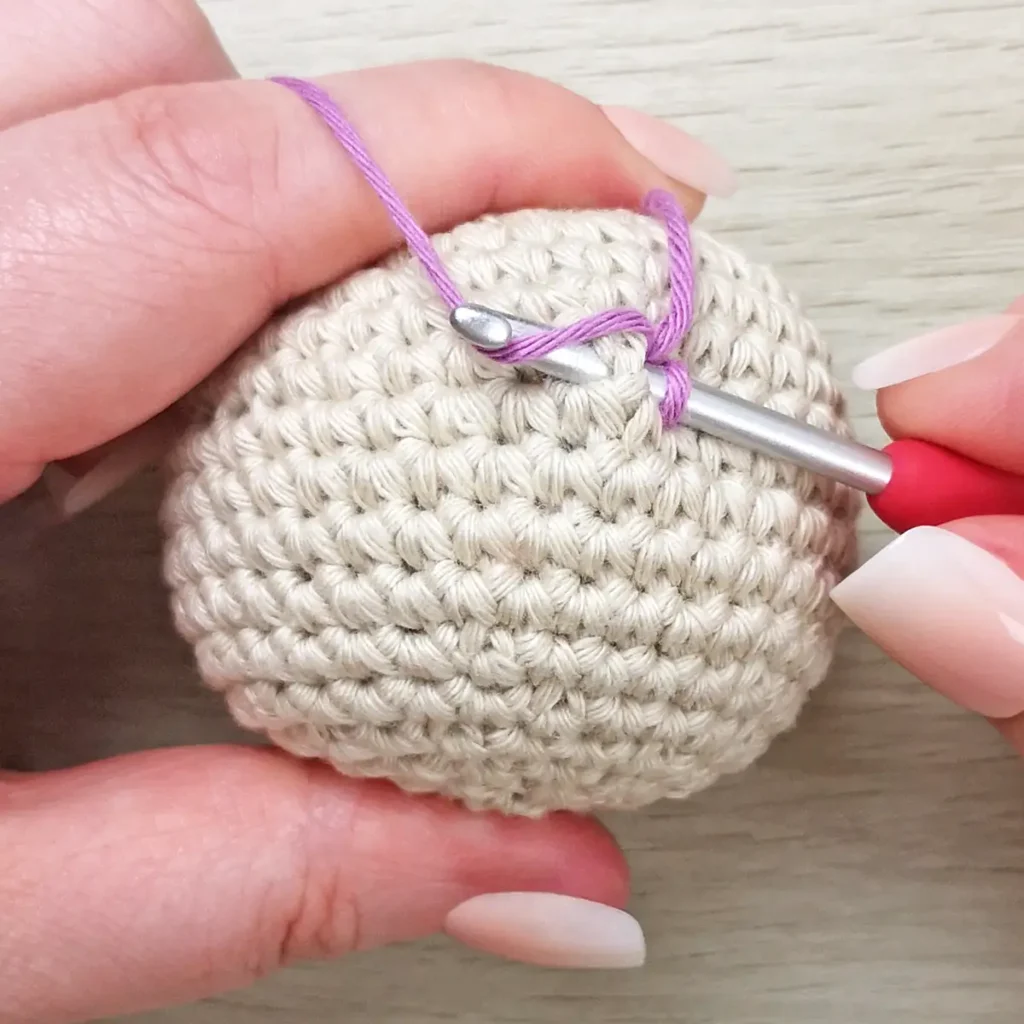
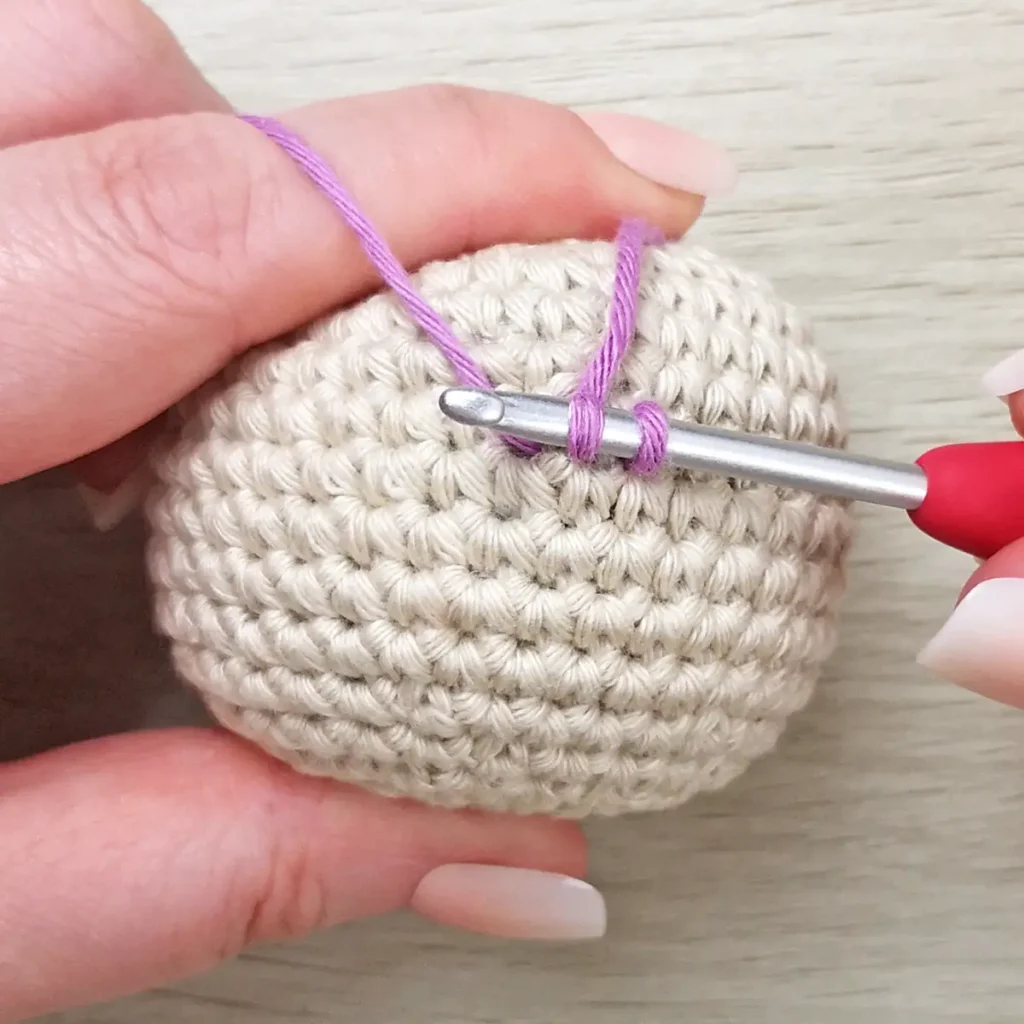
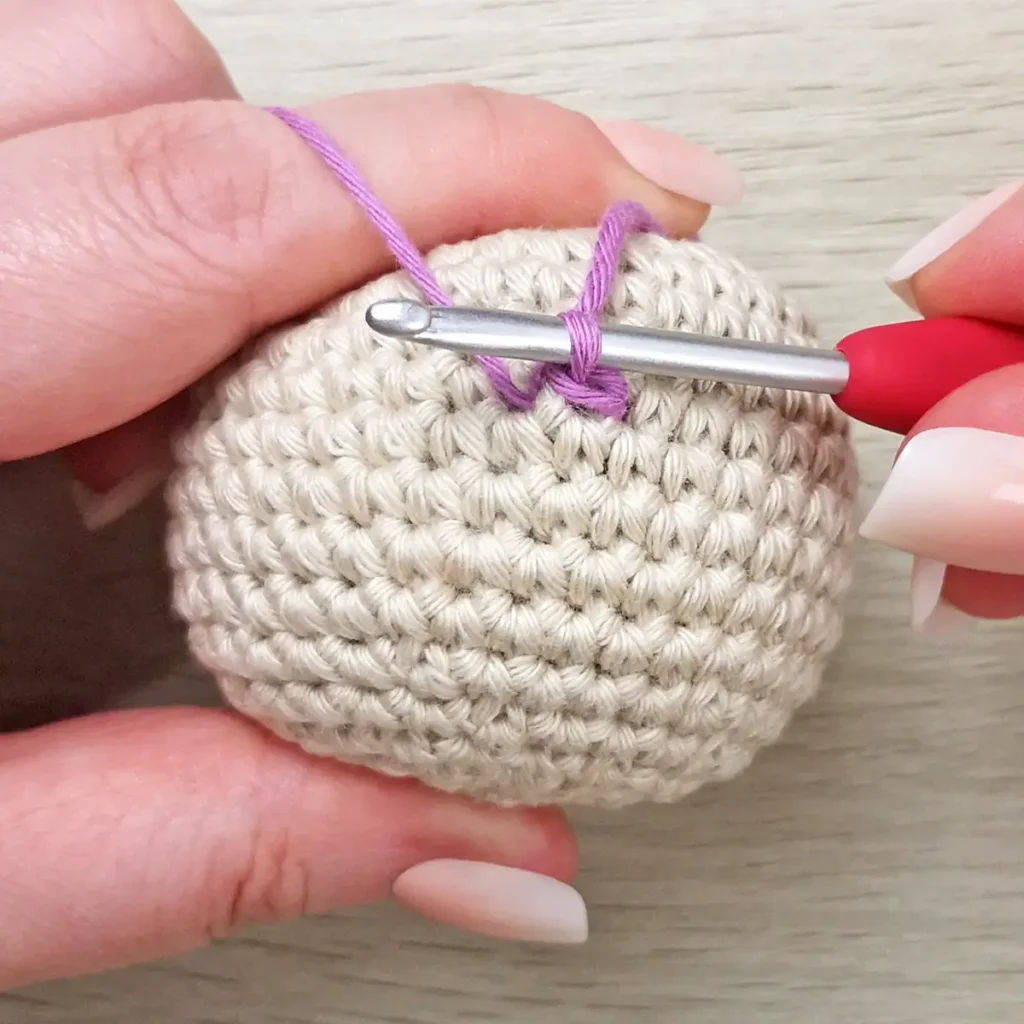
5. Keep working surface slip stitches by repeating steps 3 and 4.
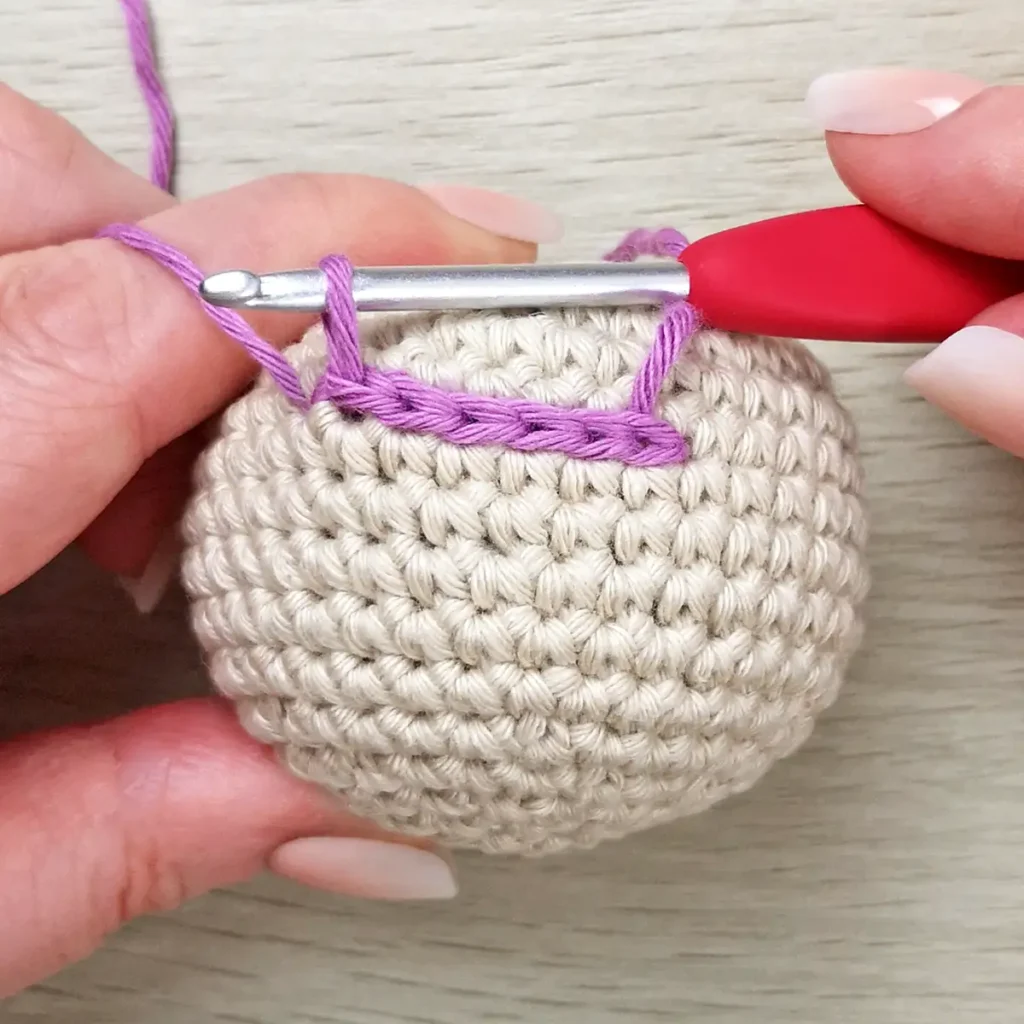
Fastening Off
When fastening off a crochet surface slip stitch, the method is slightly different depending on whether you’re working in a line or joining your stitches to form a complete round.
Fastening Off Surface Slip Stitch in a Line
The basic method is the same whether you’re working on a flat crochet piece or amigurumi.
- Once you’ve completed your final slip stitch, cut the yarn, leaving a tail.
- Pull the yarn tail through the loop on your hook.
- Thread the yarn tail onto a yarn needle and insert it into the same stitch as your final slip stitch, bringing it through to the wrong side of your work or out through a different point on your amigurumi.
- Weave in ends.
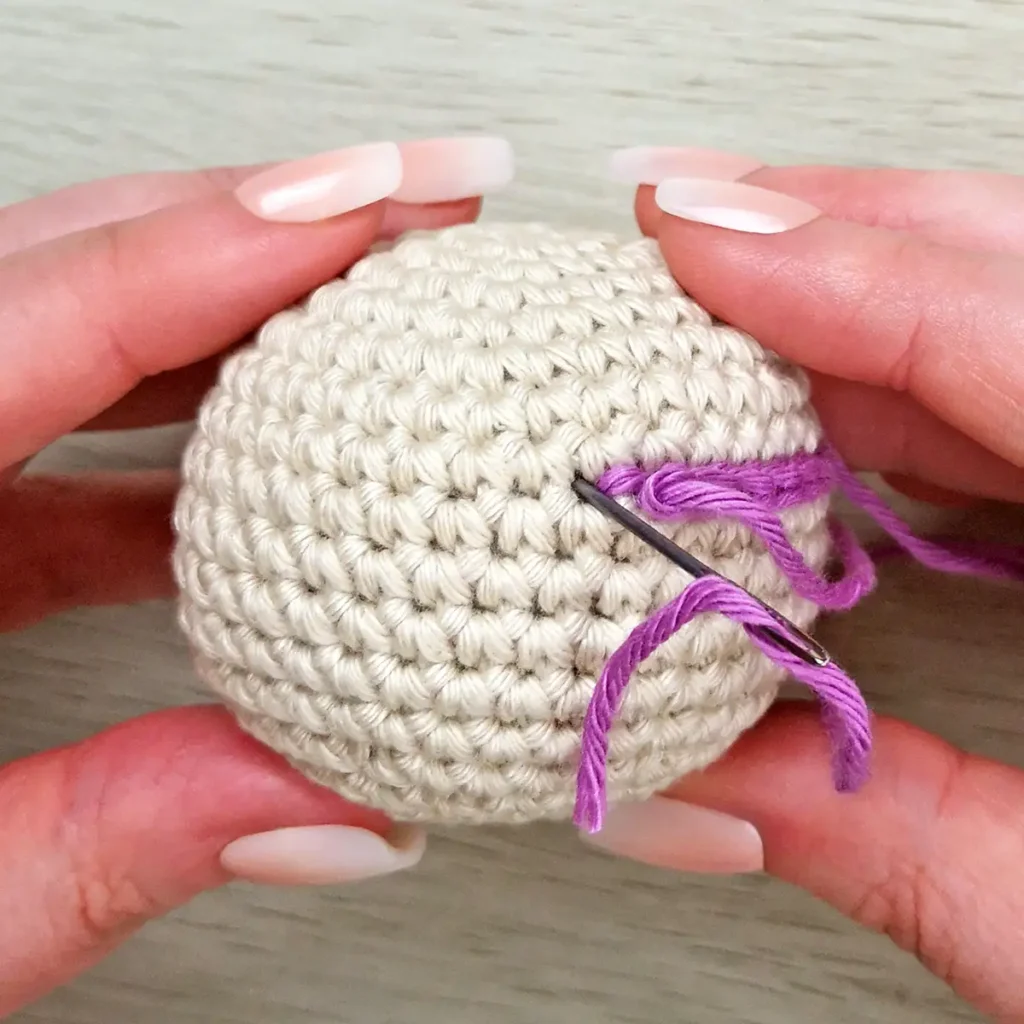
Fastening Off Surface Slip Stitch in a Joined Round
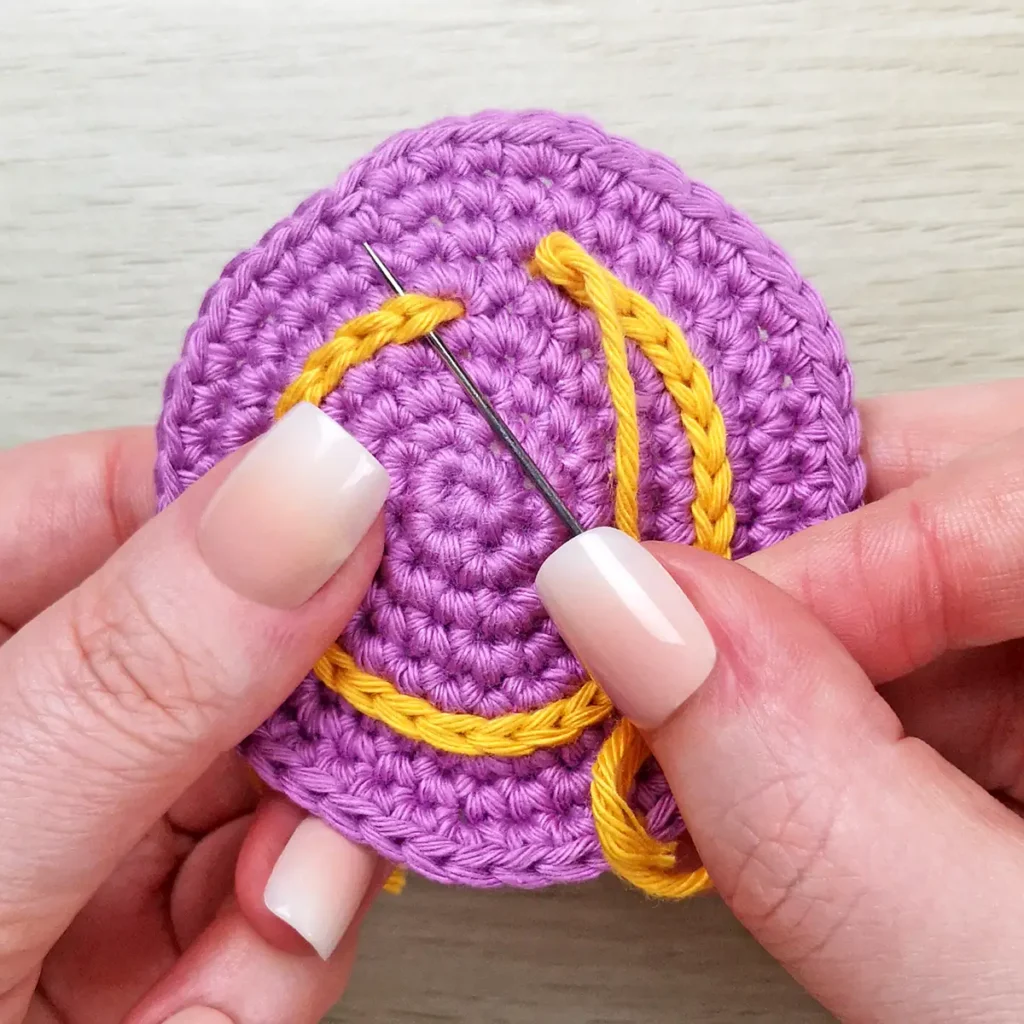
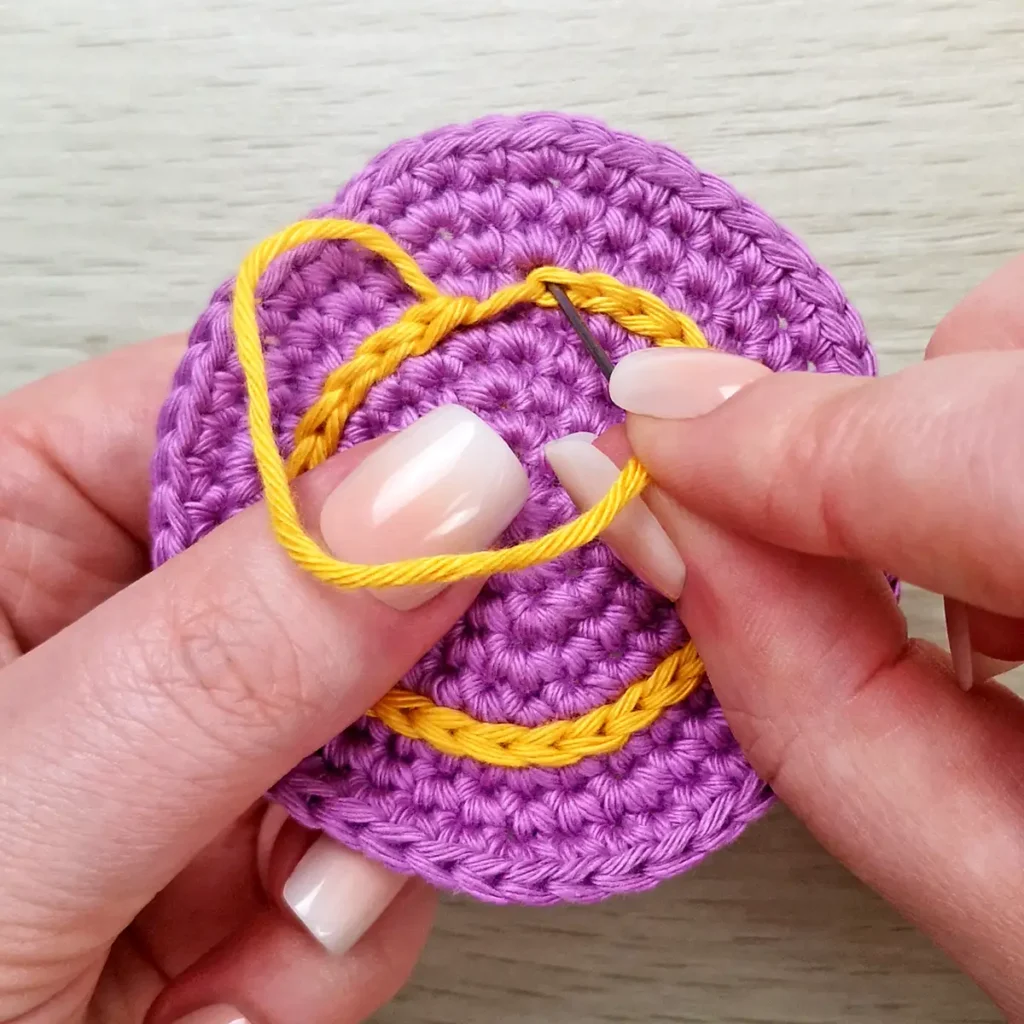
When working surface slip stitches in a complete round, you’ll want to join the final stitch to the starting point for a neat finish. This is very similar to the invisible fasten off technique.
- Stop one stitch before completing your round and cut the yarn, leaving a tail.
- Pull the yarn tail through the loop on your hook.
- Thread the tail onto a yarn needle and pass the needle under both loops of the first surface slip stitch. Then insert it back down through the centre of your final stitch.
- Gently pull the yarn tail to tighten the false stitch until it matches the size of your other stitches.
- For flat projects, weave in the ends on the back of your work. For amigurumi, weave the tail through the inside of your piece.
Tips for Crochet Surface Slip Stitch
- Keep your tension relaxed. Pulling your yarn too tightly can cause the fabric to pucker or distort, particularly on amigurumi.
- Choose your insertion points carefully. Aim for consistent spacing between stitches to create a neat line.
- Use a contrasting colour. A different yarn colour makes your surface stitches easier to see and gives your design more definition.
- Practise on a swatch first. This lets you experiment with your tension and stitch placement before working on a finished project.
- Secure your yarn ends. Weave in the ends securely especially on amigurumi that may be handled frequently.
not ready to try this yet?
Pin this post for later
Invitation to our Private Community
We hope you enjoyed this crochet tutorial. Come and hang out in our Stitch by Fay Community. We created this space for you to share pictures, ask questions and support each other.

This is an original crochet tutorial written for Stitch by Fay. Please don’t claim this tutorial as your own. If you wish to share this crochet tutorial, you may link to this post but please do not reprint it on your site.