

No-Sew Crochet Piggy Pattern
Looking for a fast and fun amigurumi project? This no-sew crochet piggy is it! Just look at that little chonk.

With no sewing required, this small crochet pig works up quickly, making it an ideal choice for last-minute gifts, craft fairs or a cute little desk buddy.

How to Crochet a Pig
This crochet piggy pattern is worked from snout to tail.
We’ll begin by chaining 2 and working 8 half double crochet into the second chain from hook to make the snout, before fastening off invisibly and joining our new colour in the third loop only.
The ears are worked in the front loop only so that we can use the leftover back loops to continue with the next round.

Why You’ll Love This Crochet Pig Pattern
2025 Toy Box Crochet Along
This pattern is featured in the 2025 Toy Box CAL hosted by CAL Central Crochet.

Head on over to the CAL Central Crochet Facebook group for more details and so you don’t miss out on any of the free patterns plus the chance to enter into all the fun giveaways at the end of the CAL!
More Patterns
If you love this crochet pig pattern, you might also like to check out these other no-sew animal patterns:


No-Sew Crochet Piggy Pattern
Materials
- Super bulky yarn in dark pink and light pink (I used Premier Yarns Parfait Chunky in Bubblegum and Candy)
- 4.5mm crochet hook
- 6mm safety eyes
- 4 ply yarn in black or black embroidery floss
- Polyester fiberfill
- Stitch marker, yarn needle, scissors
Abbreviations (US Terms)
- ch – chain
- sc – single crochet
- inc – increase
- invdec – invisible decrease
- FLO – front loop only
- BLO – back loop only
- bo – 4dc bobble stitch
- hdc – half double crochet
- dc – double crochet
- tr – treble crochet
- st/s – stitch/es
- […] – repeat the instructions in brackets
- (…) – indicates stitch count at end of round
Special Stitches
4 Double Crochet Bobble Stitch (bo)
- Yarn over.
- Insert your hook into the indicated stitch.
- Yarn over and pull up a loop (3 loops on hook).
- Yarn over and pull through first 2 loops (2 loops on hook).
- Repeat steps 1-4 three more times in the same stitch (5 loops on hook).
- Yarn over and pull though all 5 loops on hook.
- Push bobble to the right side of fabric.
Useful Links
Finished Size
The finished pig measures approximately 3.5″ (9cm) long. Size may vary depending on tension and materials used.
Gauge
Gauge is not important in this pattern. Use a hook size to match your chosen yarn. Make sure that your stitches are tight enough to prevent stuffing showing through and adjust hook size if necessary.
Notes
- Pieces are worked in a continuous spiral. Mark the first stitch of each round with a removable stitch marker.
- All bobble stitches are worked in the front loop only.
- R2 is worked in the third loop only.
- In R7, the single crochet stitch before and after each ear is worked in the back loop only.
Identifying the Third Loop in Half Double Crochet
If you look at the top of your work, you’ll see the front loop and back loop of each stitch. Tip your work towards you and you’ll see an extra bar behind each stitch. This is the third loop and what you’ll be working into in R2.

Pattern Instructions
Pig (starting with dark pink)
R1: Ch 2, 8 hdc in second ch from hook (8)
Fasten off invisibly.
This next round is worked in the third loop of the hdc st. Join light pink yarn to the third loop of any st.
R2: Ch 1, sc in same st and in each st around (8)
Continue to work in a spiral without joining.
R3: [Inc] x8 (16)
R4: [Sc, inc] x8 (24)
R5: [Sc] x24 (24)
In this next round we’ll be creating the ears by working some stitches in the front loop only.
R6: 9 sc, FLO hdc in next st, (FLO dc, tr, dc, hdc) in next st, 4 sc, (FLO hdc, dc, tr, dc) in next st, FLO hdc in next st, 5 sc, FLO bo, sc
Tip: Use stitch markers to mark the two leftover back loops behind each ear to make them easier to see in the next round.
In R7 we will fold the ears down in front and sc into the leftover back loops behind the ears. The sc sts before and after each ear are worked in the back loop only.
R7: 4 sc, FLO bo, 3 sc, BLO sc, 2 sc, BLO sc, 2 sc, BLO sc, 2 sc, BLO sc, 6 sc (24)
Insert safety eyes between R3 and R4, 4 sts apart.
R8-10: [Sc] x24 (24) 3 rounds
Over the next two rounds we will be adding the back feet. You may need to adjust the placement of the bobble sts, they should be in line with the front feet.
R11: 23 sc, FLO bo (24)
R12: 4 sc, FLO bo, 19 sc (24)
In the next round we’ll be adding the tail. It should be centred between the ears. Keep your sl sts tight for more of a curl.
R13: Invdec, [sc, invdec] x4, ch 9, sl st in second ch from hook and in each ch across, sc [invdec, sc] x3 (16)
Start stuffing and continue to stuff as you go.
Fold the tail down in front and ignore it in the next round.
R14: [Invdec] x8 (8)
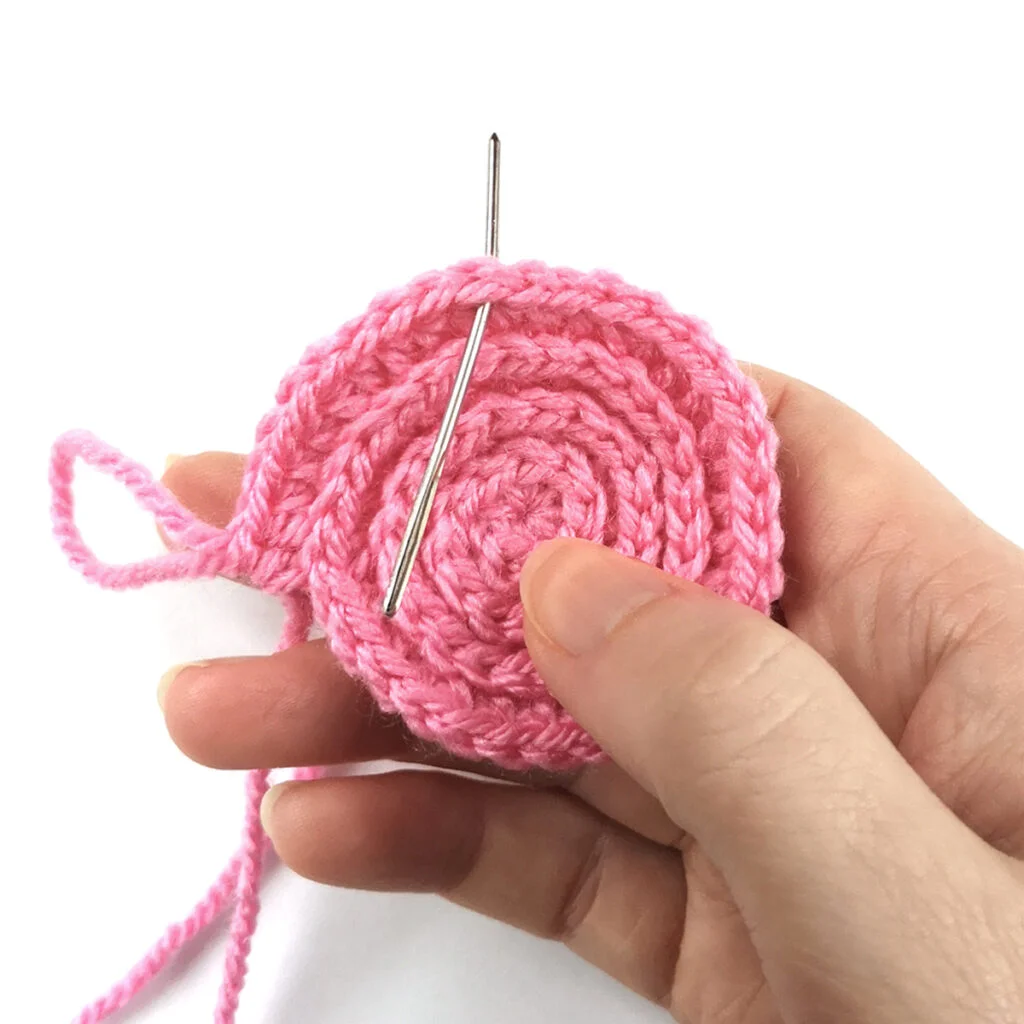
Cut the yarn leaving a tail and pull through last st. Weave the yarn tail through the front loops only of the final round and pull to close. Hide the end inside the pig.
Finishing
Gently stretch out the ears and fold them forwards towards the eyes.
Shape the tail into a curl.
Using 4 ply black yarn doubled or black embroidery floss, sew 2 vertical lines on the pig’s snout for the nostrils.
not ready to make this yet?
Pin this post for later

Explore More Crochet Patterns
After you crochet this pig, here are some more crochet patterns to try!
What’s Next?
Have questions? Join the Facebook group!
We hope you enjoyed this pattern. Come and hang out with me in the Stitch by Fay Community Facebook group. We created this space for you to share pictures, ask questions and support each other.

This pattern is for personal use only and may not be copied, reproduced, altered, published or distributed in any format (including video). If you wish to share this pattern, you may link to this pattern but please do not reprint it on your site.
You can sell finished products made from this pattern in small quantities. Do NOT use our photos as your sale photos.
I made one, and my daughter fell in love with it. I have just finished my second. Everyone who sees them loves them.
I think I might be missing something. I’m only seeing instructions for one of the front feet. Is there a revision to the pattern?
Hi, both feet are there. The first foot is at the end of R6 and the second foot is at the beginning of round 7 🙂